Red Happy Birthday…

Hello everyone!!  I’m here today with DoubleClick Skittles Challenge!

This months theme is Birthday!  I’m happy about this because you can’t have enough birthday cards on hand.

I choose to use a couple of dies and embossing paste to create my card for today.

Take a look at my card:

Happy Birthday balloons

I saw a card created by Laura Bassen and I fell in love with the design.  I was so excited to see her use the new Simon Says Stamps Stitched Rectangles die set.  I order mines and it came just in time to create this card.

To create this card:

1. I started with a piece of Stampin Up! Cherry Cobbler cardstock and cut it to an A2 size card.

2. Then I used Simon Says Stamp Medium Dots Stencil and Wendy Vecchi Embossing Paste to create the dots in the center of the cardstock.

3. I cut a piece of Neenah Solar White cardstock to add to the top of my card base.

4.  I used Simon Says Stamp Stitched Rectangles to cut out a window in the card panel.

5. I cut two balloons using Simon Says Stamp Balloons Craft Die to cut two balloons.  I add Stampin Up! Whisper White Barkers Twine.  I adhered the balloons with foam adhesive. I added foam adhesive to the back of the card panel and centered it onto the card base.

6. I stamped my sentiment using Simon Says Stamp More Sketchy Banner Greetings.  I cut the tail off and adhered the banner to the right side of the card.

7. I added Rudolph Red Skittle to the banner.  Then I added Clear Wink of Stella to my balloons.

Finished.  Very easy to recreate.

What do you think? Let me know.  Now its your turn to join us and play along with our challenge this month. I hope to see you there!!

I’m also entering Simon Says Stamps Wednesday Challenge: Anything Goes!

wed-newchallenge-header

Supplies used:

Cherry CobblerSSS Medium DotsEmbossing PasteSSS Stitched Rectangles DieclassiccrestsolarwhtieSSS Balloons Craft DiesWhisper White Baker's TwineMore Sketchy banner GreetingsRudolph Red Skittle

Thanks for stopping by!

~Kymona

Die Cut Crazy Happy Birthday Blog Hop + Blog Candy Giveaway

August DCC BD Hop

Hello everyone!! Welcome to the Die Cut Crazy Birthday Blog Hop.  The Die Cut Crazy Contributors have created some amazing birthday projects to inspire your own die cut creativity to make any birthday special.  If you just joined the Birthday Hop at my site, be sure to go back to the beginning to Die Cut Crazy blog for the hop kick off, then hop along the list to each of our designers.  You won’t want to miss any of the special birthday projects in this hop for sure. The DCC Blog Hop will run from today, August 15th at 4:00AM CST and ends Monday August 18th 11:59 PM CST.

Besides a lot of die cut inspiration, one lucky hopper will win a special prize!! Die Cut Crazy Magazine will be giving a 3 month subscription to one lucky winner which will be announced on Tuesday, August 19th on the DCC blog and DCC Facebook Page.  To win, all yo have to do is leave a comment on each of our blogs and Like the Die Cut Crazy Facebook page and then leave a comment on the DCC blog saying that you did all of that.

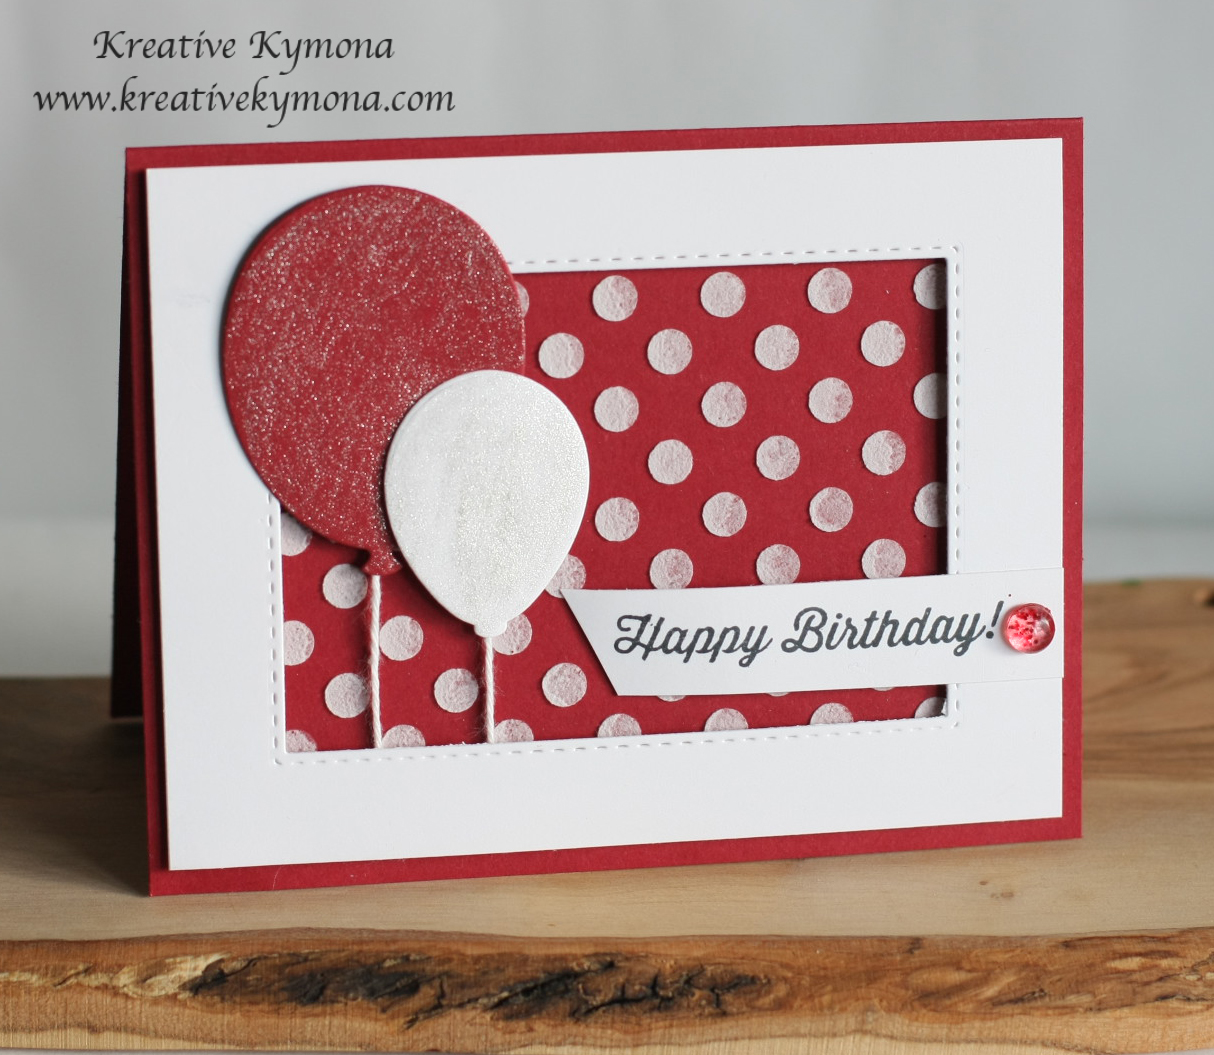
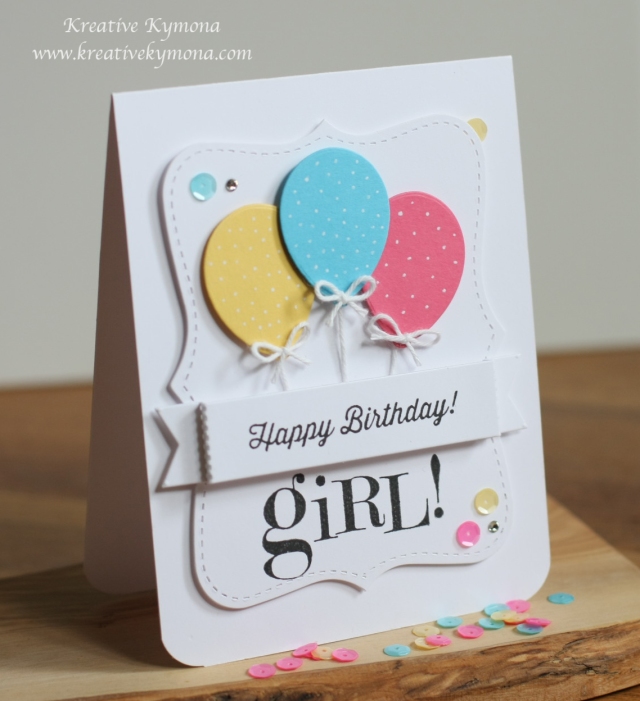
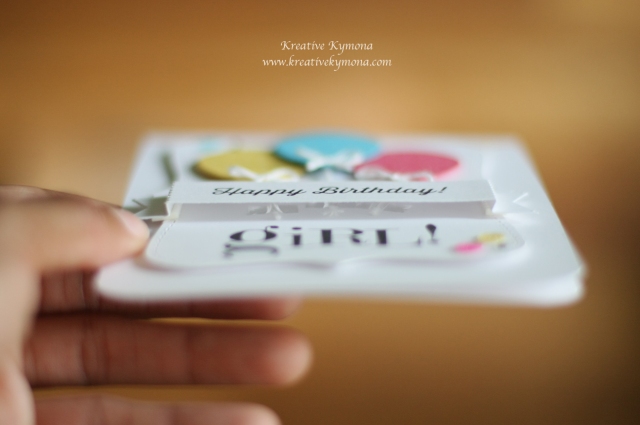
My Birthday project I am sharing is a Happy Birthday Day Card.  I had a lot of fun making this card and a lot of thought went into creating this card at the end, lol, you’ll see why.

Take a look:

Happy Birthday Side View

What to know how I created this card, here you go:

1. I cut my Bazzill Marshmallow cardstock to an A2 size card (4-1/4 x 5-1/2 scored at 5-1/2).

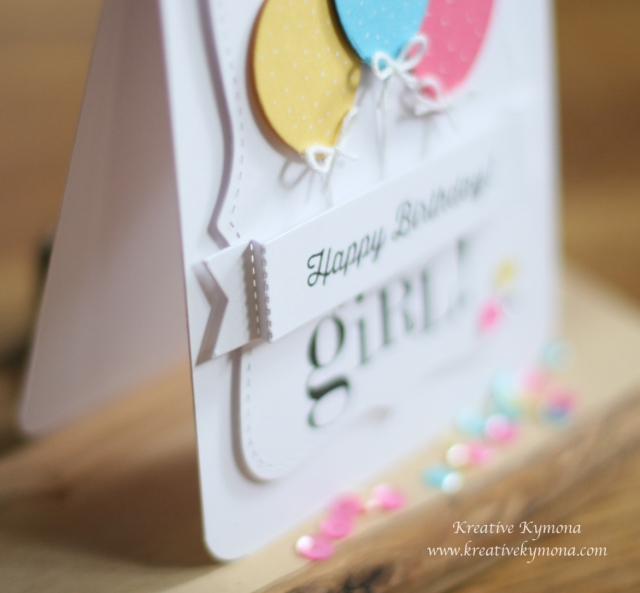
2. I cut my card panel out of the same color cardstock to fit on top of my die. I love the white on white it makes the card look elegant with a pop of color.

Top Note Die Cut

3. I used my Stampin’ Up! Top Note Die to cut out my card panel using my Stampin’ Up! Big Shot.

Happy Birthday Balloon die cut

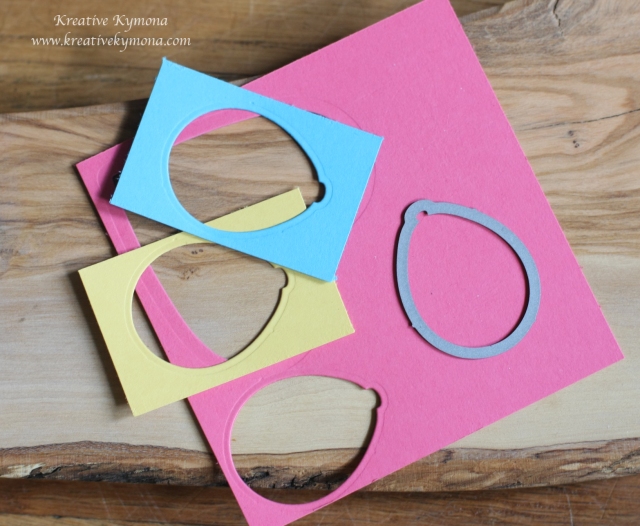
4. Then I used my Simon Says Stamp Balloons Die to cut out the smallest balloon in the set.  I cut the balloons out of Stampin’ Up! Strawberry Slush, Daffodil Delight and Tempting Turquoise cardstock.

Happy Birthday Banner die cut

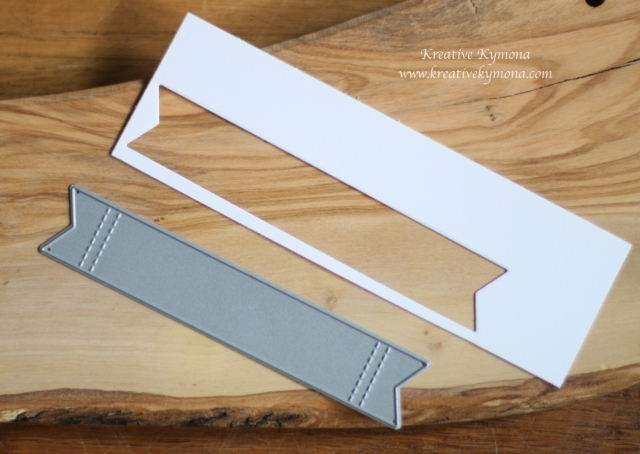
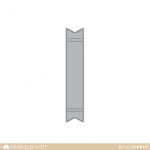
5. Then I used my Mama Elephant Bold Banner Creative Cuts to cut out my banner for my sentiment.

6.  After I die cut all of my pieces, I started to assemble my card.

Happy Birthday Balloons close up

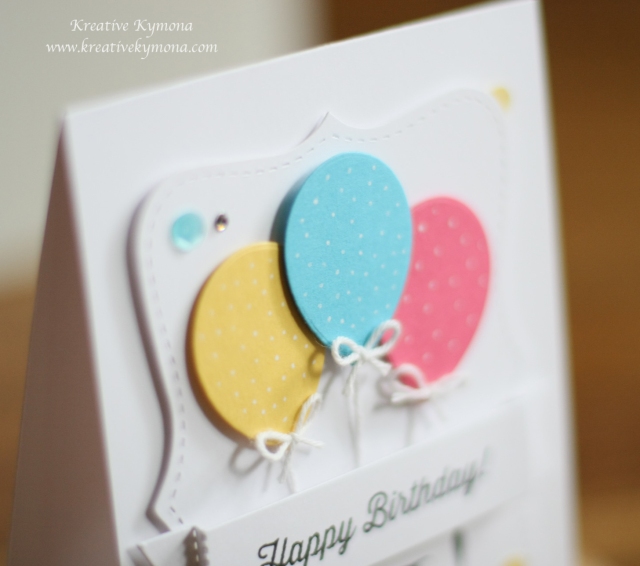
7. I added Stampin’ Up! Whisper White Bakers Twine to the back of my balloons using regular tape so that it looks like the string is attached to the balloons.

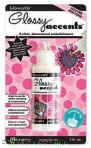
8. I tied small bows and add them to the front of the balloon using a small dot of glossy accents.

9. I attached my balloons using foam adhesive to the top note card panel.  I added two pieces of foam adhesive to the blue balloon so that it sits higher then the other two balloons.

Happy Birthday Inside Banner close up

9. I taped down all of my balloon strings with regular tape so that the string looks tight.  I also cut them so that they don’t hang down past the banner.

10. I stamped my sentiment on the banner using Simon Says Stamp More Sketchy Banner Greetings stamp set in Versafine Onyx Black ink.

Happy Birthday Banner close up

11.  I attached the banner to the front of the card using foam adhesive right under the fold on both sides.

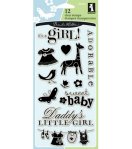
12. This is where I was stuck.  I couldn’t figure out what to stamp under my banner.  I didn’t really think this though before I put the card together.  I had to rattle my brain to figure out that I wanted to add to the bottom of my card.  I searched my stash and found this stamp from Inkadinkado called Baby Girl. I liked the “girl” sentiment but it had other words attached so I cut the stamp set.  Yes, you heard me right I cut the stamp!! It fit perfectly.

Happy Birthday Front

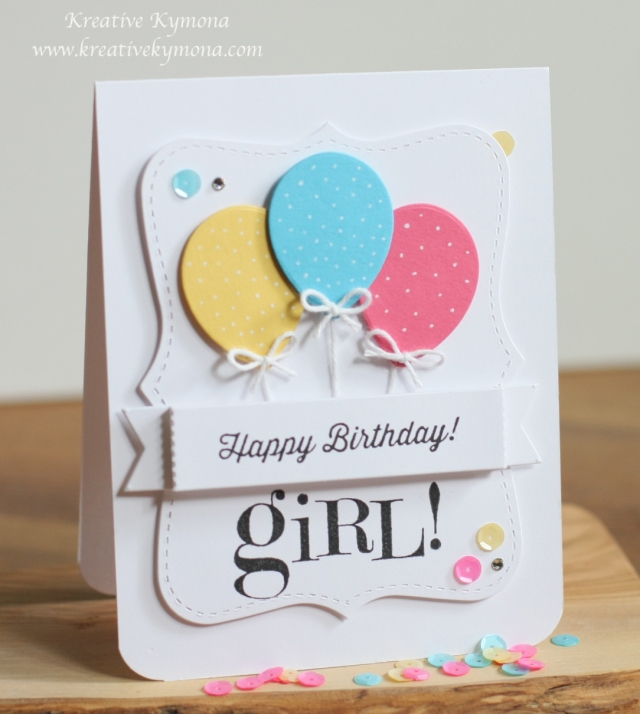
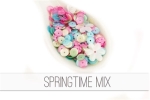
13. I added Pretty Pink Posh Springtime Mix sequins and some Stampin’ Up! rhinestones for dimension.

14. My balloons looked to plain so I used my White Signo Uni-Ball Gel Pen to add white dots to my balloons.

WALA, my card is done. The hardest part in creating this card was die cutting all of the pieces.  Once that’s complete, putting it together is easy.

I hope you give this design a try.

Now on to my Blog Candy Giveaway!!

Hearts Lawn Cuts   LF Spring Showers

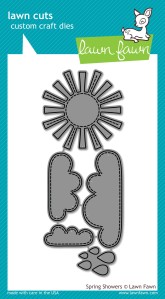
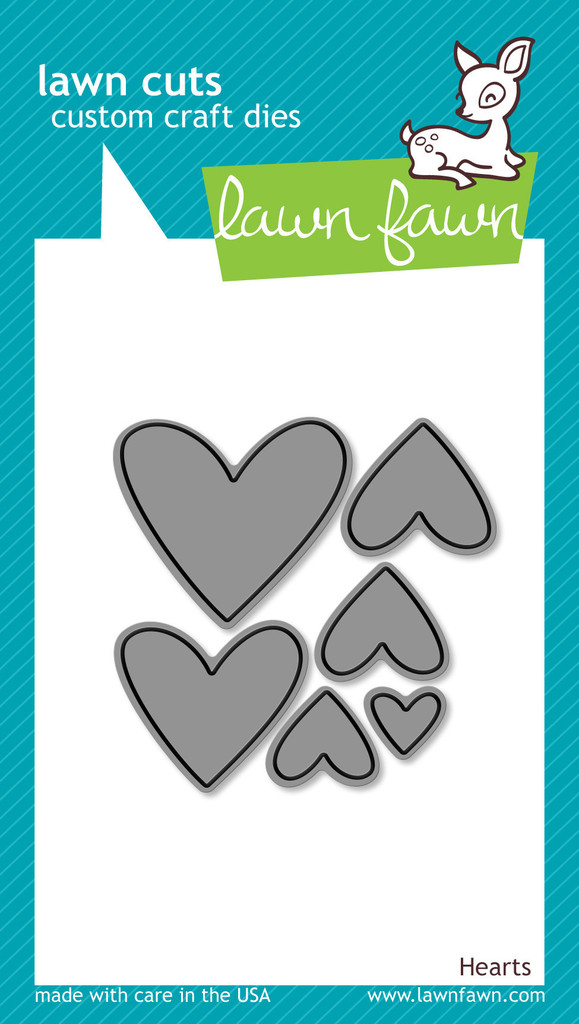
Happy Birthday to you!!!  I’m giving away two different Lawn Fawn Dies:  Hearts and Spring Showers!!

THE RULES: For your chance to win all the above goodies, please leave me a comment at the end of this post with your answer to the question below.  Deadline is 11:59 pm EST, Sunday, August 17th, at which time I’ll choose a random winner.

The Question: If you could have anything for your birthday, what would that be?

Edited to include the winner of this challenge

Winner of Challenge

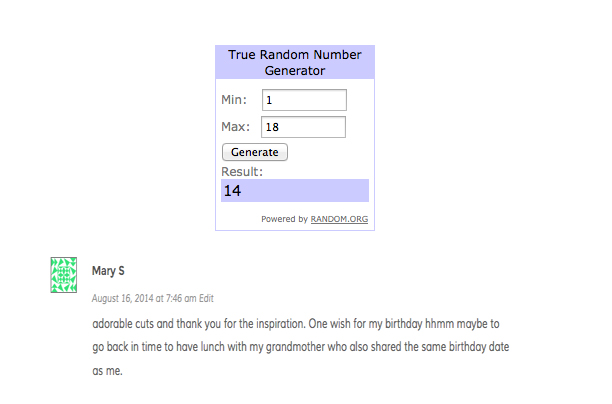
Congratulations to Mary S!!  I will send you an email.  Thank you to everyone else who played along!!!

Thanks for stopping by.  I’m the last but not least stop on this hop.  If you want to start all over again, Die Cut Crazy is the first stop.

To make sure you don’t miss any of the birthday projects, here is the list of all of our blog hop designers:

Die Cut Crazy

Debbie

Deepti

Tina

Kelly

Lisa

Jennifer

Karen

Holly

Mary

Dianne Hosted at DCC

Kymona ← You are here!

Supplies used:

Daffodil Delight CSTempting TurquoiseStrawberry SlushBazzill Marshmallow CSTop Note DieBig Shot Die-Cut MachineBOLD BANNERWhite Baker's Twine3M Mounting Tapeglossy accentsMore Sketchy banner GreetingsOnyx Versafine InkInkadinkaso Baby GirlSpringtime Mix SequinsWhite Signo Uni-Ball Gel PenBasic Rhinestones Jewel Accents

Thank you for stopping by!!

~Kymona

Do You See Spots and Dots?

Hello everyone! I’m here today playing along with Simon Says Stamp Wednesday Challenge.

wed-newchallenge-headerThis week the challenge is SPOTS AND DOTS!

This was a fun challenge to play with.  At first I wondered what in the world to do.  I wasn’t sure want to make that has spots and dots.

I pondered for a while.

Take a look at my card:

HB spots and dots

I looked at my stash, then remembered I needed to make a birthday card for someone special this coming Saturday so I decided to use my Simon Says Stamp Balloon dies.

Once I made that decision, I looked on Pinterest for some inspiration.  I immediately saw balloons with spots.  So I knew I would create spots on my balloon.

To do that, I use my Simon Says Stamp Medium Dots Stencil and Wendy Vecchi Embossing Paste to create my white spots on my balloon.

To create my spots, I used my Stampin’ Up! Perfect Polka Dots Textured Impressions Embossing Folder.

I added some Stampin’ Up! White Bakers Twine to bottom of my ballon and tied a bow.

For my sentiment, I wanted to add a pop of color so I decided on red, that surely would pop, lol.  I used Simon Says Stamp Happy Birthday Die Cut to create my sentiment.

So what do you think?

Let me know. I would love to hear from you.

Supplies used:

SSS Medium DotsSSS Balloons Craft DiesEmbossing PastePerfect Polka Dots Textured Impressions Embossing FolderHappy Birthday die cutclassiccrestsolarwhtieSSS Lipstick Red CardstockSSS Soft Navy Blue CSWhite Baker's TwineStampin' TrimmerBig Shot Die-Cut MachineTombow Power Adhesive Glue Tabs

Thank you for stopping by!

~Kymona

SSS Wednesday Blog Challenge – Happy Birthday Card 2

I’m back with another card for Simon Says Stamp Wednesday Blog Challenge.

I’ve been watching a lot of videos on using watercolor on cards and I love how it looks.  So I decided to try the technique myself.

Take a look:

Happy Birthday Watercolor

The die cut balloon is what I used the watercolor technique on.  For my first try, I think I did an OK job.

As I look at the card, I realized that the background on the card is competing with the balloon image.  It might look better if the card base was blank, then the balloon image would really stand out on its own.  All in all, this was a learning experience for me.

Please, leave a comment letting me know what you think.

Supplies used:

Classic Crest Solar White CS

Classic Crest Solar White CS

Hero Arts Tide Pool Ink

Hero Arts Tide Pool Ink

Hero Arts Orange Soda Ink

Hero Arts Orange Soda Ink


On Point Borders

On Point Borders

Birthday Balloons

Birthday Balloons

SSS Balloons Craft Dies

SSS Balloons Craft Dies


Memento Tuxedo Black

Memento Tuxedo Black

Stampin' Dimensionals 104430

Stampin’ Dimensionals
104430


I also used a gold trim elastic cord from Stampin’ Up!’s Sale-A-Bration free kits.

Signature

Clean & Simple Card Class – Day 10 Textural Effects Part 2

So, I’m back again with another post on textural effects by Stephanie Klauck.  This second technique combines sticky embossing powder, glitter, and masking with a very clever twist.  I had fun trying out this technique.

Take a look:

Happy Birthday

  • To create the clean frame, I used washi tape to mask off the edges of the cardstock.
  • To create the shiny balloons, I used the heat and stick powder and a mask to add the different colors of glitter.

Let me know what you think of my embossed card.

Supplies used:

Classic Crest Solar White CS

Classic Crest Solar White CS

Worn Lipstick  Distress Ink

Worn Lipstick
Distress Ink

Birthday Balloons

Birthday Balloons


Coastal Cabana 131175

Coastal Cabana
131175

Strawberry Slush 131178

Strawberry Slush
131178

Blending tool

Blending tool


Heat and Stick Power 100625

Heat and Stick Power
100625


I also used random glitter, washi tape and a black pen for the balloon strings.

Signature

5 Days of Birthday Cards – Day 3

Today’s card is the third card in my birthday series.  This birthday card was made for a swap that I’m apart of.  The colors that I chose for this card were Strawberry Slush, Wisteria Wonder and Coastal Cabana.  I think these colors are so pretty together.

Take a look:

Happy Birthday to You

Stampin’ Up! Gorgeous Grunge stamp set is so versatile.  You can use it for just about any card.  This stamp set can be passed off as a  stencil.  I love how it looks no matter how you stamp your paper.  The Blossom punch gives the card extra dimension.

Let me know what you think.

Supplies Used:

Whisper White CS 100730

Whisper White CS
100730

Strawberry Slush 131178

Strawberry Slush
131178

Coastal Cabana 131175

Coastal Cabana
131175


Wisteria Wonder 126985

Wisteria Wonder
126985

Basic Black Ink 126980

Basic Black Ink
126980

Strawberry Slush CS 131295

Strawberry Slush CS
131295


Cycle Celebration 130270

Cycle Celebration
130270

Mixed Bunch 12537

Mixed Bunch
12537

Gorgeous Grunge 130514

Gorgeous Grunge
130514


Stampin' Trimmer 126889

Stampin’ Trimmer
126889

Basic Rhinestones Jewel Accents 119246

Basic Rhinestones Jewel Accents 119246

3/4 inch circle punch 119873

3/4 inch circle punch
119873


Blossom Punch 125603

Blossom Punch
125603

Snail Adhesive 104332

Snail Adhesive
104332

Stampin' Dimensionals 104430

Stampin’ Dimensionals
104430


Signature