Hello everyone! I’m here today with CS Take It Make It Design Team for our CS Take It Make It: Take a Technique Challenge Inspiration Photo!!!
This month’s theme is Take a Technique: Embossing!!This means using texture paste or embossing paste on your project or using a technique such as embossing, either embossing powder or embossing folders. Anything that gives your project a “touchy-feely” style!!
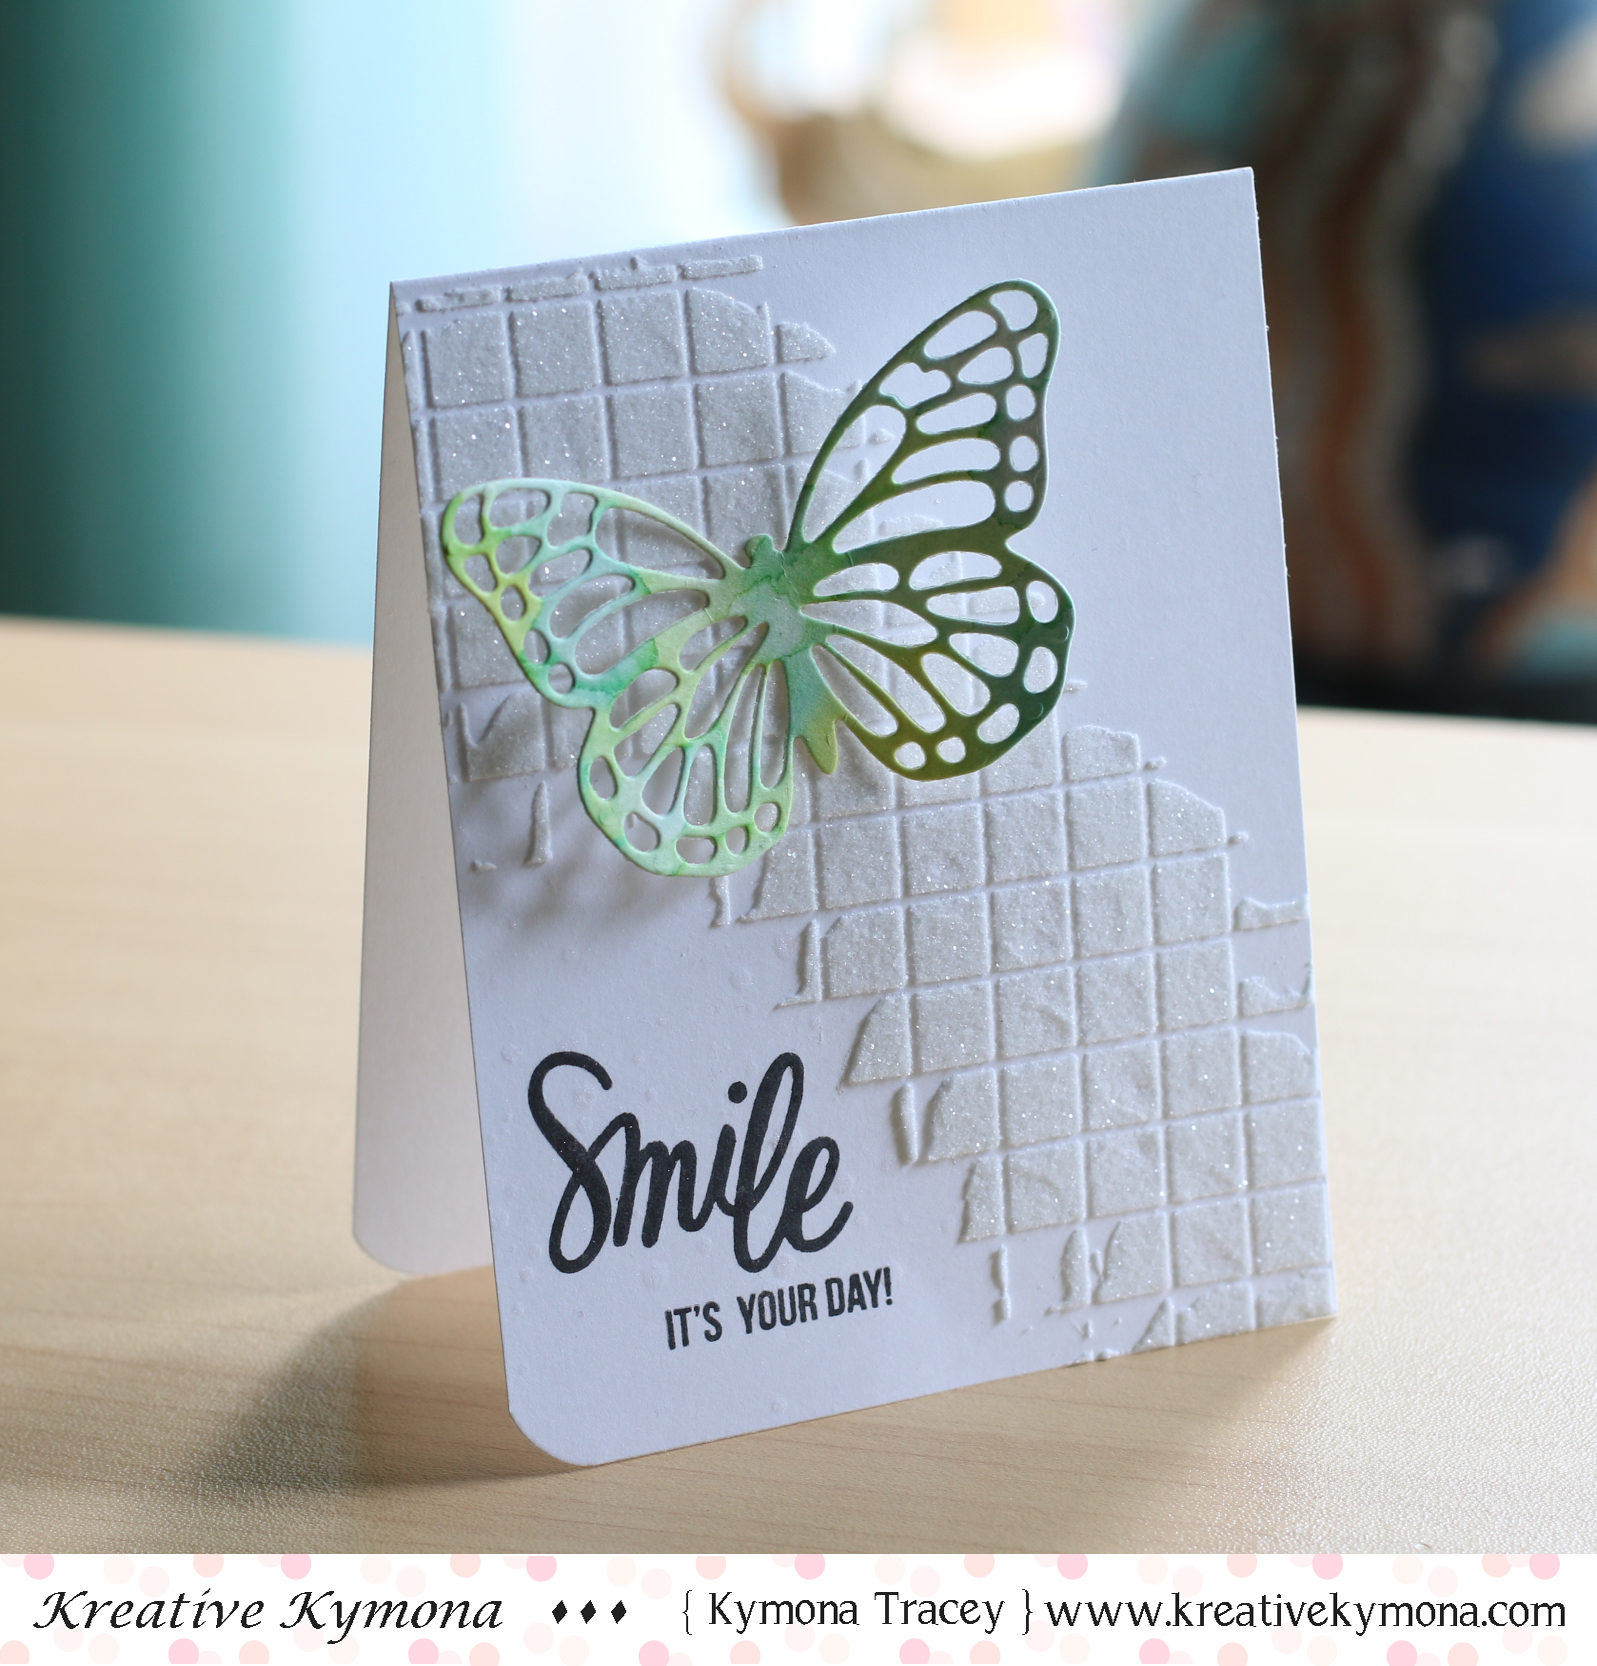
Take a look at my card:
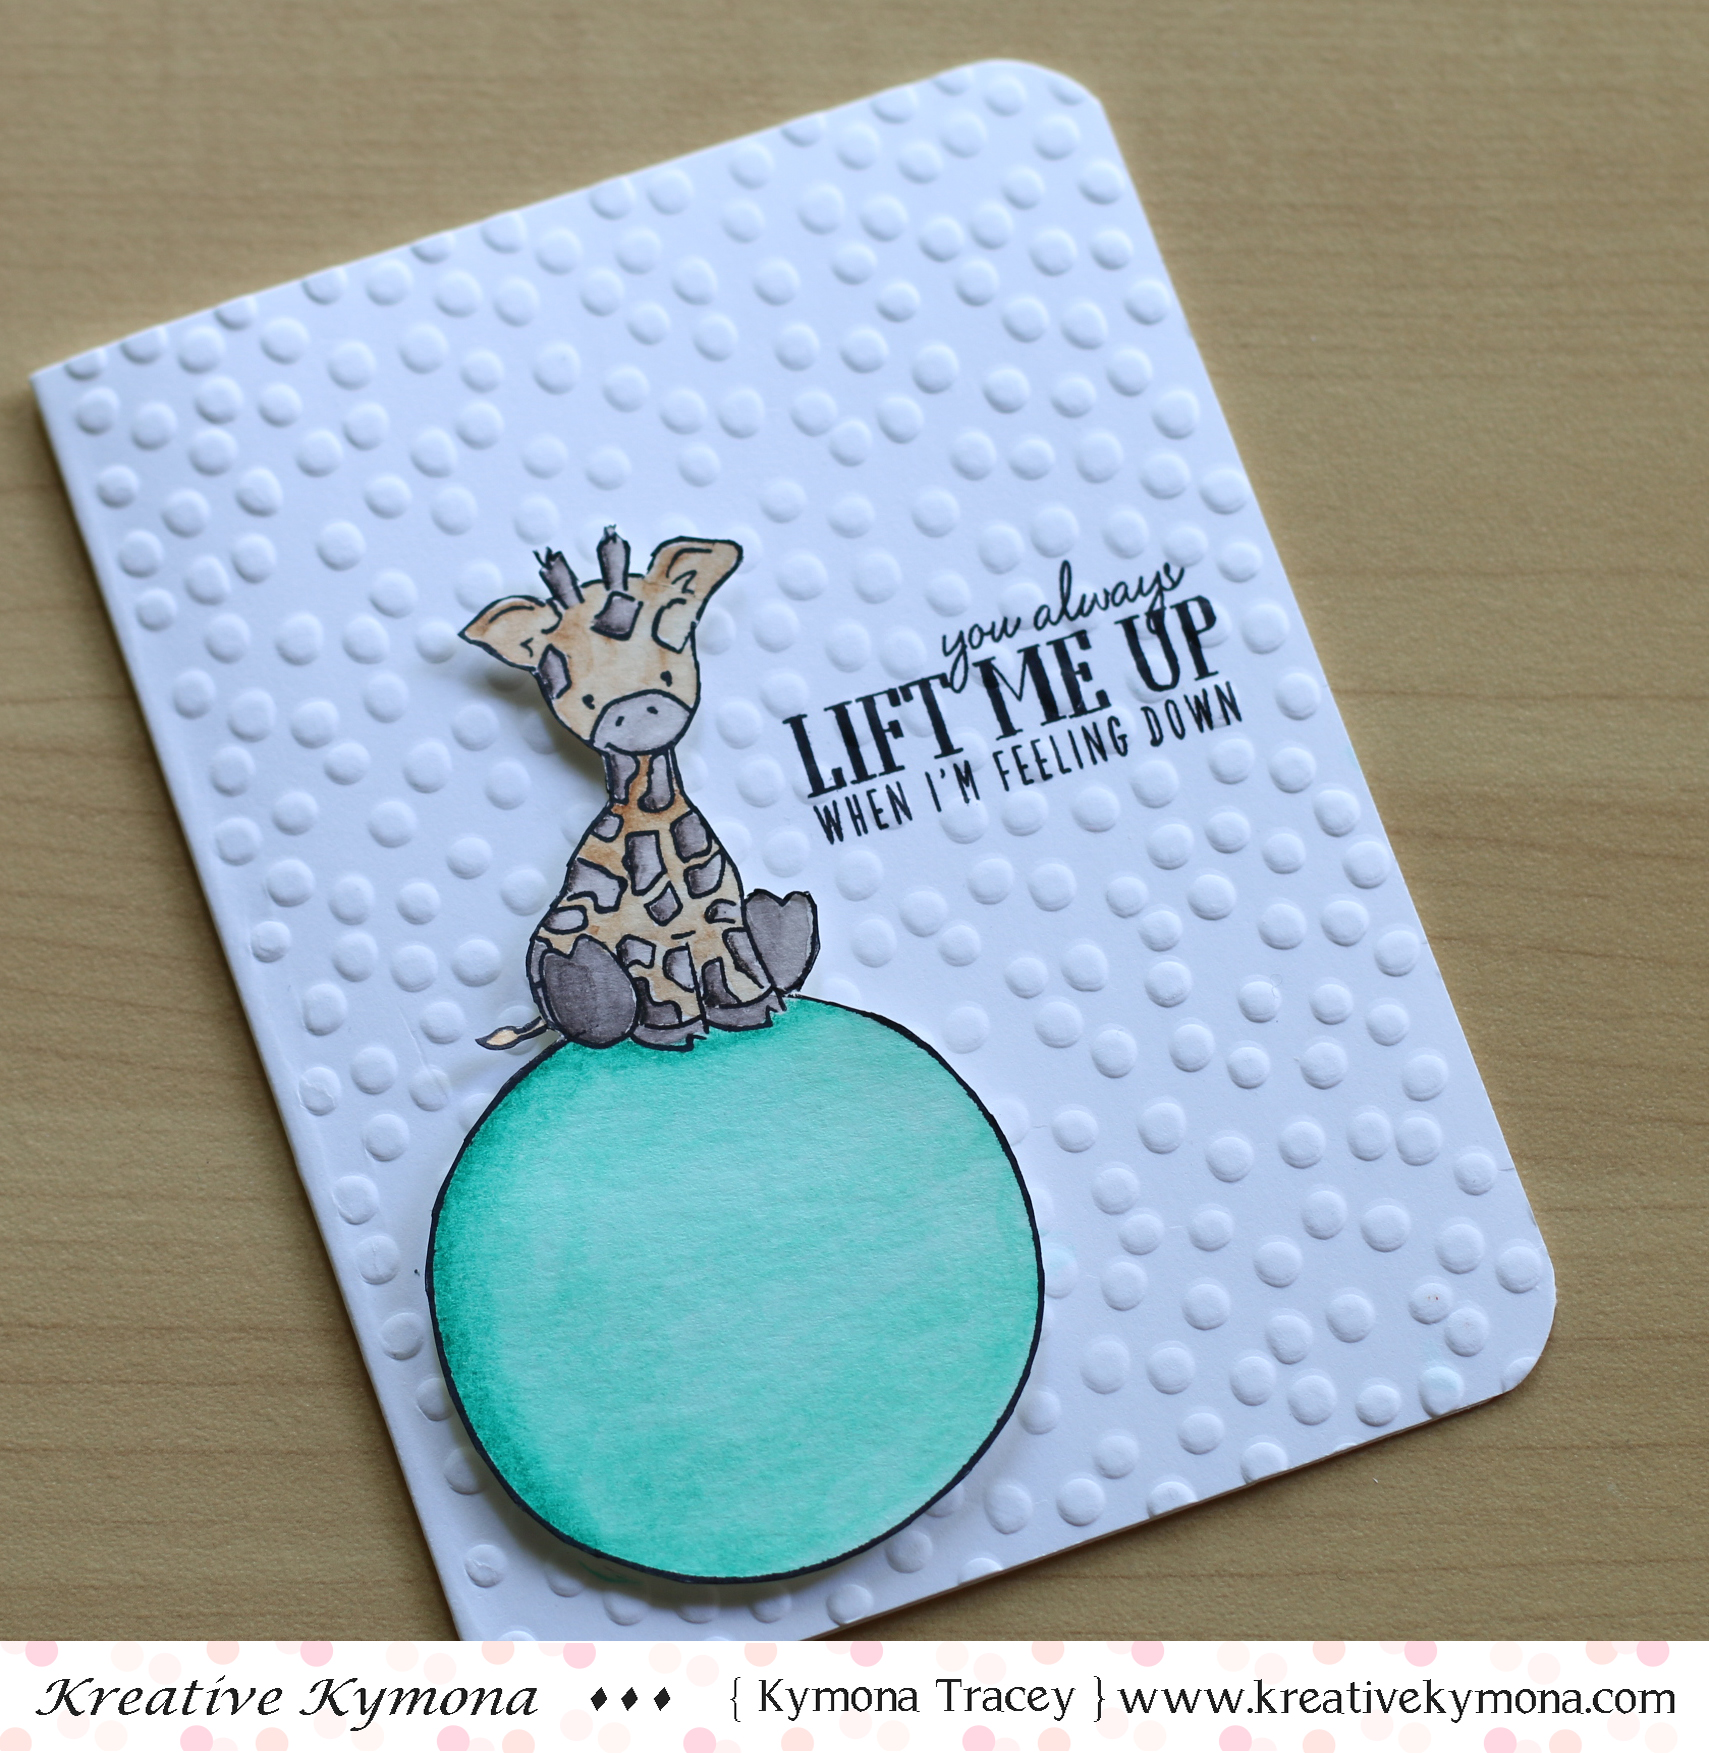
I am so tickled about this card! That little giraffe from Wplus9 Party Animal Stamp Set is the cutest little thing I’ve seen lately.
I original colored this image for Kathy’s 30 day coloring challenge this past Wednesday.

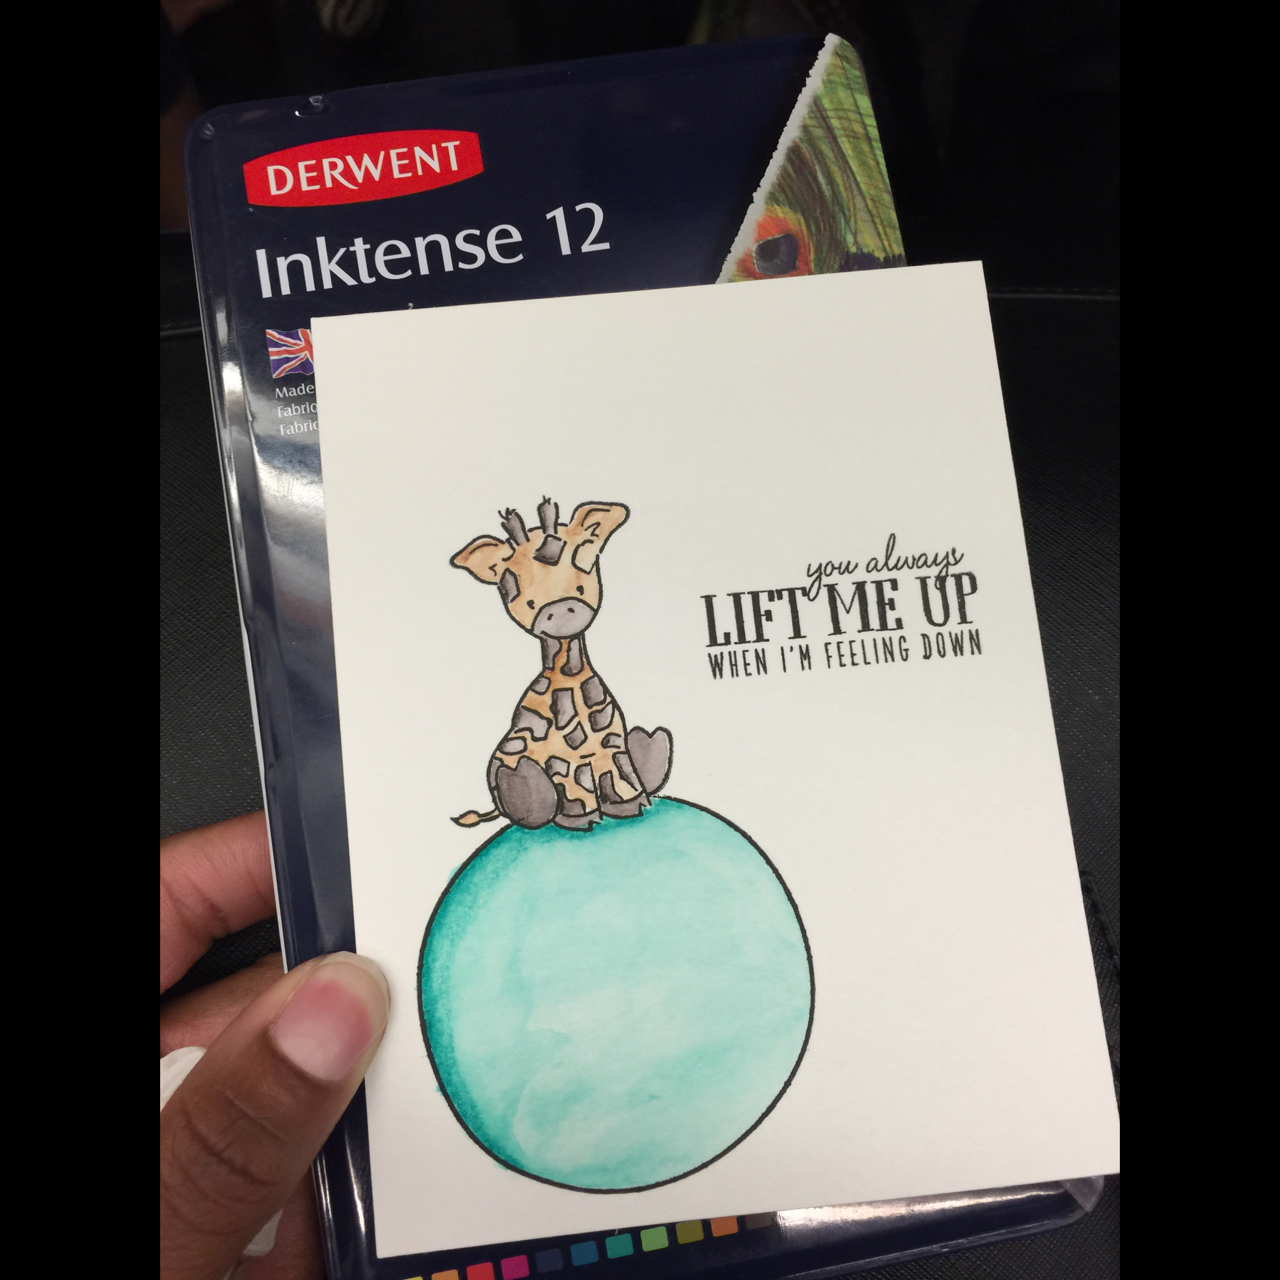
I colored this image while on the train to work. Coloring everyday had made my commute to work that much easier!!
When I was done, I was happy about the giraffe, but not with the balloon. I used my Derwent Intense Watercolor Pencils with a water brush. I wasn’t happy with the water brush. So, when I arrived home I used a small paint brush for a smoother effect.
Totally love how that turned out.

To create the rest of the card:
I embossed my card base with Stampin’ Up! Decorative Dots Textured Embossing Folder.
I fussy cut my giraffe and balloon and adhered the entire piece using 3M foam tape.
I used my Misti to stamp my sentiment that came from the stamp set with My Favorite Things Hybrid Black Ink.
Nice and easy!!
Now its your turn to play along with us.
We have a great prize pack for you.
We have two prizes to offer this month, the first is our sponsor prize. This winner will be chosen randomly from all of the entries in the challenge! The sponsor for June is:
Random Winners will win a voucher worth £20!

Our second winner is our Design Winner. This winner is chosen by our DT, who all vote for their favorite design from all of the entries. This winner will have their winning project published in Craft Stamper Magazine, they will have a GDT slot for an upcoming challenge, and will also feature in their very own Winners Profile blog post!
Now if that isn’t a reason to play along I’m not sure what is!!
I can’t wait to see what you come up with.
Supplies used:


Thanks for stopping by!
~Kymona