Thanks a Bunch…

Hello everyone!!  I’m here today with a2z Scrapbooking with a fabulous “Thank You” card that combines two Hero Arts products, which is what our current challenge is all about!!

I’m using the same stamp sets that I used on my previous card that I created for a2z Scrapbooking which you can see here.

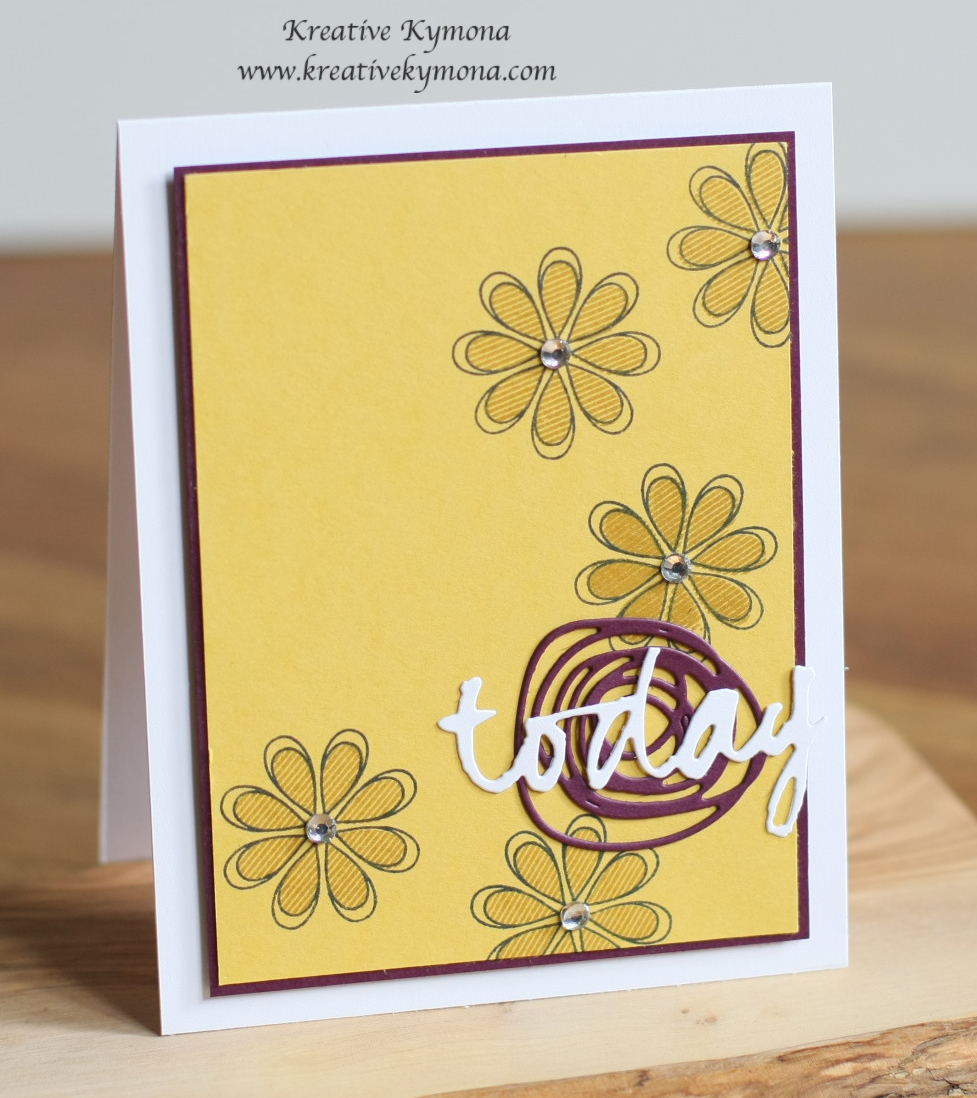
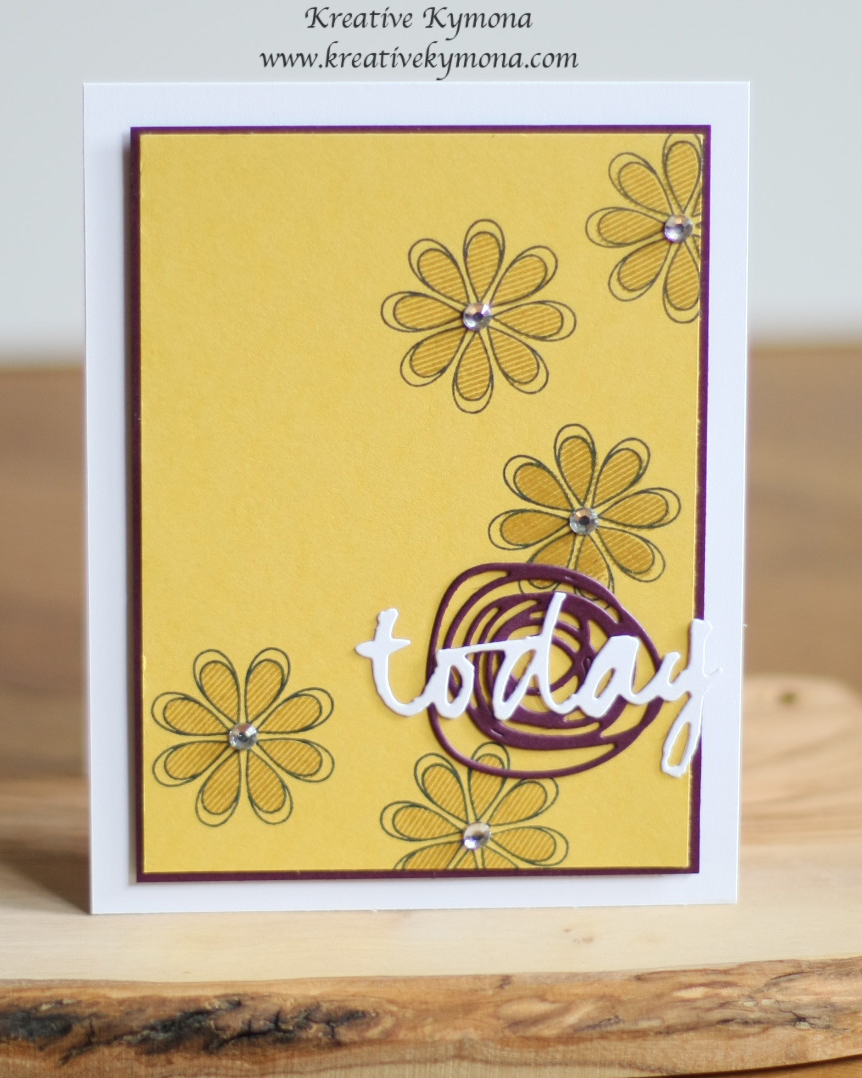
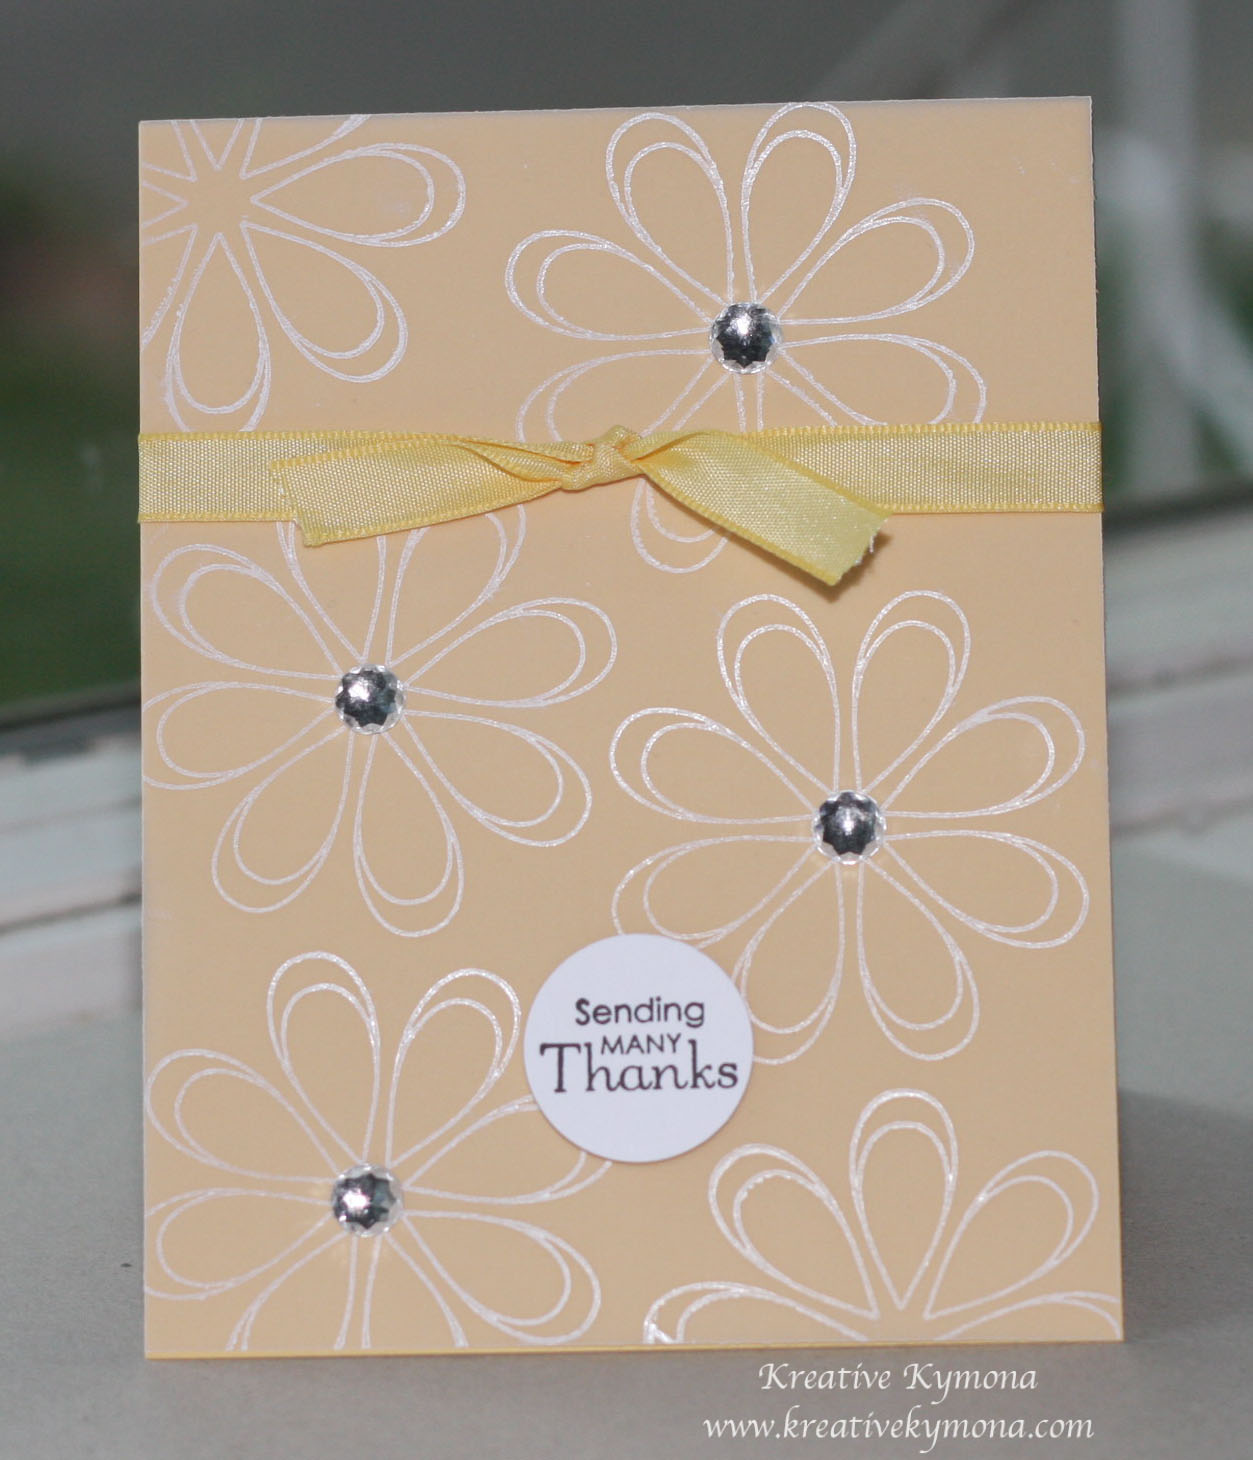
The difference with this card is I didn’t color the flower.  I colored the cardstock to match the ink I was using.  Take a look:

color cardstock with ink
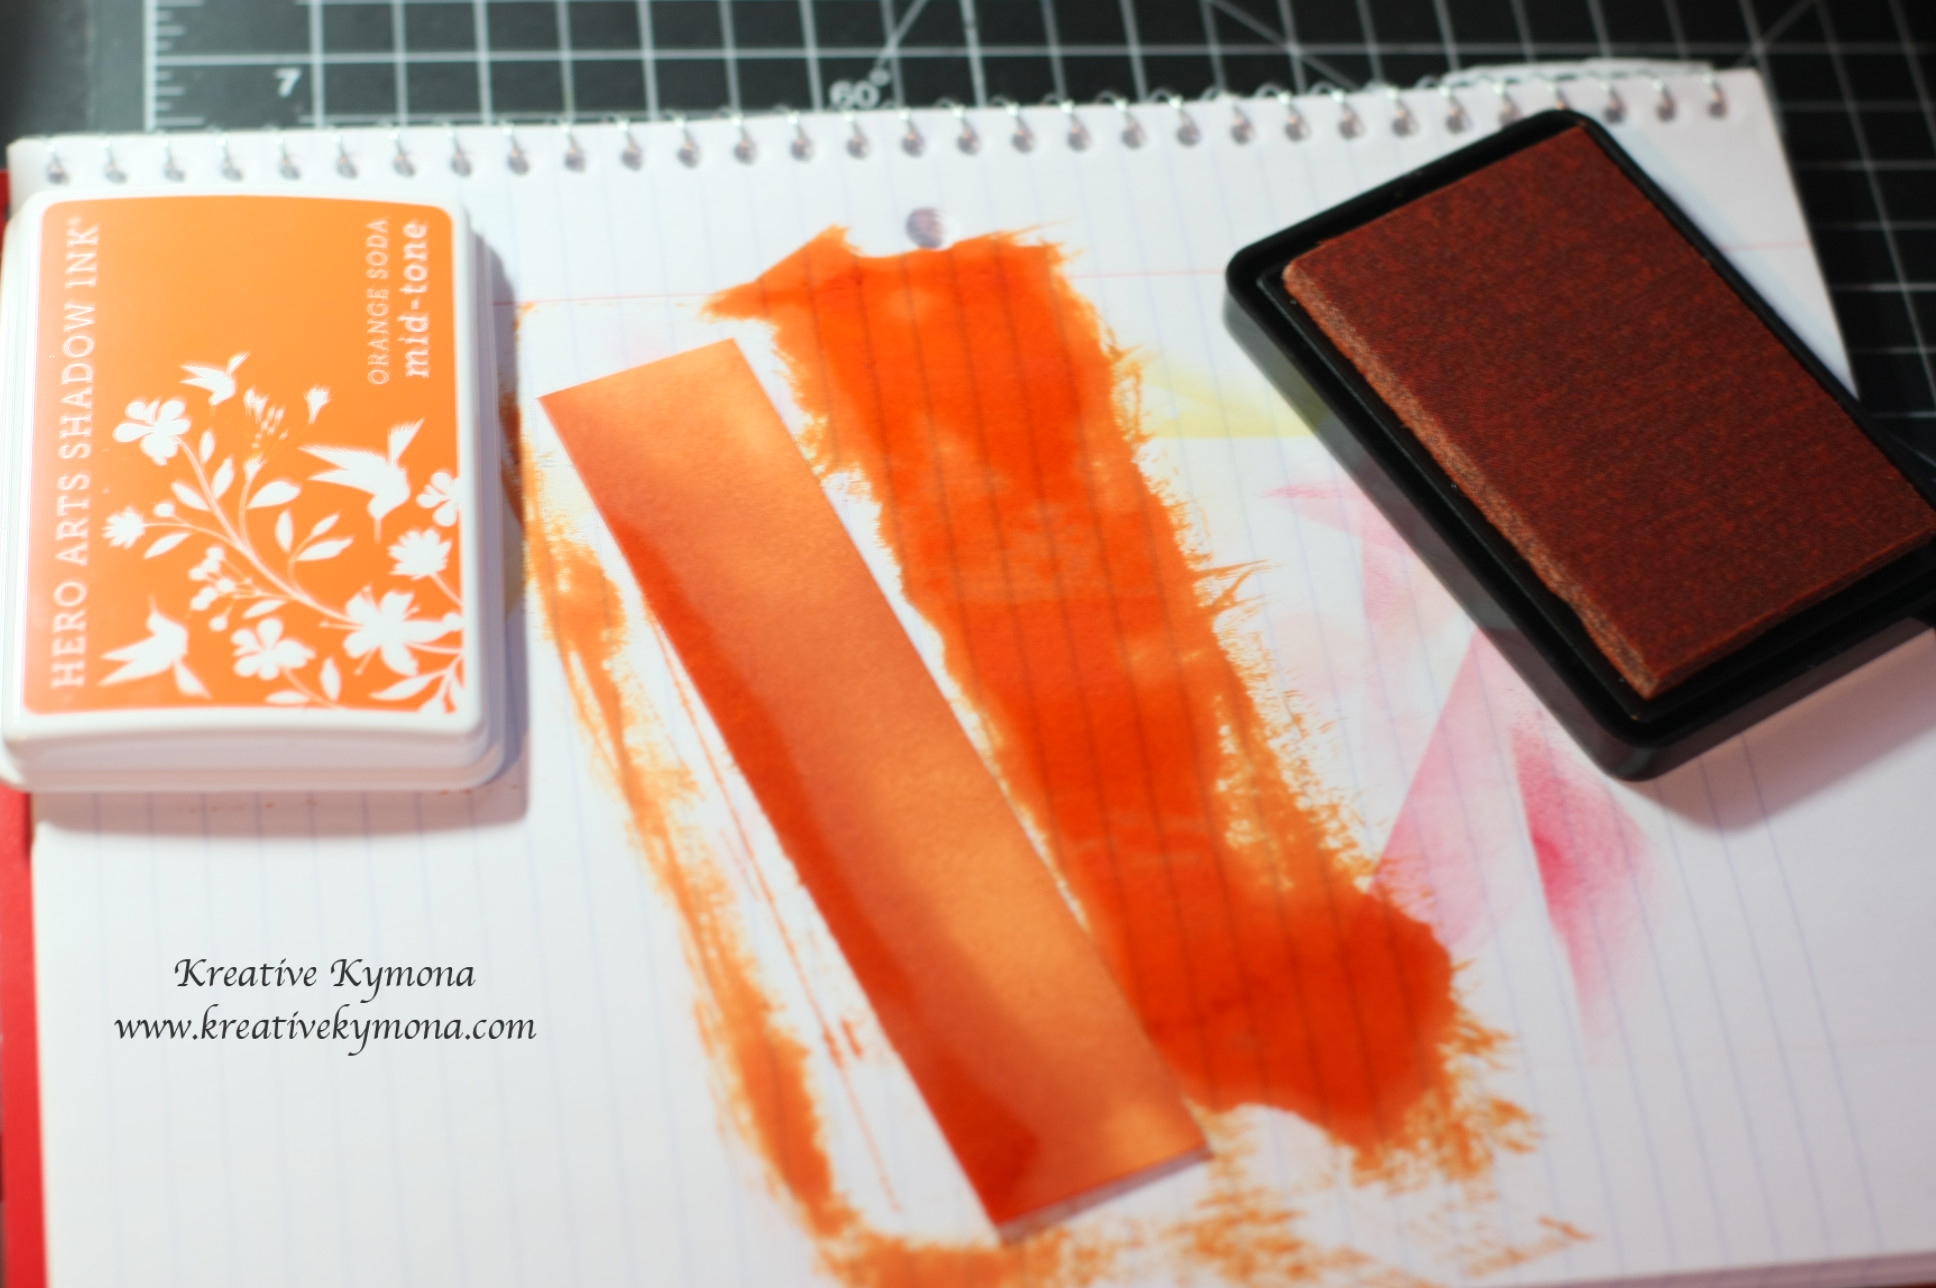
I do not believe that Hero Arts has cardstock to match their inks and I wanted my back panel to the ink I was using.  So, I used my ink pad and color the white card stock to create the color I needed.

Take a look at my card:

Thanks a Bunch

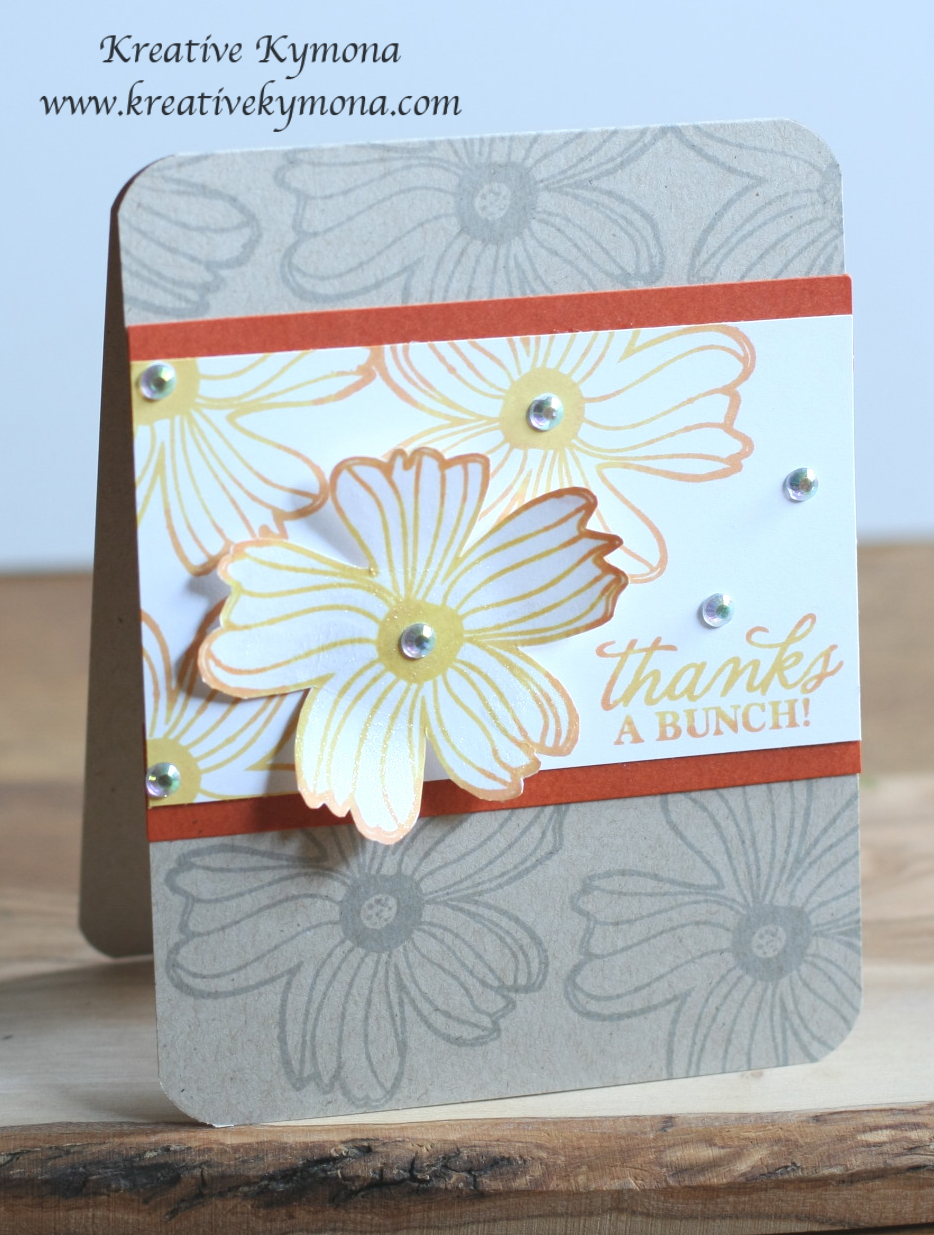
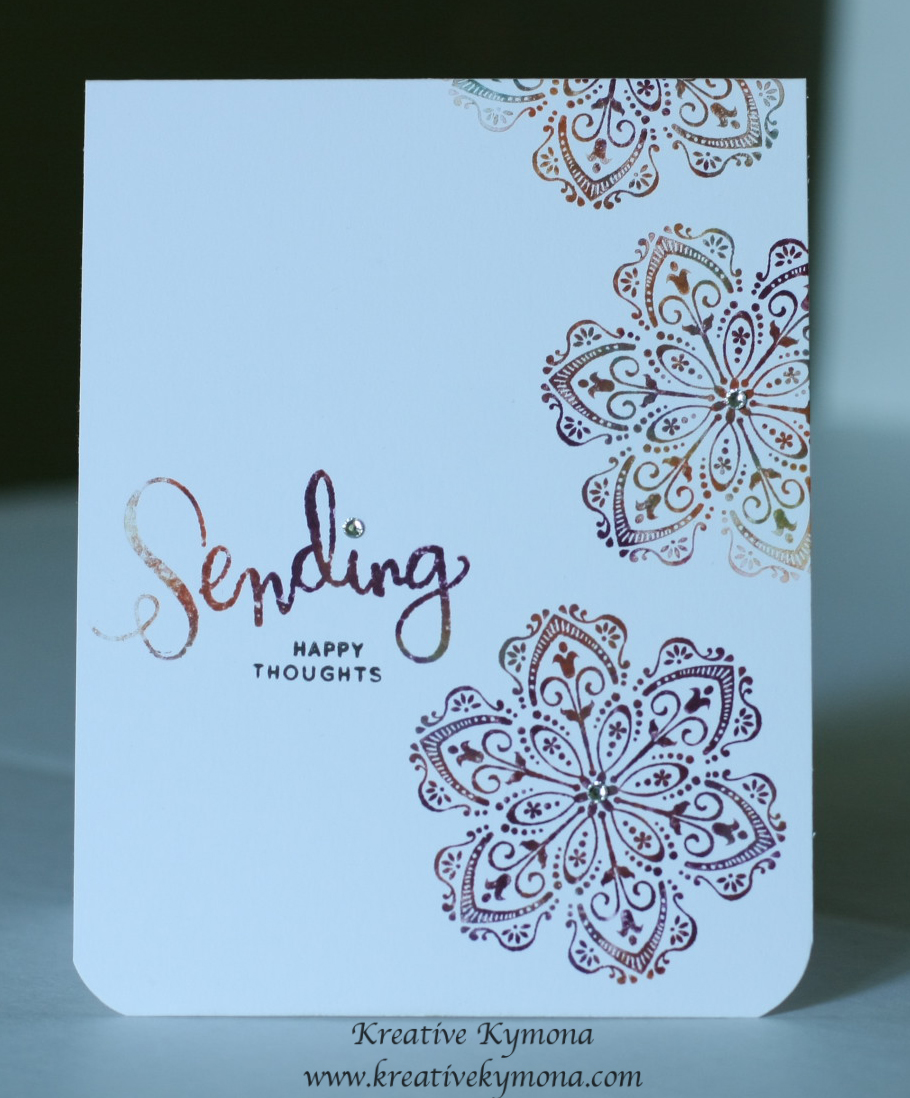
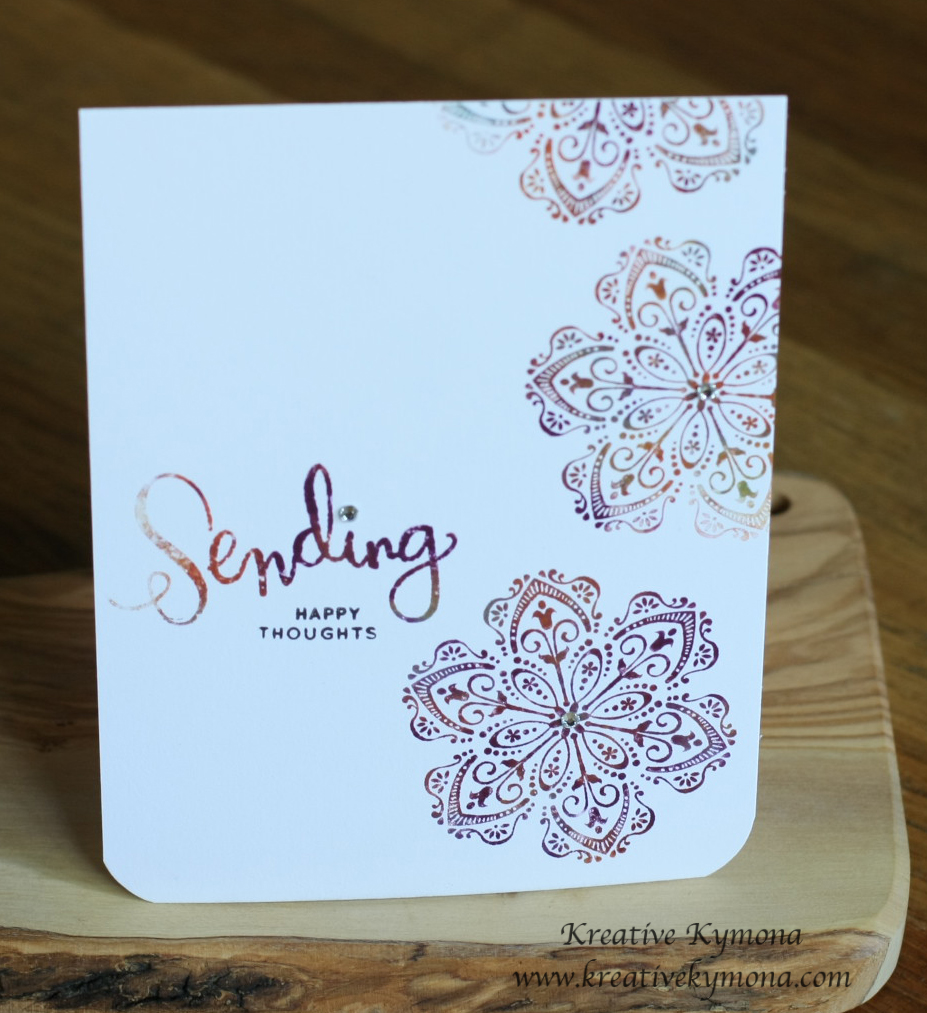
Doesn’t that matching panel look so pretty with the stamped flower edges?  So, there is another technique that I used on the flowers and the sentiment.  This might look familiar to many of you, yes, its the “Rock n’ Roll” technique.

With this technique, I stamped the flower with the lightest ink first and then rolled the edge of the stamp onto the dark ink, which creates a two-tone look.

So what do you think?  If you want the full tutorial, please visit a2z Scrapbooking blog for all of the details.

The items I used for my cards can all be found at the a2z Scrapbooking Store. If you would like to purchase any of the supplies I used please head on over to the store and use the coupon code KYMONA15 to get 15% off your purchase.

I hope my card gives you some inspiration to participate in our Current Challenge. It runs to the end of the month, which ends in a couple of days. So hurry and create!

The theme is Any Two Hero Arts Products. You have a chance to win a $25.00 gift card to the a2z Scrapbooking Store. Hope to see you there!

One more thing before I go, did you know that we are on Twitter, Instagram and Facebook. If you haven’t done so already, please follow us on these different social media outlets!! You don’t want to miss out on any fun promotions!!

Supplies used:

Hello Sunshine Hello Flowers Diamond Gems 5mm Wink of StellaSnow Layering Paper Butter BarOrange SodaHero Arts Soft Granite

Kymona

Today Is A Good Day!!

Hello everyone!  I’m here today playing along with the Muse Challenge #80 this week.  The Muse this week is Therese Calvird.

Take a look at her card:

Amazing!Therese Calvird

Take a look at my card that I created:

Today

I wanted to keep this card nice and simple just like Therese card. I’m not really good with floral stamps.  I never know what to do with them.  So I used these blossom stamps because they are easier to maneuver to me.

1. I cut my card base out of Bazzill Marshmallow to an A2 size card (4.25 x 5.50 scored at 5.50).

2. My card panels are Stampin’ Up! Blackberry Bliss (3.75 x 5) and Hello Honey cardstock (3-10/16 x 4-14/16).

3. On the Hello Honey cardstock, I stamped Papertrey Ink’s Oopsie Daisy stamp set with Memento Black Ink.

4.  I stamped the inside of the flower using the same stamp set with Hello Honey ink.

5. I used Papertrey Ink’s Circle Scribbles Die to cut out the medium scribble with Stampin’ Up! Blackberry Bliss cardstock.

6. I adhered that scribble piece with Tombow Multipurpose Glue.

7. I used Papertrey Ink’s Wet Paint Cuts II ” Today” from Bazzill Marshmallow cardstock.  I adhered that to the scribble with Tombow Multipurpose Glue.

8. I added Stampin’ Up! Rhinestones to the center of the flowers.

Very easy, simple card to recreate.

So, what do you think?  Do you like this card? Let me know.

Today Front view

Supplies used:

Bazzill Marshmallow CSBlackberry Bliss CSHello Honey CSOopsie Daisy Stamp SetMemento Black InkHello Honey InkPTI Circle Scribbles DieTombow Multi-Purpose AdhesiveBasic Rhinestones Jewel Accents

Thank you for stopping by!

~Kymona

Flowers…

Hello everyone!!  I’m here today playing with the Muse Challenge #76.  I missed it last week.  I created a card but didn’t get a chance to post it.  So I wanted to make sure I get this week’s card in.

This week’s Muse is Therese Calvird.  Take a look at her card.

friends

This challenge was a little difficult for me because I hardly create cards with flowers on it.  I have the hardest time placing the flowers or even building them.

I gave it a try this go round and I’m ok with the results.  I’m not in love with it but I think its a good start.

Take a look at my card:

Hey you are my favorite

I used Simon Says Stamp Favorite Flowers Stamp Set to create my flower bed.

I used Papertrey Ink Summer Sunrise ink and Hero Arts Green Hills Shadow Ink.

I tried to make this card as simple as I could because I really don’t know how flowers should look on a card.

Please let me know what you think, good or bad.


Supplies used:

Favorite FlowersPTI Summer Sunrise InkHero Arts Green HillsOnyx Versafine InkStampin' TrimmerclassiccrestsolarwhtieWe R Memory Keepers Corner Chomper

Thank you for stopping by.

~Kymona

WOW! What Color Is That?

Hello everyone!  I’m back again today, this time for the Muse Challenge #73.  The Muse for this week is Beverley Brown!

Take a look at Beverley Brown’s card:

MuseNow take a look at my card:

Sending Happy Thoughts front

 I wasn’t sure which picture I wanted to use so I decided to add both of them.

Sending Happy Thoughts

Beverley created a CAS card that I love. I love the simplicity of her card.

Beverley used multicolor in her butterflies, so I wanted my flowers to have that same multicolor look.  I used the baby wipe technique to create my multicolor flowers.

Then I stamped my sentiment with the same multicolor ink.

I had fun creating this card.  Soooo, what do you think?

Supplies used:

Sending Happy ThoughtsMixed Bunch Stamp SetBlackberry Bliss ReinkerLost LagoonHello Honey ReinkerTangelo Twist ReinkerBasic Rhinestones Jewel AccentsMarshmellow CSStampin' Trimmer

Thank you for stopping by!

~Kymona

Do You Have Petal Power?

Hello everyone, I guess your asking yourself what is petal power?  Guess what I was wondering the same thing.  I thought it was a cute title so I decided to go with it.  LOL, LOL!!!

No for real, petal power is when a flowers petal stand out from the rest of the flower.  What do you think?

Well my notebook today, has petal power.  The petals are so vibrant and rich, I just love it.

Papertrey Ink’s  Make It Monday #167 Challenge is DIY Notebooks!  Yes, notebooks.  So cute and irrepressible.  I couldn’t wait to participate.

Take a look at my Mini Notebook with tear out pages:

Mini Notebook

Mini Notebook side

This mini notebook was so easy to make, I just love it.

Here’s how:

1.  I cut all of my card stock and back chip board to 2-3/4 by 4-1/4.

2. I stamped “read this” sentiment from PTI’s Clip Tips on all of my colored card stock inside my notebook.

3. I stamped my flowers, butterflies and hello sentiment on my front cover.

4. I attached a piece of pattern paper to the top of the cover and to the back of the book with glue.  The pattern paper will hold all of my pages together.

5. I added double-side adhesive to the middle of the pattern paper.

6. I made sure all of the pages of my books were attached to the adhesive.

7. Then I used my hand to crease the front and back of the book.  All of the inside pages should be adhered to the double-sided tape.

WALA, your book is made and ready to use! The double-sided tape allows you to tear the pages out of the book and put it back.

Isn’t that amazing!

Supplies used:

Bazzill Basics 180-piece "Olivia Premium Cardstock KitLife is Beautiful Stamp SetOopsie Daisy Stamp SetClip Tips Stamp SetBasic Rhinestones Jewel AccentsOnyx VersafinePure Poppy InkSummer SunriseWet PaintStudio Calico Papper Pad Snippets 6x6

Please let me know what you think of my Mini Notebook!

~Kymona

Flowers Any One….

Hello everyone, I’m back again with another card for CASology Week 96: Flower challenge.  I am pushing this one.  I only have 1 hour and 58 minutes to submit my card.

This see how I do under pressure!!!!

I stopped at McDonalds to pick up a large coffee for my mother yesterday morning and I saw these leaves that was just watered and the water was just sitting on the leaves.  They looks so pretty, I had to take a picture of them.

Water on the leaves

What a great way to start the morning!!  They leaves were so still that the water drops just sat there so peacefully.  I love it.

My card today gives me that same feeling.  Very peaceful with very vibrant colors.  I used Simon Says Stamp June Card Kit to create my card.

Love is everything front

The inspiration for this card came from Sarah Moerman.

No long talking today, I only have 1 hour and 45 minutes to get my card in.

What do you think?

Supplies used:

SSS June Card Kitpure poppyPTI Tropical TealPTI Summer Sunrise Inkblueberry skyCN Enamel heartsMME Enamel DotsSnail AdhesiveStampin' Trimmer

Please leave me a comment.

~Kymona


What’s Your Favorite Flower?

Spring is in the air and all of the flowers are budding.  It’s amazing to see the many different flowers that grow this time of the year.

On my way to work yesterday, I decided to take some pictures of the flowers I see along my walk.  I used my iPhone to take these photos and I must say they aren’t so bad.  I was pretty amazed. Take a look at what I found.

LilliesPink FlowerWhite Flower

Look how pretty these flowers look.  It makes me want to plant new flowers in front of my house.  Let me think, um mm, *shaking my head*, I don’t think so.  No green thumb here.  What I do have are crafty fingers!!!

So, I created a card using flowers for the Less is More Challenge.  The theme this week is Flowers!! How fun!!  Perfect timing, my Papertrey Ink order just came in and my new Oopsie Daisy stamp set, which contains a lot of different flowers, was included.

Sending Many Thanks

By the way, my favorite flower is the Daffodil!!! Hence the Daffodil Delight card stock!

1. I used the larger flower and stamped it with Colorbox Frost White ink and stamped my vellum card front six times.

2. I allowed the ink to dry because if it doesn’t it would smudge all over the place.

3. Once the ink dried, I added Stampin’ Up large rhinestone to the center of the flower.

4. I attached the vellum to my Daffodil Delight card stock with tiny dot of glue behind the rhinestones.

4. I added Daffodil Delight ribbon and stamped the sentiment in Versamark Onyx.  I punched the sentiment out using my Stampin’ Up! one inch circle punch.

This card was easy and fun to create!

Supplies used:

Oopsie Daisy Stamp SetDaffodil Delight CSFrost WhiteLarge Rhinestone Basic JewelPetite Pairs Stamp SetOnyx Versafine

I also used Stampin’ Up! Daffodil Delight ribbon that is retired.

Please let me know what you think.

~Kymona


Watercolor Background: How Playful!!

I can’t believe my Watercolor for Card Makers class is coming to an end.  This Friday is the last day to submit all of our homework.  I have so much left to do.

It was truly an amazing class!  I learned a lot about water-coloring.  I was granted the opportunity to try different types of watercolors mediums (watercolor pencils and crayons, transparent water colors, opaque watercolors, kids watercolor, shimmer watercolors).

I’m hoping to make at least one water-coloring card a week.  This will allow me to spend more time with my daughter who also loves water-coloring.

Today’s watercolor technique was taught by Tim Holtz himself.  Truly fun and amazing.  He taught us how to make amazing backgrounds using “watercolor stamping or monoprint” using a stencil.

I had so much fun creating my card, that I made two cards..  I’m also submitting this card into the Papertrey Ink’s Make it Monday #165: Artsy Watercolor Backgrounds Challenge.  Betsy showed us how to create watercolor backgrounds using our current stamps.  I’m excited!!

Happy Watercolor

So, what do you think of this card?  It looks so delicious to me.  The colors are so vibrant.  My flower was punched from a watercolor background that I created.  I thought that bought more balance to the card.

Hello Friend

For my second card, I wet the outer edge of the flower to create the watercolor effect surrendering each individual flower.  That gives each flower a beautiful soft and subtle effect.

I love how both of my cards turned out.  I am going to try to create a couple more cards with this fun effect!!

Please let me know what you think.

Supplies used:

Canson Watercolor PaperWet PaintOopsie Daisy DieOopsie Daisy Stamp SetHarlequin StencilDistress Inks Kit 1Hawaiian ShoresPTI Summer Sunrise InkTim Holtz Watercolor CardstockStampin' TrimmerSnail AdhesiveOnyx VersafineBig Shot Die-Cut MachineStampin' DimensionalsBasic Rhinestones Jewel AccentsLarge Rhinestone Basic JewelsDaffodil Delight CSBasic Black CSWe R Memory Keepers Corner Chomper


~Kymona

Are You A Watercolorists?

Watercolor painting is an art form that creates artistic representations, usually on watercolor paper, using pigments that are water-soluble.

OK, I love the wording “artistic representation” because I can’t draw for the life of me and I also have trouble actually painting objects much less making my sentiment look like I painted it.  I’m so glad that my cards are beautiful regardless if I can’t draw or paint.  Thank you “artistic representation”!!

With that said, I created two cards today for my online Watercolor for Card Makers Class Homework.  The assignment was to watercolor paint over a stamped image.  This was fun!  My daughter, niece and I sat down to create our cards.  It’s amazing how all of us came up with different versions of the same image.

I made two cards because I felt like my first flower was dulled out and wanted to see if I could use a different flower.  Also, my sentiment was giving me so trouble.  Here are my “artistic representation” of flowers in a vase!

Made with Love

On my first card, the blue water started to seep out of my jar on the side.  I went to close to the black line with my wet paint brush.  I over did it a little with the shadow at the bottom of the jar.  You have to learn from your mistakes.

Made with Love2

This second card, the water stayed in the jar and my shadow looks so much better.  The sentiment is where I think I over did it.  That’s the beauty of water-coloring.

So what do you think?  Did I do a good job at depicting a watercolor painting?  Would you call me a Watercolorists?

Well in my book, I’m the best Watercolorists on this side of the computer screen, lol!!!!

The real test is how do I compare to my daughter and niece!!  Below you will find the cards they painted.

Little Lady Sanaa Flower Little Lady Zoe Flower

My Daughter                                                       My Niece

What fun!!!

Well that’s it for today.  I hope you enjoyed our cards today and will not hesitate to try water-coloring and become a Watercolorists!!


Supplies used:

Canson Watercolor PaperKio WaterColorsLove JarMemento Tuxedo BlackStampin' TrimmerSnail Adhesive

~Kymona

Clean & Simple 3 Card Class – Day 7 Creative Coloring Part 2

For the past couple of days, I’ve been so busy, that I haven’t been able to post a thing.   My online card class ended this past Friday and I have not posted my homework for 4 days.  I have so much to share.  So let me get right to it.

Today’s card is another card from day 7.  I love the creative coloring class so much, that I had to make another card using that technique, wait, another 2 cards!

This class taught us how to make clean and simple one layer cards.  When I started to create today’s card I was so excited that I didn’t realize it wasn’t a one layer card.  As a matter of fact, the card didn’t even have space for someone to write in it.  I thought to myself why, didn’t I realize that in the beginning.  I was busy creating that I totally missed it.

Take a look:

Birthday with heart

When you open this card the sentiment is left on the inside of the card.  The card looks nice but it isn’t functional.  The hearts where colored with the same Copic colors.So, I decided to make the card all over again.  The second card is a one layer card that is very functional.

Take a look:

Birthday with flower

What do you think? I like both cards but in terms of the clean and simple one layer, the second card is the winner.  Take a look at both of the cards together.  The flowers were colored and cut using the same Copic colors.


Birthday 2 Cards

Supplies used:

PTI Birthday Die

PTI Birthday Die

PTI Bitty Button Stacks Die

PTI Bitty Button Stacks Die

Tombow Multi-Purpose Adhesive 110755

Tombow Multi-Purpose Adhesive 110755

LF Hearts Cuts

LF Hearts Cuts


Basic Rhinestones Jewel Accents 119246

Basic Rhinestones Jewel Accents 119246

Big Shot Die-Cut Machine 113439

Big Shot Die-Cut Machine
113439

Classic Crest Solar White CS

Classic Crest Solar White CS


Whitegrain cardstock

White Woodgrain cardstock

Copic Markers

Copic Markers


The Copic colors that I used are RV66, BV17, YR16, BG49 and YR23.

Please let me know what you think.

Signature