a2z Scrapbooking February Challenge

Hello everyone!!  I’m here today with a2z Scrapbooking February Challenge.  The theme is Embossing!!

How fun is that.  There is so much you can do with embossing.  As a matter of fact I just finished a class that taught me new trick with embossing. So I have so much to share this month.

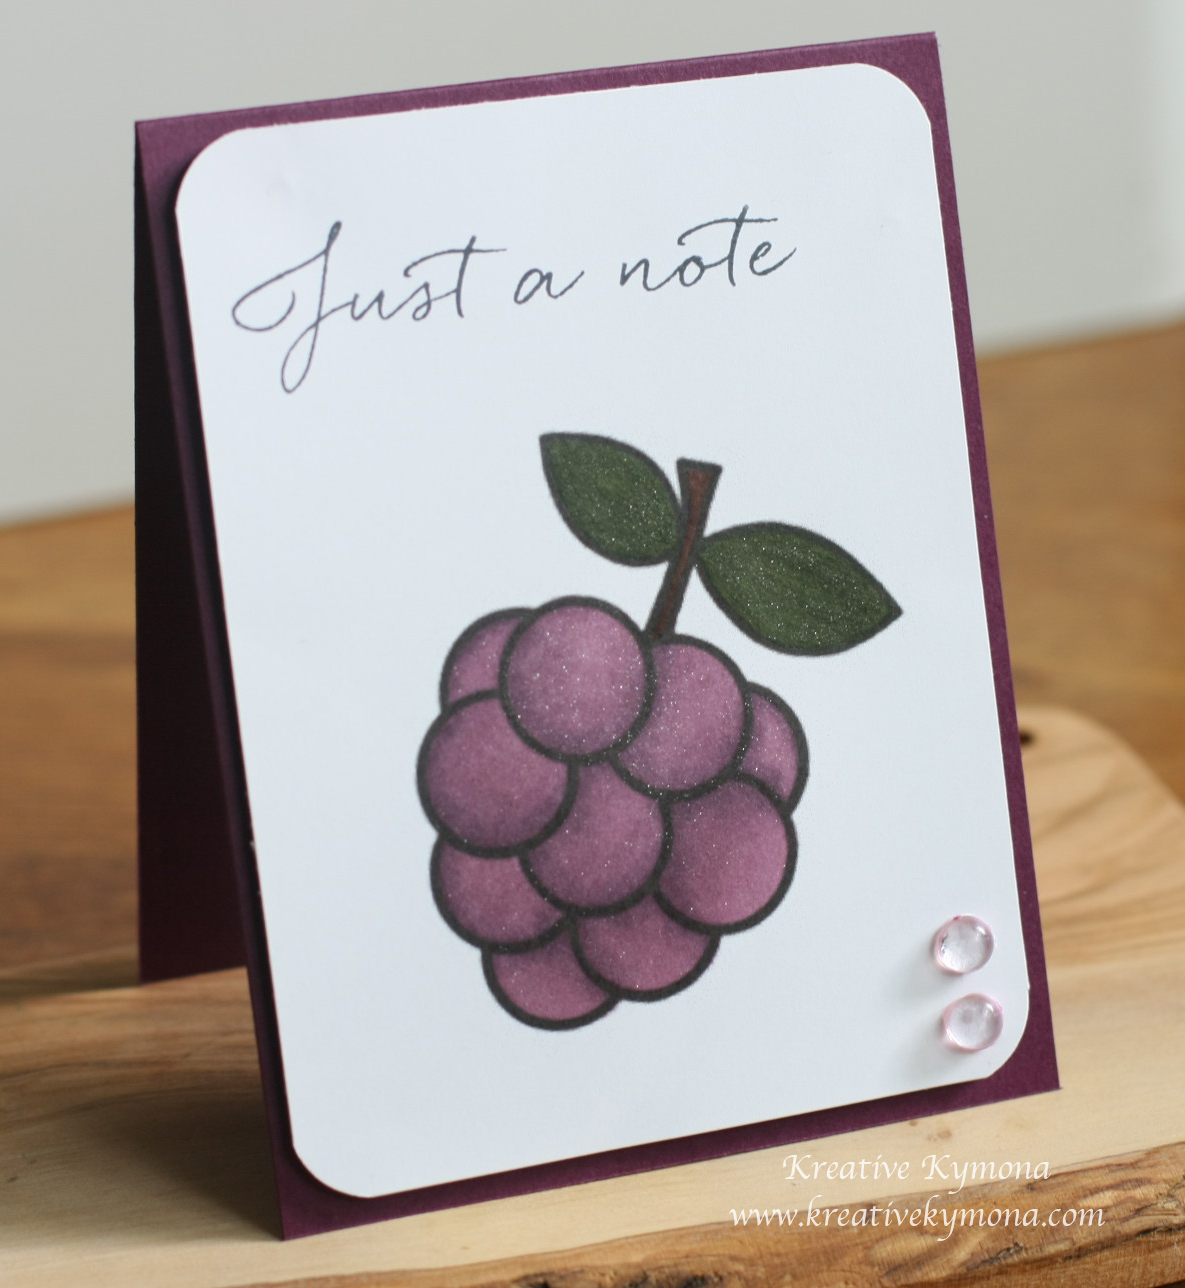
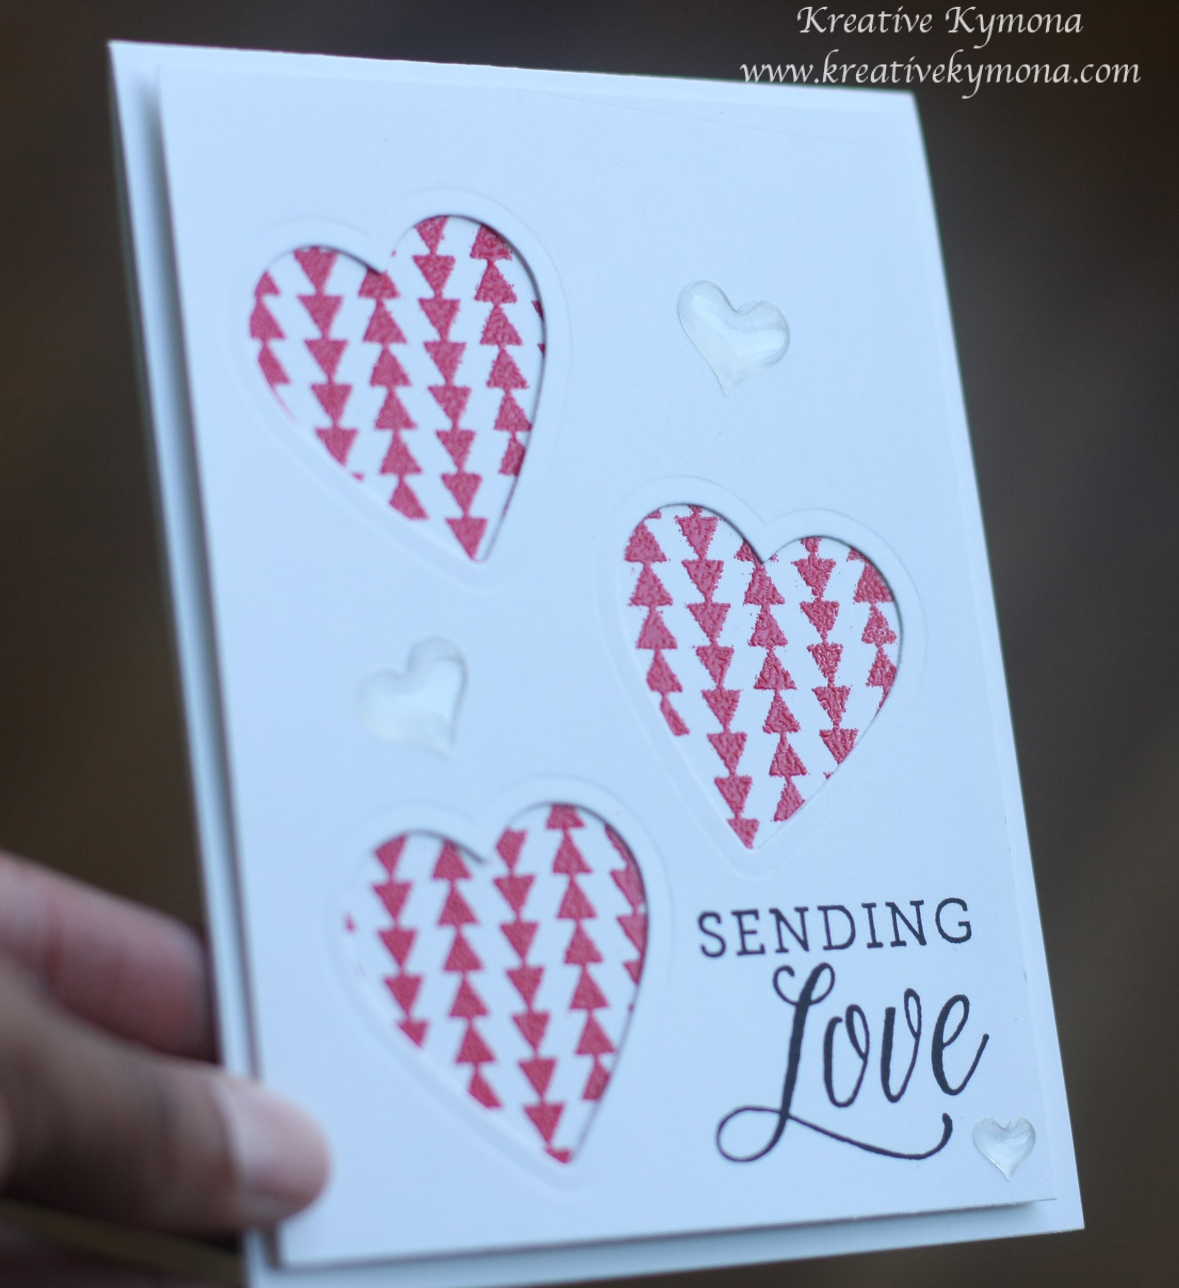
Take a look at the card I created:

Sending Love

Check out those embossed hearts!!  Totally amazing.  So you want to know how I created this card?

Sending Love closeup

Here you go!

1. I cut my card base out of Hero Arts Snow Layering Paper to an A2 size card (4.25 x 5.50), my embossed panel to 3.75 x 5.0 and my front panel to 4.0 x 5.25.

2. I taped my Hero Arts Basic Grey Triangle Pattern Stencil on top of my middle card panel.  I used Versamark ink and stamped directly on top of my stencil.

3. I added Wow- Cable Car Red embossing powder on top of my stamp image then heated it up. Then I set that panel aside to cool down.

4. I used the heart die from Hero Arts Stamp and Cuts Hearts set to cut 3 hearts out of my front card panel.

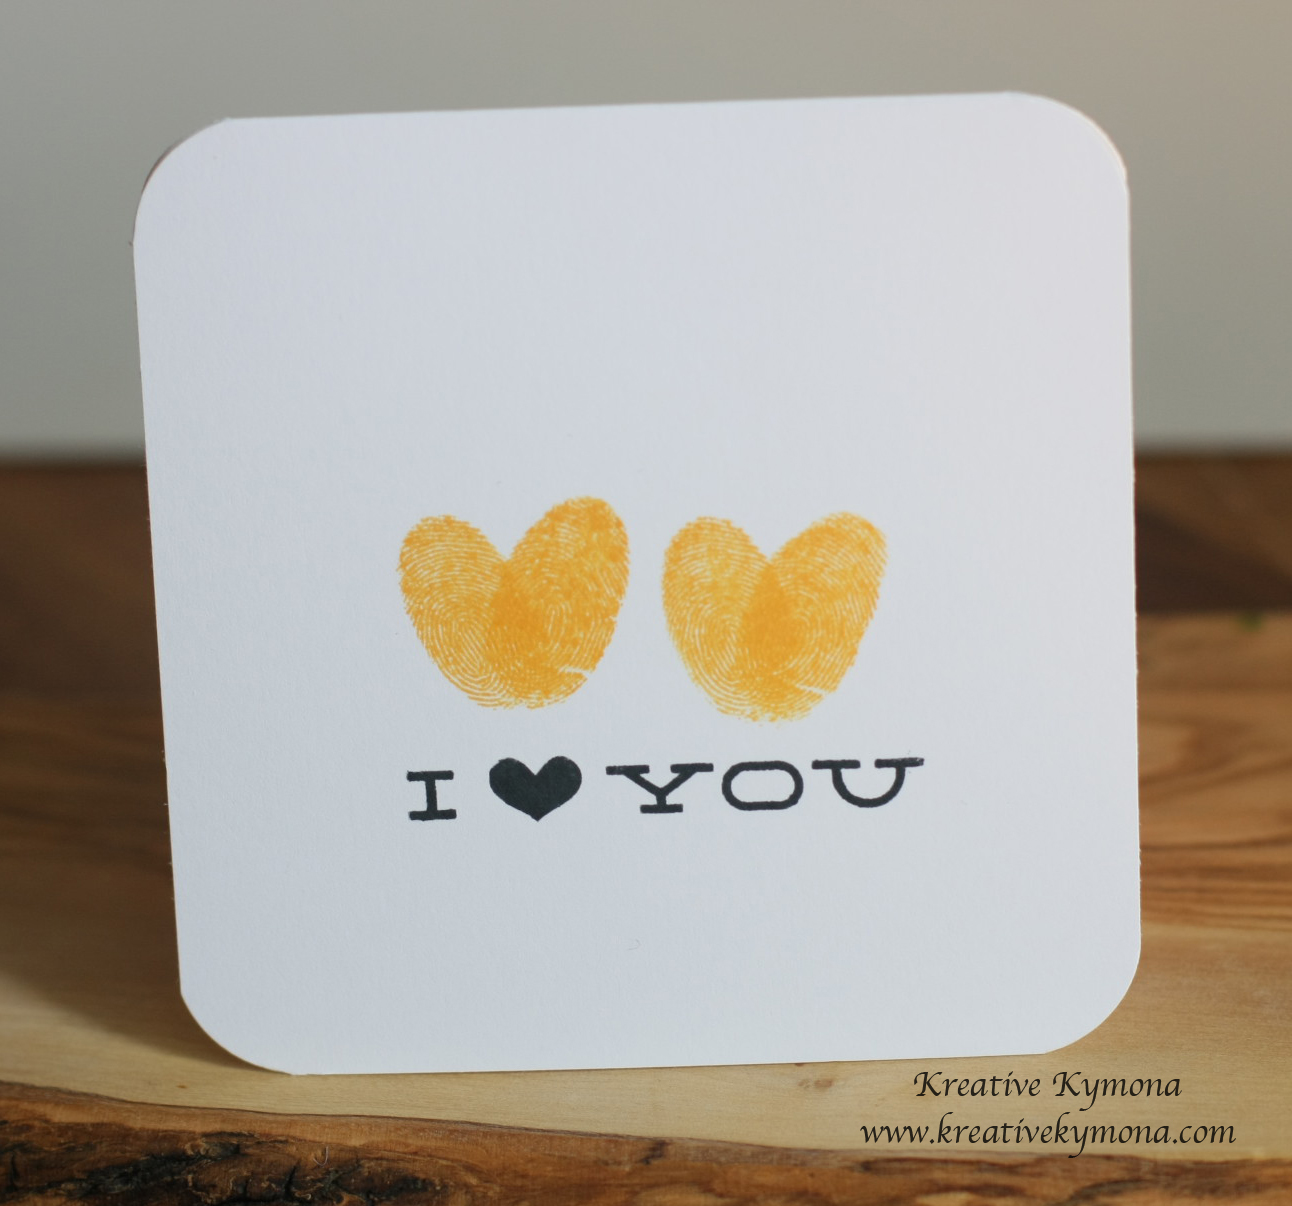
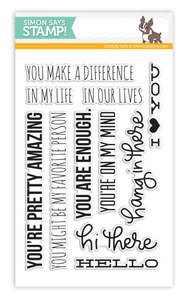
5. I stamped my sentiment on the front card panel using Hero Arts Sending Love Stamp.

6. I attached my embossed panel to the back of my front card panel.

7. I added Stampin’ Up! Itty Bitty accents Epoxy Stickers to my front card panel.

Easy Peasy!! I love how this card turned out.

Well, now its your turn!!

Some of the supplies I used can be found at the a2z Scrapbooking Store. If you would like to purchase any of the supplies I used please head on over to the store and use the coupon code KYMONA15 to get 15% off your purchase.

I hope my card gives you some inspiration to participate in our Embossing Challenge. It runs to the end of the month, you only have 27 days left to play along.

You have a chance to win a $25.00 gift card to the a2z Scrapbooking Store. Hope to see you there!

Supplies used:

Kymona:

Hero Arts Triangle Patten Stencil Itty Bitty Accents Epoxy Stickers Versamark

One more thing before I go, did you know that we are on Twitter, Instagram and Facebook?. If you haven’t done so already, please follow us on these different social media outlets!! You don’t want to miss out on any fun promotions!!

Thanks for stopping by!!

Kymona

Top Dog Dies Dotted Tags

Hello everyone!!  Happy Wednesday!! Friday is in sight now, yes!  I need a day off!!  LOL!!

Wednesday’s are my Top Dog Dies days!!  I’m here today to share another new die they released last week!

Take a look:

TDD Dotted Tags Die SetTop Dog Dies Dotted Tags Die Set

They are super cute and will fit on any box, card and scrapbook page.  The stitched edges are so pretty!

Take a look at my totally awesome gift box:

Be Mine box

You can give this box to anyone, simply change the sentiment from “Be Mine” to something that would suit your recipient.

I used the heart die from Top Dog Dies Heart Mini Album Finishers Die Set, to create all of those small hearts on my box!!

Take a closer look at my box:

Be Mine box closeup tag

I attached the tag under one of the glitter hearts and it fit perfectly.  No string needed!!

Be Mine box side view

I added the glitter hearts on both sides of the box.  This box is big enough to hold a nice size gift!!

I added a bag fill of chocolate to this box.  I’m giving my box to my daughter.  I have to make another one for my son.

Here is how I created this gift box:

1. I stamped the big and small heart from Waffle Flower Crafts DT Mix Stamp Set on my box using Versamark Ink.

2. I put the box together buy folding on the score lines. I added my chocolate to the box now because when I add the decorations to the box, you can’t open it back.

3. I used my retired Stampin’ Up! Scallop border punch to create the scallop border out of Stampin Up! Cherry Cobbler cardstock.

4. I attached the border punched cardstock to the edge of the white cardstock.  Then I adhered the entire piece to the takeout box using Tombow X-treme adhesive.

5. I attached 5 pieces of Stampin’ Up! Cherry Cobbler Baker’s Twine around my box.

6. I die cut 16 small hearts from Top Dog Dies Heart Mini Album Finishers Die Set and attached them to the bakers twine with glue dots.

7.  I die cut my tag from Top Dog Dies Dotted Tags Die Set and stamped my sentiment from Stampin’ Up! You Plus Me stamp set. I adhered it to my box.

That was super easy to create and the recipient will love it.  Head on over to the Top Dog Dies shop to see what they have to offer. You will not be disappointed.

So what do you think?  Let me know below.

Supplies used:

TDD Heart Mini Album Finisher Die SetTDD Dotted Tags Die SetTake out boxCherry Cobbler Baker's TwineRed Glimmer PaperCherry Cobblerclassiccrestsolarwhtieae540-versamarkBasic RGB Tombow XtremeYou Plus Me


Thanks for stopping by!!

~Kymona

CASology 130 – Friend

Hello everyone!!  I’m here today with the new CASology Challenge!

I have to admit, the cue card this week had me stumped for a minute.  I wasn’t sure what to create or even were to begin.  Its not that the word was hard because it wasn’t, I just didn’t now what to do.

You see, for this challenge I love thinking out of the box.  I always look in my dictionary for another meaning of the word.  For this cue, it was hard to get an alternative meaning.  So, I decided to go back to the basics and just play with the my  stamps with no deep meaning behind it!!

Here is the Cue Card:

Week 130 - FriendSo you see what I mean.  When you see the word “Friend”, you know what it means hands down.  How do you interpret that word?

Here is what I came up with:

Friends ForeverI went back the basics here!  I stamped and colored.  I searched my stamps for a stamp set that would either represented a friendship or the word friend.

I came across Lawn Fawn’s Feathered Friends stamp set.  The light bulb went off, how perfect is this set.

My card is simple as simple can be. This is how I created it:

1. I cut my white cardstock to an A2 size card (4.25 x 5.50) scored at 5.50.

2. I stamped all of the images from the stamp set on the front of my card.

3. I used Copic markers to color my image: R22, R24, Y11, Y13, YR68, E35, E37.

4. I added some Clear Wink of Stella to the hearts.

5. That was it!  My card shows the friendship between the two birds.  What could be better then that!!

Don’t forget to check out what my fellow DT members have created.

Design-Team

Our Guest Designer: Ren

Now its your turn!!  I can’t wait to see what you come up with. Our wonderful sponsor this week is DeNami Design. You don’t to miss this one!

I’m also linking this card to the Less is More Challenge.

Less-Is-More-Header

I’m also linking this card to Uniko Studio Challenge#17 Love and Friendship

BlogHeader2

Supplies used:

Feathered Friends Memento Black InkCopic MarkersclassiccrestsolarwhtieWink of Stella clear

Thanks for stopping by!!

~Kymona

Watercolor Love

Hello everyone!!  I’m here with a2zScrapbooking and our December Challenge!!

I have another card featuring our theme this month, which is Watercoloring.

Take a look at what I created:

Watercolor Love

What do you think? I love these two colors together. They just works so well together.

How my card was created:

1. I used painters tape to cover 1″ of my card panel on all 4 sides.

2. I added water to the center of the card so that my paint could move freely.

3. Then I added my two colors to the watercolor color paper.

4. I used my heat tool to dry my card panel.

5. I used the heart from Hero Arts Stamp and Cut Hearts set to stamp the hearts in the center of the panel.

6. I added a faux stitched line around the watercolor panel and Hero Arts Gems for some interest.

7. I added my card panel to my black card base.

Wow, isn’t this the cutest valentines day card you seen in December, LOL!!

Well, now its your turn!!

All of the supplies I used can be found at the a2z Scrapbooking Store. If you would like to purchase any of the supplies I used please head on over to the store and use the coupon code KYMONA15 to get 15% off your purchase.

I hope my card gives you some inspiration to participate in our Current Challenge. It runs to the end of the month, so you have time to play along.

You have a chance to win a $25.00 gift card to the a2z Scrapbooking Store. Hope to see you there!

Supplies used:

Hero Arts Black Ink Diamond Gems 5mmRanger Watercolor paperBlack Notecard Stamp and cut hearts Winsor And Newton Cotman Water Color Paint

Thank you for stopping by!!

Kymona

Are You Rolling With It?

Hello everyone!  I’m here today with Paper Smooches Guest Designer Search for October!!  I figured why not throw myself in the mix!!

I’m also entering the Paper Smooches Sparks: Anything Goes.

SPARKS BADGE

Sometime this week I received Paper Smooches Spiffy Scooters Stamp set and decided that I would use that stamp set to create a new card.   I was waiting for my new Copic markers to come in the mail so that I can practice my coloring.

Guess what!!  My Copic Markers arrived this morning!!  Yayyy!! I’m so excited.  Practicing here I come. Now I have 108 markers.

So without further a due here is my card:

Roll With It

I had a lot of fun coloring this little cute scooter.  It challenge me a bit.  I wanted to make sure I was able to do some blending.

The Copic colors I used were:

YR04, YR07 – the flame

B00, B02 – the scooter body

100 – the hub caps, seat, bottom of the muffler

Y21 – the wheel covers, head light

C3, C5 – the headlight cover, the handlebar, top light cover, tailpipe, back-light cover

R35 – backlight

T0, T2 – wheels, shadow

So what do you think of my coloring?  Please let me know.

Now here is another card that I want to submit for this search:

Just a Note (grapes)

I created this card a couple of days ago.  If you want to know how I created this card you can check out that blog post here.

I didn’t use Copic’s to color these grapes I used Stampin’ Up! Rich Razzleberry Blendabilities.

Supplies used:

Spiffy ScootersCopic MarkersclassiccrestsolarwhtieCN Enamel hearts


Thank you for stopping by!

~Kymona

Who Do You Feel Strongly About?

Hello everyone!  I’m here today with Casology week 104.  The Cue Card is Pet!! I’m also linking this card to Addicted to Stamps and their challenge is CLEAN AND SIMPLE (CAS).

Week 104 - Pet

Addicted to Stamps

When I first saw the word I immediately thought of a pet animal.  I figured everyone would choose that so I decided to look up the meaning of the word “pet” to see what else it means.

I decided to go with pet as an adjective: to feel particularly strongly about someone or something.

Take a look at my card:

Love you with heartss

Nothing like a father’s love for his only daughter!

I decided to do a one layer card with a lot of white space, one focal point and a sentiment, CLEAN AND SIMPLE (CAS) at its best.

My Koala’s are from my new Sweet Stamp Shop Koala stamp set and my sentiment and hearts are from Lawn Fawn’s Love You Tons stamp set.

I used my Copic markers #B12, B14, #R20, R24 and C3.

I wanted to color with my Copic’s for practice.  I need to color more often. I want to master this skill.


This was my first card but I didn’t like how the sentiment “little sister” turned out but I wanted to share it with you.

Plus the belly is blue and not pink.

Love you little sister

What do you think?  Let me know!

Supplies used:

Koala FamilyLove You TonsCopic Markerscopic blending xpress itStampin' TrimmerWe R Memory Keepers Corner Chomper

Thank you for stopping by.

~Kymona

Are You Ready to Fingerpaint?

Hello everyone!  I’m back again with another card for Less is More Week 180:  One Layer Card.

FingerPrintArt

The challenge is to Adapt a Fingerprint.  Yayyyy!!  This reminds me of my childhood when we just created with no cares or worries and thought everything was beautiful.

My daughter and I had a great time playing with this challenge.  She will post her cards later on today and I will link to it when she post.

Take a look at my card:

Fingerpainting I love you

I used my index finger and Papertrey Ink’s Summer Sunrise ink to create my heart. How cute is that!!

My sentiment is from Simon Says Stamp Stripe Greetings stamped with Memento Black Ink.

I created a couple more cards for this challenge.  I couldn’t help myself.

Take a look:

Fingerpaint string of lights

Fingerpaint I love you 2

So what do you think?  I think all of you should try it.  Bring out your inner child this weekend.

Supplies used:

PTI Summer Sunrise InkSSS Stripe GreetingsMemento Black InkclassiccrestsolarwhtiePTI Berry Sorbet InkAqua Mistblueberry skyCopic Multiliner

Shadow Stamping

This week’s challenge technique is a one layer Shadow Stamping card for Less is More.

Shadow Stamping is stamping the an image twice without re-inking the stamp.  You will see the stamp lighter the second time, which creates a shadow.

I used Stampin’ Up!’s Peachy Keen stamp set to create this effect.

Take a look:

Double Heart Enjoy

I stamped the first heart with Crisp Cantaloupe ink,  then without re-inking the stamp I stamped the heart again, giving the heart a shadow.  I repeated those steps using the Bermuda Bay ink.  I stamped the sentiment from the Simply Celebrate stamp set in Memento Tuxedo Black ink.  I added a rhinestone to finish the card off.

I am pleased with how my shadow stamping turned out.

Please leave a comment below letting me know what you think.

Supplies used:

classiccrestsolarwhtieBermuda Bay InkCrisp CantaloupePeachy KeenSimply CelebrateBasic Rhinestones Jewel Accents

You Make Me Smile Big

I’m back again with another fun card for you.  I made this card using the Big You die from Simon Says Stamp and the Hello You stamp set.  The card stock and pattern paper came from one of SSS card kit.

Take a look:

You make me smile big

I gave the you’s some dimension by die cutting eight extra yous and stacking them together.  I love how the you’s compliment the strip of pattern paper. I added two hearts to balance out the bottom of the card.

Please let me know what you think of my card.

Supplies used:

SSS HelloYouBigYouStamp Runner Dot AdhesiveUltra Thick White CS 120Hearts Lawn CutsWe R Memory Keepers Corner Chomper

*The color card stock and pattern paper is from Simon Says Stamp Card Kit.  I’m not sure which one.

Clean & Simple 3 Card Class – Day 7 Creative Coloring Part 2

For the past couple of days, I’ve been so busy, that I haven’t been able to post a thing.   My online card class ended this past Friday and I have not posted my homework for 4 days.  I have so much to share.  So let me get right to it.

Today’s card is another card from day 7.  I love the creative coloring class so much, that I had to make another card using that technique, wait, another 2 cards!

This class taught us how to make clean and simple one layer cards.  When I started to create today’s card I was so excited that I didn’t realize it wasn’t a one layer card.  As a matter of fact, the card didn’t even have space for someone to write in it.  I thought to myself why, didn’t I realize that in the beginning.  I was busy creating that I totally missed it.

Take a look:

Birthday with heart

When you open this card the sentiment is left on the inside of the card.  The card looks nice but it isn’t functional.  The hearts where colored with the same Copic colors.So, I decided to make the card all over again.  The second card is a one layer card that is very functional.

Take a look:

Birthday with flower

What do you think? I like both cards but in terms of the clean and simple one layer, the second card is the winner.  Take a look at both of the cards together.  The flowers were colored and cut using the same Copic colors.


Birthday 2 Cards

Supplies used:

PTI Birthday Die

PTI Birthday Die

PTI Bitty Button Stacks Die

PTI Bitty Button Stacks Die

Tombow Multi-Purpose Adhesive 110755

Tombow Multi-Purpose Adhesive 110755

LF Hearts Cuts

LF Hearts Cuts


Basic Rhinestones Jewel Accents 119246

Basic Rhinestones Jewel Accents 119246

Big Shot Die-Cut Machine 113439

Big Shot Die-Cut Machine
113439

Classic Crest Solar White CS

Classic Crest Solar White CS


Whitegrain cardstock

White Woodgrain cardstock

Copic Markers

Copic Markers


The Copic colors that I used are RV66, BV17, YR16, BG49 and YR23.

Please let me know what you think.

Signature