Smiling Is So Contagious

Have you ever smiled till it hurts? 

Smiling

Well I’ve been smiling since Saturday.

I received some good news yesterday from CAS(E) this sketch!  My Seeing Stars card was chosen as one of their favorite cards!!!!!  You can check out the announcement here. I was so excited.  Thank you ladies for that distinction.

I’m here again with another CAS(E) this sketch! #78.  Julie Day created the sketch for this challenge.

Take a look:

CTS_Sketch78

This was a fun sketch to work with.  Since I was so happy, I wanted to stick with happy colors for this sketch.

Take a look:

Smile someone love you

I used the zig zap stamp form Life is a Journey Simon Says Stamp to create the zig zap pattern in the three different colors.

I had to use Papertrey Ink’s Wet Paint 3 Smile sentiment because I can’t stop smiling.

To give balance to the card I added some sequins and rhinestones in the colors of the ink.

Simply but classy one layer card! What do you think?

Supplies used:

classiccrestsolarwhtieWet Paint 3Hero Arts Tide PoolBubble GumHero Arts Butter BarLife is a journeyHello Sunshine Mixed SequinsBasic Rhinestones Jewel AccentsStampin' TrimmerCrystal Effects

Let me know what you think.

~Kymona


Watercolor Butterflies

How beautiful are butterflies??  Have you ever seen one up close and personal? Did you know no two butterflies are alike.  How amazing is that!!

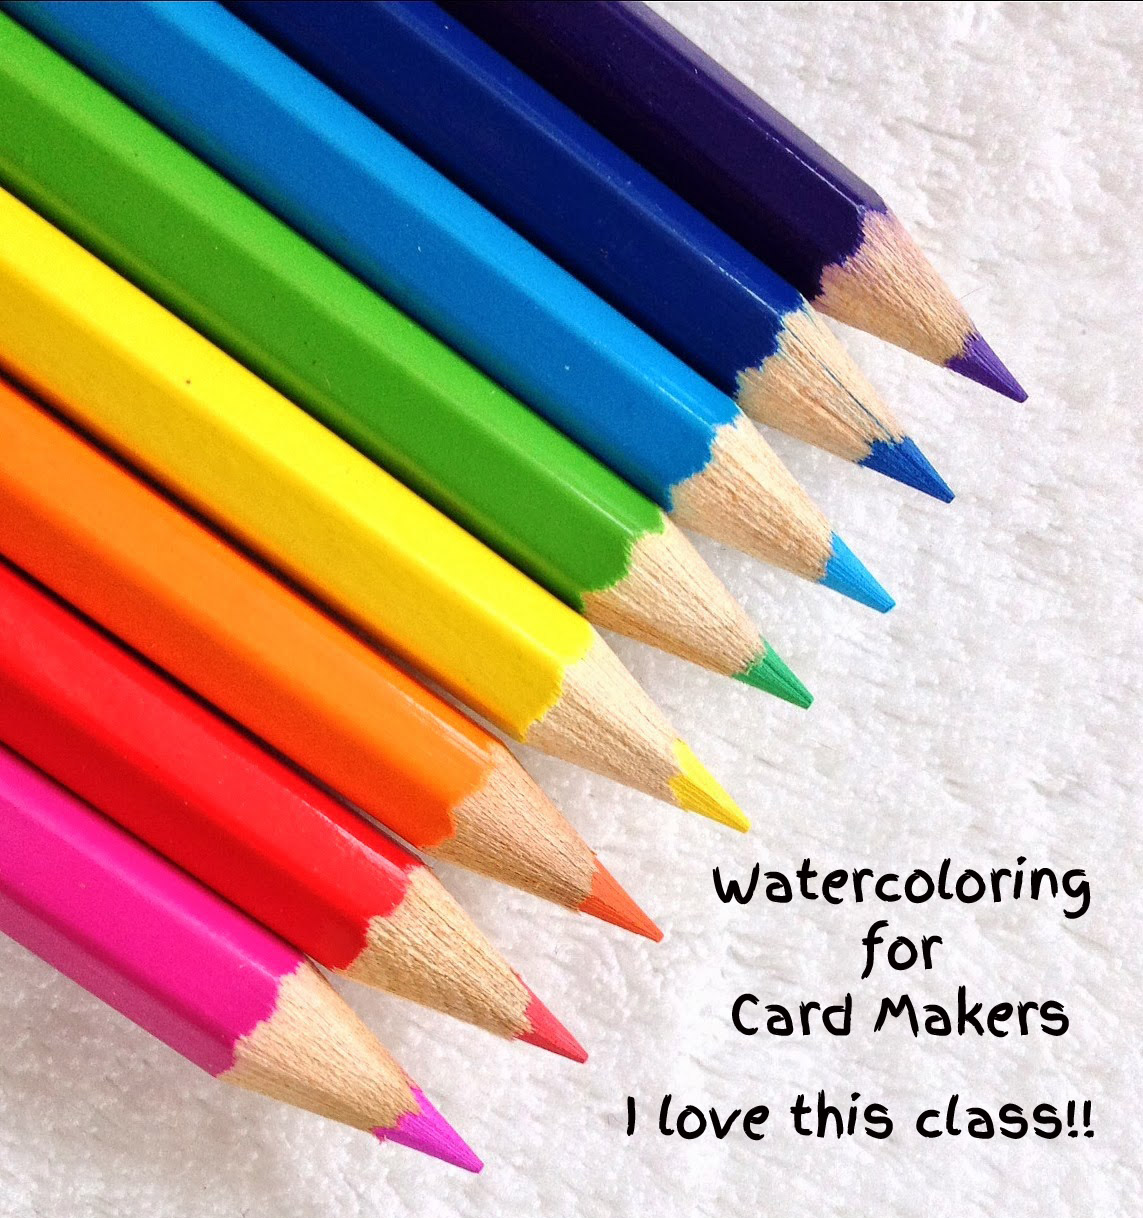
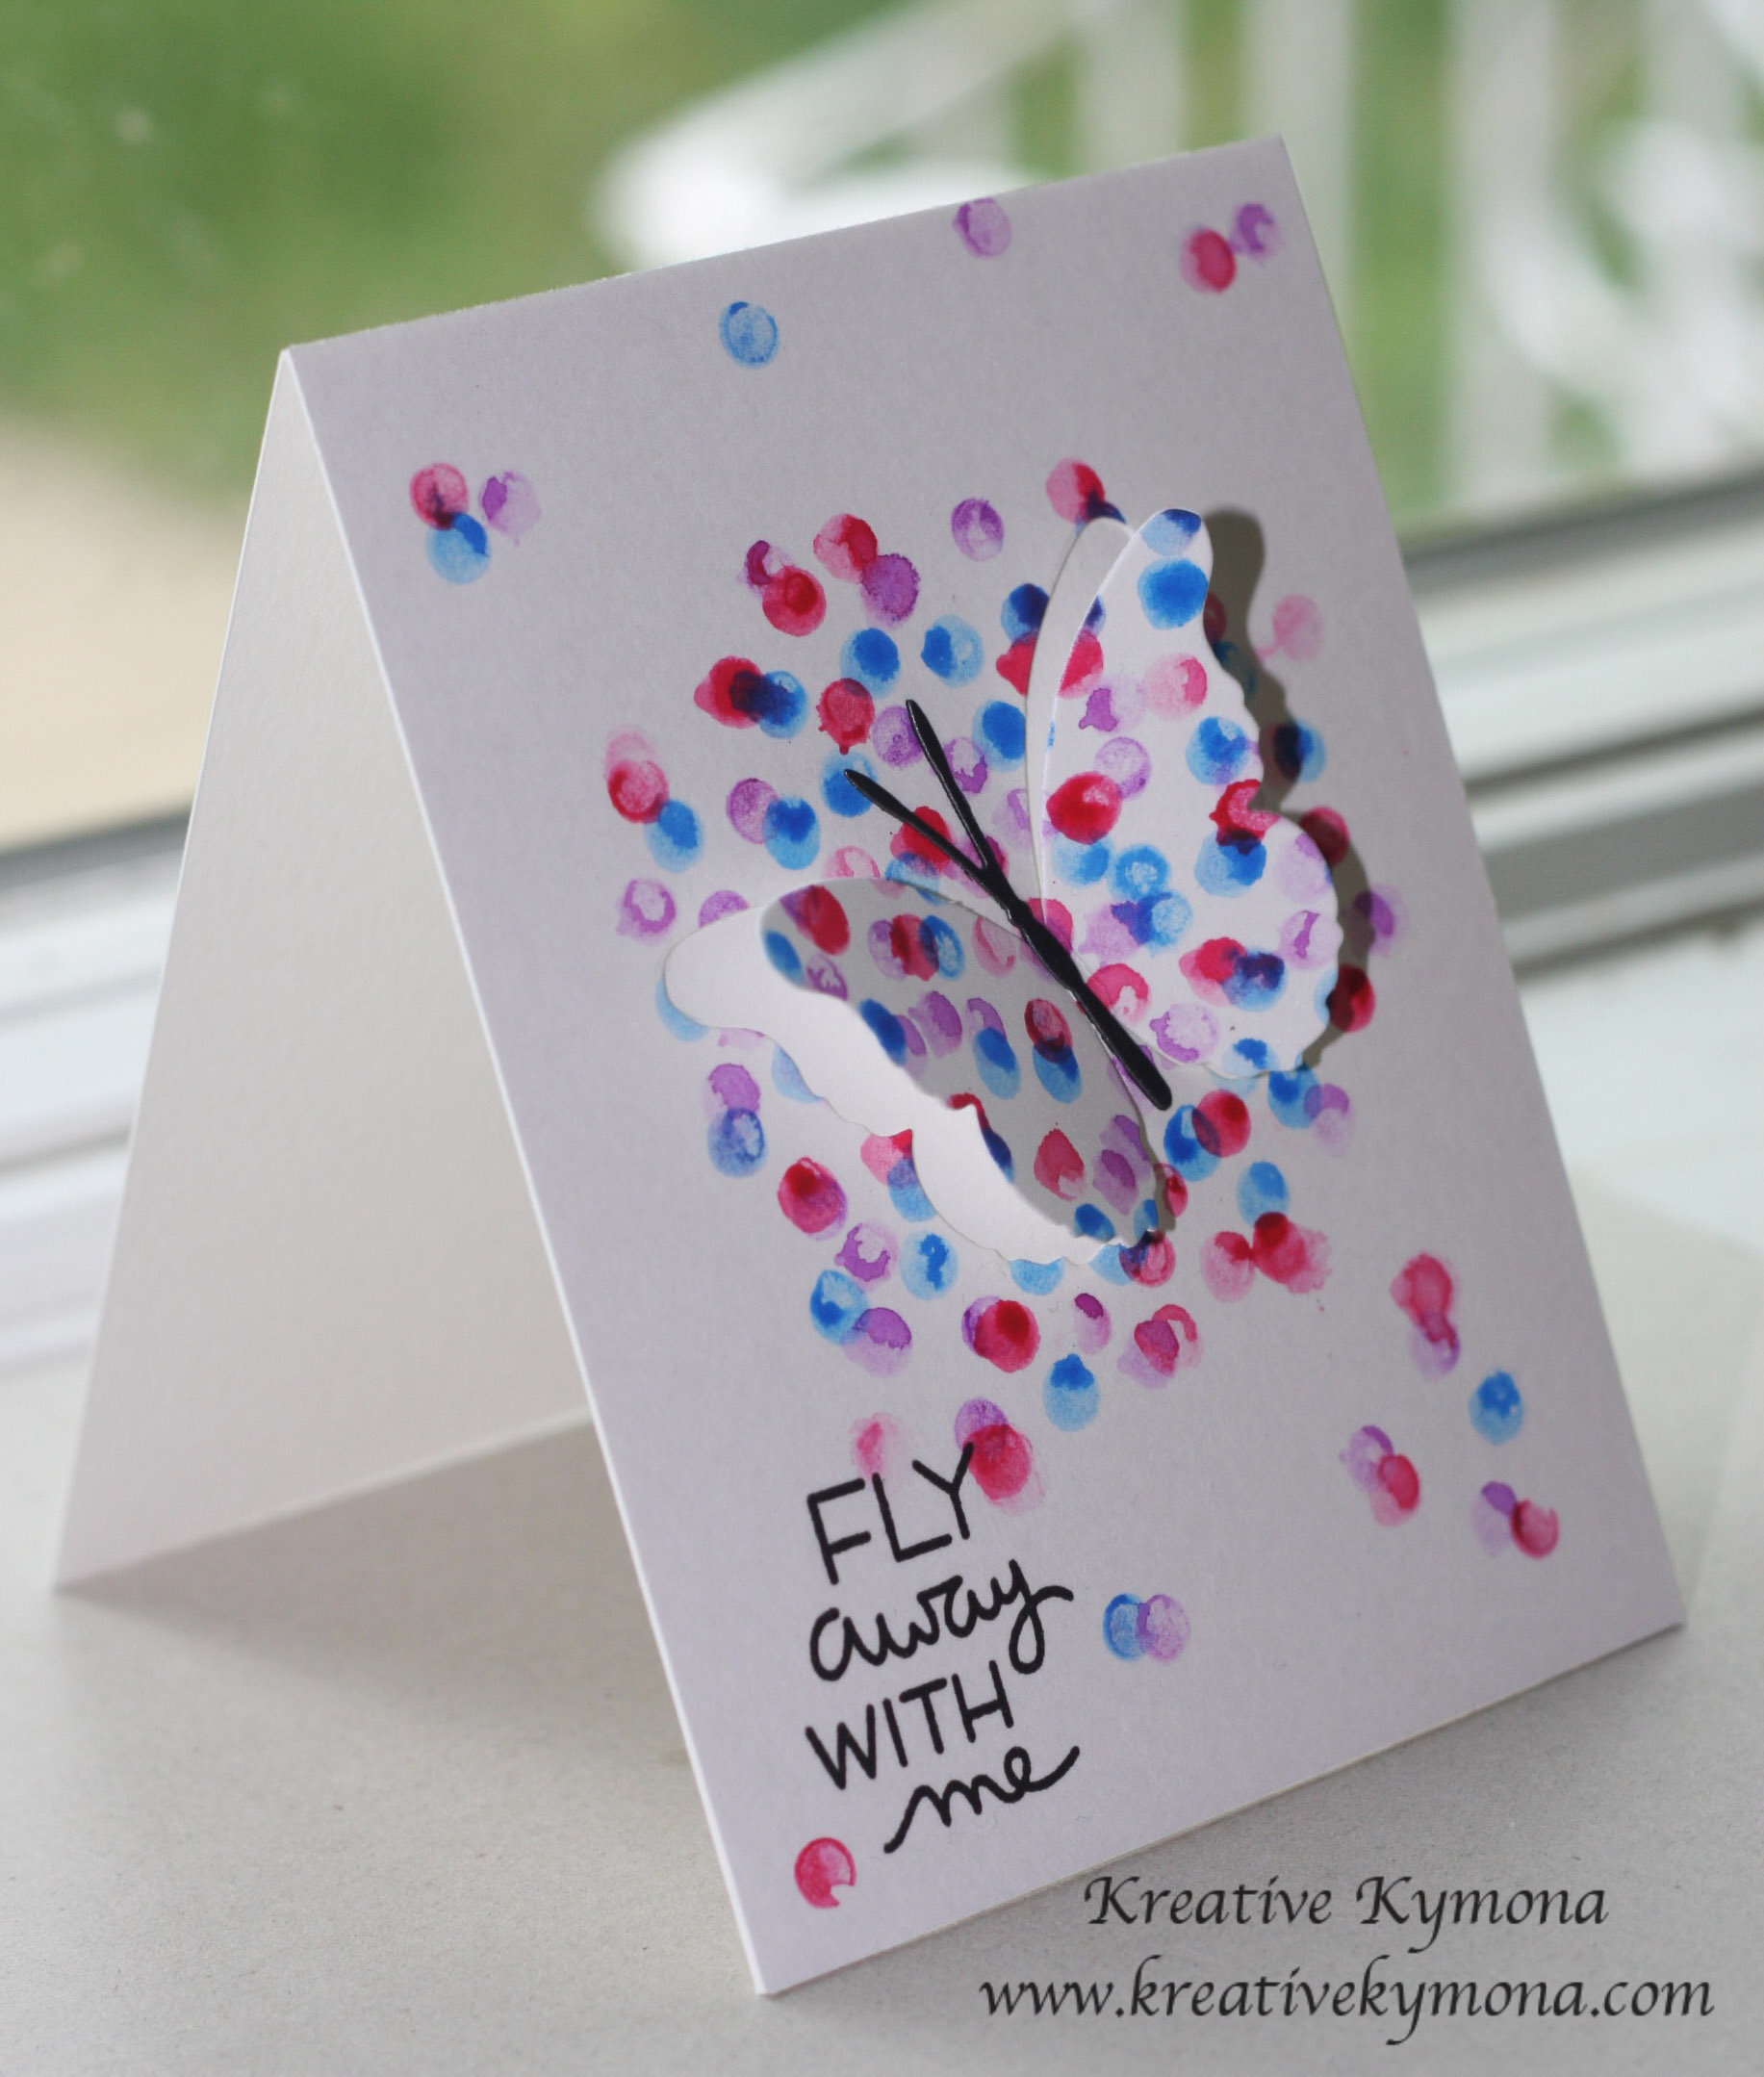
Today’s card is of beautiful butterflies that were created with water-coloring!!  Amazing, simply amazing I must say.  If you’ve been following me for the past 4 weeks, you know that water-coloring is my favorite and I vowed to create a card once a week.

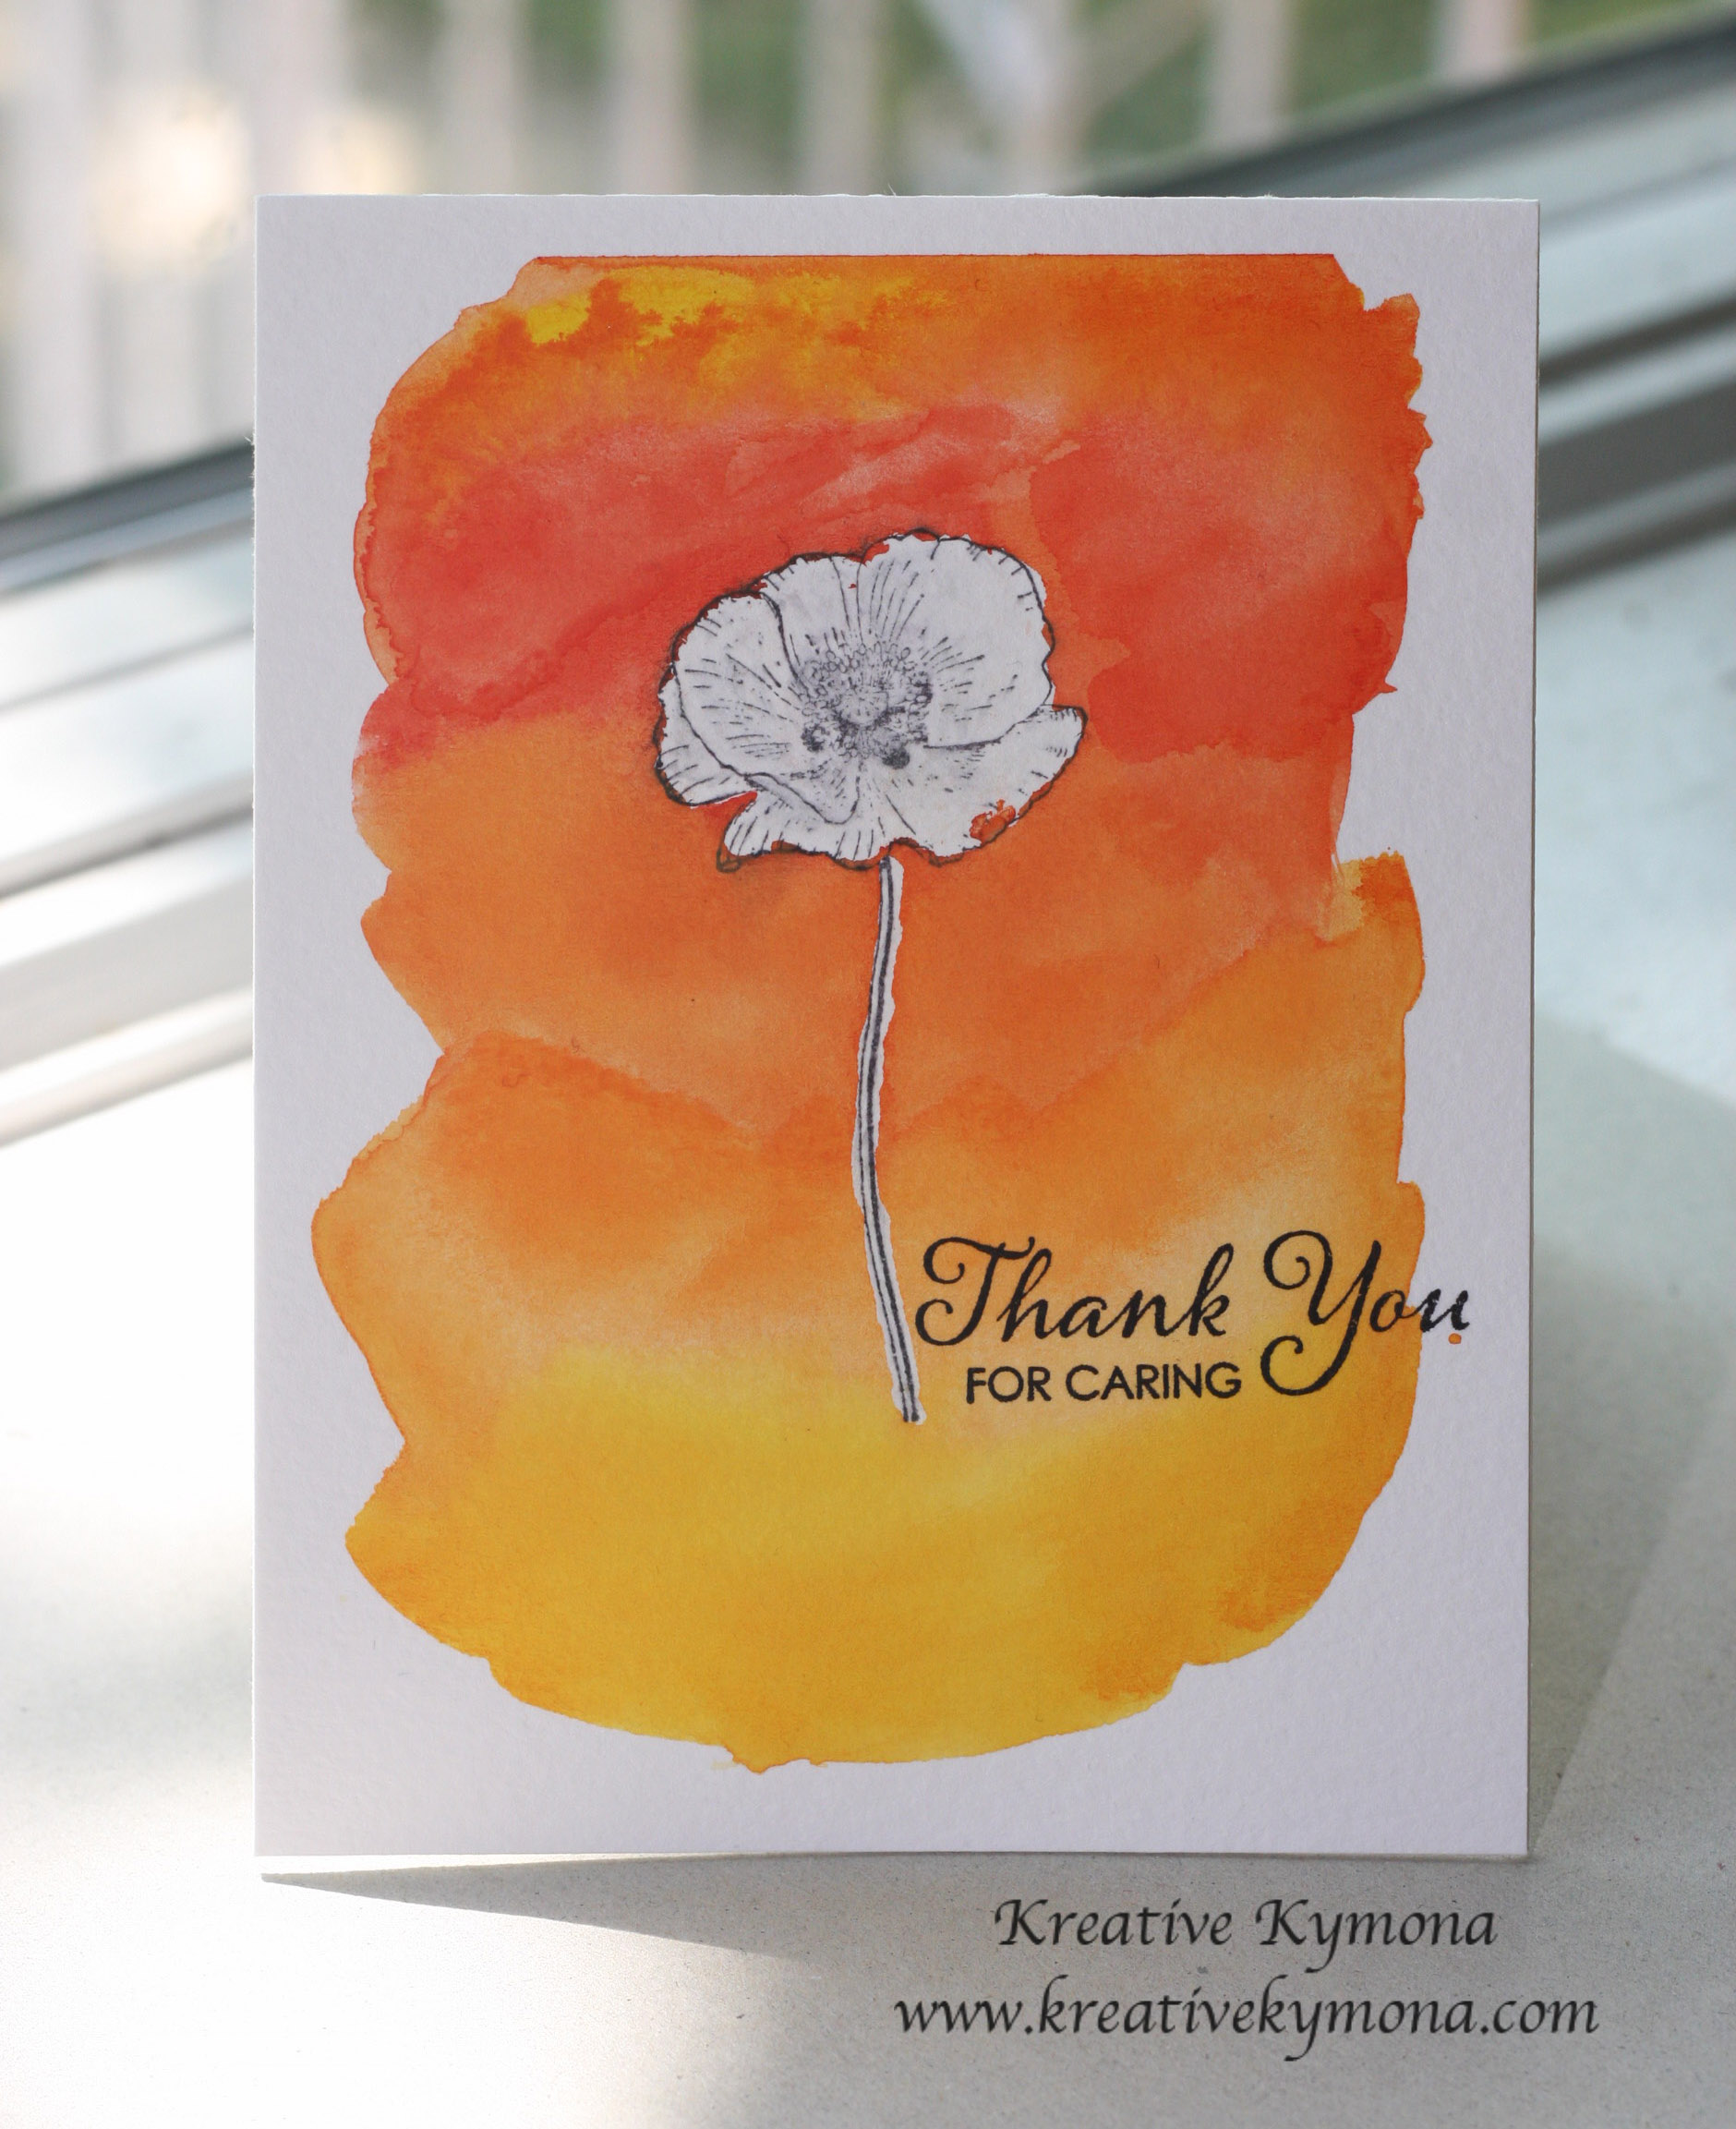
Well here it is.  My watercolor butterflies!! I made this card to play along with Papertrey Ink’s Make It Monday #166:Debossing Stamped Images.

Before I show you the card, I have to say this was the hardest card I’ve ever made.  The stamping was easy, it was the debossing that had me stuck for a while.  I just couldn’t do it like Dawn Movey showed us in her video.

She used her die to deboss instead of cutting the paper.  I kept cutting the paper instead of debossing.  So to fix my problem I turned the die upside down and debossed my butterflies like that.  I was able to create detail but not as much as Dawn did.  The inside of the wings didn’t deboss.  When I finally finish the card, I didn’t mind the look.  The watercolor really made the card for me.

What do you think?

Be Your Own Kind of Beautiful

I used my Koi Watercolors #2,12, and 20 for the beautiful colors on my card. I created a swatch that you can view here.

To accomplish that look I:

1. Added the three different colors to my clear block one color at a time, mixing the colors where they meet.

2. I misted the colors with water then pressed my stamp onto the block.

3. I stamped my cardstock 3 different times, picking up more ink after every stamp.

4.  After the watercolor dried, I stamped my sentiment in Versafine ink.

5.  I turned my butterfly die upside down and debossed 3 different times.

6. I added iridescent rhinestones.

The instructions are simple but I had the hardest time doing the debossing.  I tried to make this card 5 times before I came up with the card above.  The water-coloring was fun!

Supplies used:

Canson Watercolor PaperKio WaterColorsLife is Beautiful DieLife is Beautiful Stamp SetStampin' TrimmerSnail AdhesiveBig Shot Die-Cut MachineMagnetic PlatformDiamond GemsOnyx Versafine

Please let me know what you think.

~Kymona


Watercolor Background: How Playful!!

I can’t believe my Watercolor for Card Makers class is coming to an end.  This Friday is the last day to submit all of our homework.  I have so much left to do.

It was truly an amazing class!  I learned a lot about water-coloring.  I was granted the opportunity to try different types of watercolors mediums (watercolor pencils and crayons, transparent water colors, opaque watercolors, kids watercolor, shimmer watercolors).

I’m hoping to make at least one water-coloring card a week.  This will allow me to spend more time with my daughter who also loves water-coloring.

Today’s watercolor technique was taught by Tim Holtz himself.  Truly fun and amazing.  He taught us how to make amazing backgrounds using “watercolor stamping or monoprint” using a stencil.

I had so much fun creating my card, that I made two cards..  I’m also submitting this card into the Papertrey Ink’s Make it Monday #165: Artsy Watercolor Backgrounds Challenge.  Betsy showed us how to create watercolor backgrounds using our current stamps.  I’m excited!!

Happy Watercolor

So, what do you think of this card?  It looks so delicious to me.  The colors are so vibrant.  My flower was punched from a watercolor background that I created.  I thought that bought more balance to the card.

Hello Friend

For my second card, I wet the outer edge of the flower to create the watercolor effect surrendering each individual flower.  That gives each flower a beautiful soft and subtle effect.

I love how both of my cards turned out.  I am going to try to create a couple more cards with this fun effect!!

Please let me know what you think.

Supplies used:

Canson Watercolor PaperWet PaintOopsie Daisy DieOopsie Daisy Stamp SetHarlequin StencilDistress Inks Kit 1Hawaiian ShoresPTI Summer Sunrise InkTim Holtz Watercolor CardstockStampin' TrimmerSnail AdhesiveOnyx VersafineBig Shot Die-Cut MachineStampin' DimensionalsBasic Rhinestones Jewel AccentsLarge Rhinestone Basic JewelsDaffodil Delight CSBasic Black CSWe R Memory Keepers Corner Chomper


~Kymona

Are You A Watercolorists?

Watercolor painting is an art form that creates artistic representations, usually on watercolor paper, using pigments that are water-soluble.

OK, I love the wording “artistic representation” because I can’t draw for the life of me and I also have trouble actually painting objects much less making my sentiment look like I painted it.  I’m so glad that my cards are beautiful regardless if I can’t draw or paint.  Thank you “artistic representation”!!

With that said, I created two cards today for my online Watercolor for Card Makers Class Homework.  The assignment was to watercolor paint over a stamped image.  This was fun!  My daughter, niece and I sat down to create our cards.  It’s amazing how all of us came up with different versions of the same image.

I made two cards because I felt like my first flower was dulled out and wanted to see if I could use a different flower.  Also, my sentiment was giving me so trouble.  Here are my “artistic representation” of flowers in a vase!

Made with Love

On my first card, the blue water started to seep out of my jar on the side.  I went to close to the black line with my wet paint brush.  I over did it a little with the shadow at the bottom of the jar.  You have to learn from your mistakes.

Made with Love2

This second card, the water stayed in the jar and my shadow looks so much better.  The sentiment is where I think I over did it.  That’s the beauty of water-coloring.

So what do you think?  Did I do a good job at depicting a watercolor painting?  Would you call me a Watercolorists?

Well in my book, I’m the best Watercolorists on this side of the computer screen, lol!!!!

The real test is how do I compare to my daughter and niece!!  Below you will find the cards they painted.

Little Lady Sanaa Flower Little Lady Zoe Flower

My Daughter                                                       My Niece

What fun!!!

Well that’s it for today.  I hope you enjoyed our cards today and will not hesitate to try water-coloring and become a Watercolorists!!


Supplies used:

Canson Watercolor PaperKio WaterColorsLove JarMemento Tuxedo BlackStampin' TrimmerSnail Adhesive

~Kymona

The Art of Window Dressing

When was the last time you window shopped?  Isn’t it amazing how the items in the window really stand out!  You can’t help but to steer that much longer.  The outfit or the furniture that you see, draws you in for the buy!


Macy's Windowphoto credit

This display at Macy’s Broadway Store in NYC gives the feeling of power.  The women stand out from their background which screams, “You will see me amongst the cluster background.

Well today’s card should give you the same feeling!!  I’m participating in Papertrey Ink’s Make It Monday#164: Cluster Stamped Sentiment challenge.

Watercolor thanks

I used the “thanks” from Papertrey Ink’s Wet Paint stamp set.  I stamped it with Versamark ink and heat embossed it with clear embossing powder.

Watercolor is my new favorite medium so I created my clusters using distress inks, water and a sponge dauber.  It was cool.  This technique is called stamp emboss resist.  The ink will not attach itself to the embossed area.  I learned that in my Watercolor Card Makers online class that’s still going strong.

The more ink spots I added to the thank you area, the easier it was for the thank you to stand out from its background.  It reminds me of window dressing!  You will see me amongst the clustered background!!!

I am pleased with how my card came out.  I hope you like it too.

Supplies used:

Wet PaintDistress Ink Mustard SeedDistress Inks Picked RaspberryDistress Ink Peacock FeathersTim Holtz Ink PaletteTim Holtz Watercolor CardstockSponage DaubersclassiccrestsolarwhtieWe R Memory Keepers Corner ChomperMy Mind's Eye Enamel Dots

~Kymona

Creative Way To Have Fun With Watercolors


watercolor for card makers

OMG!!!  In my Watercolor for Card Makers class, Julie Ebersole, showed us how to do some creative watercolor stamping!!  I was blown away.  The card she made was so playful and nice.  I had to make my own version of the card.  She used some inks, watercolor paper, a beautiful butterfly wings die by Memory Box and a pencil eraser.  Yes, a pencil eraser, talk about non-tools in my tool box.

The only thing I didn’t have, was the butterfly wings die, so I ordered it and it arrive today.  I’m so lucky because that die is out of stock now.

When I saw the die on my desk, I knew I had to create this card today!

Fly away with me

Butterfly side

Aren’t you amazed!!! The butterfly wings just pop right off the paper.  It gives the card a 3 dimensional look.  It looks amazing.

Instead of using inks, I used my Koi watercolors to create my dots.  The dots were made with the pencil eraser.  I added the three colors to my color palette and then I dipped my pencil eraser into each of the three colors and applied it to my paper.  I made sure to place the dots in one area so that I can cut my butterfly wings for dimension.

Let me know what you think.


Congrats to Lizzie T she won the SSS Wrapped Mailing Label Die.  Lizzie T I will contact you so that I can send you the die.  Thanks for visiting my blog.


Supplies used:

Canson Watercolor PaperKio WaterColorsStampin' TrimmerSnail AdhesiveMemory Box Asti Butterfly WingsHelloSunshineTiconderoga pencilBig Shot Die-Cut MachineMagnectic PlatformOnyx Versafine Ink

You Can Never Have To Much Watercolor on Mother’s Day

photo credit

photo credit

Happy Mother’s Day to All of YOU Mothers!!!

I hope all of you are relaxing like myself.  Wait, I’m not relaxing.  I’m making breakfast and doing laundry! A Mother’s job is never done.

watercolor for card makers

What I want to do is play with my watercolors some more.  I have some time right now between the spin cycle to create a card for the Less is More: One Layer theme challenge this week.  Day 2 of my Watercolor for Card Markers Class, Jennifer McGuire, taught us how to use Liquid Frisket to mask of an area of the card so that the watercolor will not penetrate the image.

This technique is soooo cool!!!  I will create a PDF for this technique later and share it with all of you.

You use this cream color liquid and paint over the image you want to stay color-free.  Once it dries, you do your water-coloring without worrying about messing up the image.  You MUST let the watercolor dry before you can lift the liquid mask off of the paper.  I simple used my finger and rubbed the mask and WALA! Your image is embedded in your watercolor!

Here is my card!!  The colors are beautiful, perfect for a flower.

Thank you for caring

So you see on the bottom right side of the flower some of the color seeped onto my flower.  That is because I didn’t put any of the mask on that area.  I missed it, I guess.  I actually like it like that because water-coloring isn’t suppose to be perfect and this flower definitely isn’t perfect so it’s a perfect match!

This card can be given to any women in your life that isn’t your mother who really cared about you in one way or another!!  I have a couple of mothers in my life that I want to thank for steering me in the right direction.

I hope you like my new creation.  My younger brother told me today that my “cards are getting better and better”, thanks Garrett!

Let me know what you think.

Supplies used:

Liquid FrisketCanson Watercolor PaperPelikan WatercolorHappy Watercolorlots ThanksOnyx VersafineStamp-a-ma-jigStampin' TrimmerSnail Adhesive

Happy Easter…..

Today’s card was made for the Less is More Blog Challenge Week 169 Sketch.  I know, I know Easter was a couple of weeks ago but I didn’t get a chance to create a card for it so I took this opportunity to create one.

It is a very clean and simple card that I really love.  I used a couple of great products to pull of my CAS card.  Stampin’ Up! is retiring the Polka Dot Parade DSP  and the Large Rhinestone Basic Jewels.  That was a big shock to me because that paper is so popular.  It will go fast so if you want that paper and the rhinestone  just click here to purchase it.  I also used Papertrey Ink’s Button Stacks Die.  I love this die, the buttons are so cute.

Take a look:

Happy Easter

I used my circle dies to cut perfect circles and laid the DSP behind it.  I colored my bunny with my C3 Cool Grey Copic maker.

It’s funny because I wasn’t sure if I should color the bunny, so I asked my son because my daughter was sleeping, and he honestly gave me his opinion.  For those that know my son, he could care less what I do!!  So thanks E, for the help.

Soooo, what do you think?

Please leave me a comment letting me know what you think of my CAS card!

Supplies used:

Bitty Button Stacks DiePolka Dot ParadeLarge Rhinestone Basic JewelUltra Thick White CS 120Circle FramelitsMemento Tuxedo BlackStampin' TrimmerSnail AdhesiveCopic Markers

Watercolor Embossed Thank You

Second Post for the Day

I’m back again today with a card that I made with my new Koi Watercolors.  In my last post, I introduced that set of watercolors and the colors that I used to create this card.

I stamped the “Thank You” with VersaMark and embossed it with clear embossing powder.  By doing that, I created a watercolor resistant area.  Which means the watercolor will roll off the embossed area.  It is so cool to see.  It took me awhile to create this effect but I finally got it.

Take a look:

Thank You Watercolor

I just love it.  I love how the thank you has small splotches of watercolor on it.  I could have wiped the color off the sentiment but I really loved how it looks.  I used the colors that I said I loved in my last post. Numbers 15, 19, and 23. They combine so pretty.

I decided that I wanted to add a border around the card mask before adhering it to the card base.  I used Papertrey Ink’s Stitching Lines Die.  I love them.  The die made it easier to add dimension to my card.

Please let me know what you think? I would love to hear from you.

Supplies used:

Stitching Lines DieAnother Thank You Photopolyer Stamp SetclassiccrestsolarwhtieKio WaterColors

-Kymona

Watercolor Splats

Did I tell you that I’m soooo excited about Water-coloring!!!  Well, just in case you missed it, I’m soooo excited about Water-coloring!!!!!

My water-coloring class starts next week and I can’t wait.  So in the meantime, I’m practicing using my watercolors.  I’m also waiting from my order to come in with some different types of watercolors for this class.  What class you ask, its my Online Card Class called Watercolor for card makers.  I want to learn everything there is to know about how to use water-coloring on my cards.  I also want my 7-year-old daughter to learn all about water-coloring as well. She’s taking the class with me, lol.

Today’s card is for Papertrey Ink’s Make it Monday #161: Watercolor Splats challenge.  What a great way to practice water-coloring!!! I Love It.

So, watercolor splats are a fun twist that lets you use droplets of water to do all of the work for you.  I used Papertrey dye ink’s to pull of this effect.  My order of ink’s came in today which was perfect for this card.  The colors are amazing and they do dry fast.

Take a look:

You are My...Watercolor Splats

To create these watercolor splats, I used my sponge daubers to apply the ink to my paper.  I love the textured look the sponge daubers created on my paper.

After applying each color of ink, I used my Artist’s Loft #4 paint brush soaked with water and touched my paper with the tip of the brush.  I didn’t press hard at all.

Once the water landed on the paper, the ink started to move all by itself.  To create bigger circles, I just added more water to the center of the circle.  It was fun to watch.

I can’t wait for my 8 year daughter to create her card with these splats.  She is going to be amazed.  I’ll post her card when she is done.

Supplies used:

classiccrestsolarwhtiePTI Summer Sunrise InkPTI Berry Sorbet InkPTI Tropical Teal Sponage DaubersPTI Phrase Play #1 DiePTI Phrase Play #1 Mini Stamp SetWe R Memory Keepers Corner ChomperStamp Runner Dot Adhesive

Please leave a comment below, letting me know what you think!!  I would love to hear from you.

-Kymona