Are You One Of A Kind?

Hello everyone!  I’m back again today with another Papertrey Ink Make It Monday #168: Baby Wipe Stamping!!  I’m so excited about this Make It Monday.  Ashley taught us how to use baby wipes to do our multicolor stamping.  I had a blast with this technique today.

Take a look:

baby wipes and reinkers

First I added Stampin’ Up!’s new in colors to my baby wipe.  I randomly added the ink to the baby wipe.

teast sheet

I wanted to make sure my card looked a little different then Ashley’s, so I stamped my sentiment using the same baby wipe.  I used this piece of card stock as my scrap to make sure my stamps were inking up properly.  I love the colors on this butterfly and the sentiment.  Can you see how each stamp has different colors.  No two stamps are the same.

butterfly closeup

Closer look at my butterfly.  The colors are awesome!

sentiment closeup

Closer look at my sentiment. These colors are delicious.

Smile somone loves you

I absolutely love how my card turned out. This was such a great technique to try.  The look reminds me of water-coloring, which everyone who knows me, knows I LOVE water-coloring.

Supplies used:

Tangelo Twist ReinkerHello Honey ReinkerBlackberry Bliss ReinkerLost LagoonWet Paint 3Life is Beautiful Stamp SetLife is Beautiful DieUltra Thick White CS 120Big Shot Die-Cut MachineMagnetic PlatformStampin' TrimmerStampin' DimensionalsMME Enamel Dots

So tell me what you think.  I would love to hear from you.

~Kymona

What’s Popping, “YOU” Are!!!

Hello everyone!!  It’s a new week, which means new Muse Challenge.  I’m excited again because I was given honorable mention from the ladies over at the Muse Challenge for last weeks card!!  I get all giggly when I see my name and card showcased.   The winners and the other honorable mentions are talented women and I’m so happy for all of them.

So this week I’m back again with another card for this week Muse Challenge #71.  Our Muse for this week is Therese Calvird.  Stacking die cuts are what we are challenged to do.

Take a look at Therese’s card:

Hello

I love how she was able to match the lines in her background with the lines on her hello’s.  Everything follows so nicely and it looks so pretty.  I tried this same technique with my card.

Take a look at my card:

You are a true friend

I created this card using all of the Stampin’ Up! in colors.  I used Simon Says Stamps wide stripes stamp to created the background.  I die cut 5 of the you’s and stacked them with a stamp you.  I added the “you” to the background and aligned the colors on the you with the background for a seamless finished.

You are a true friend closeup

Here is a close up of the stacked” you”.  I stamped the sentiment right under the you so that it looks natural.  This technique was fun to do so I might try it again on another card.

Let me know what you think of my card.

Supplies used:

Tangelo Twist InkMossy Meadow InkLost Lagoon InkHello Honey InkBlackberry Bliss InkSSS Big You DieSSS HelloYouOnyx Versafine InkWide Stripe Background StampBasic Rhinestones Jewel Accents

Please leave a comment below letting me know what you think!

~Kymona


Creative Friends Blog Tour

Hello everyone! I’m here today to with a friend of mines from around the world.  As all of you know, my post showcase some of my creative work.  Today, I was invited to participate in a Creative Friends Blog Tour.  My fabulous friend Connie Hanks from ClickyChickCreates invited me to participate on this tour.  I am so grateful for this opportunity to share what I love and great friends who I’ve met along the way.

The idea of the tour is to answer four questions, then introduce three fellow creative bloggers who will continue the tour the following week.

I have to apologies, I was supposed to showcase 3 of my friends on this tour but 2 of my friends canceled at the last-minute.  Life, can really change our plans.  In any case, you will get to met someone who I think is awesome.  In the short time, that I’ve known her she has taught me a lot.  She may not know that, I guess she will now! LOL!

So lets dive right in!!


1. What am I working on?

Many of you know me for making cards and craft projects, but there is so much more to me then that.  At work, I run a reading group with some of my coworkers.  It’s like a book club but not so formal.  Here is how it works:

1. Everyone who participates let me know how many books they want to read for the year (January – December).  That is their goal.

2. After they complete a book, they let me know and I update the spreadsheet that is shared with everyone in the group. We work on an honesty system all done via email.

3. So currently we have 20 people in the group and everyone has different goals.  Everyone is in charge of reaching their goals.  No pressure, just accountability on my part as the facilitator.

4. At the end of the year, I give everyone who participated, a certificate.  Those that have completed their goals, will get additional prizes.

Throughout the year, I have contest and giveaways, this keeps everyone motivated.  So currently I am working on a giveaway for a couple of my coworkers who answered a question correctly.

Happy Birthday box

They are always looking for gifts for birthdays, so they can fill this box with anything.  I gave them candy in it.  Besides this, I’m working on cards for different blog challenges.

2. How does my work differ from others of its genre?

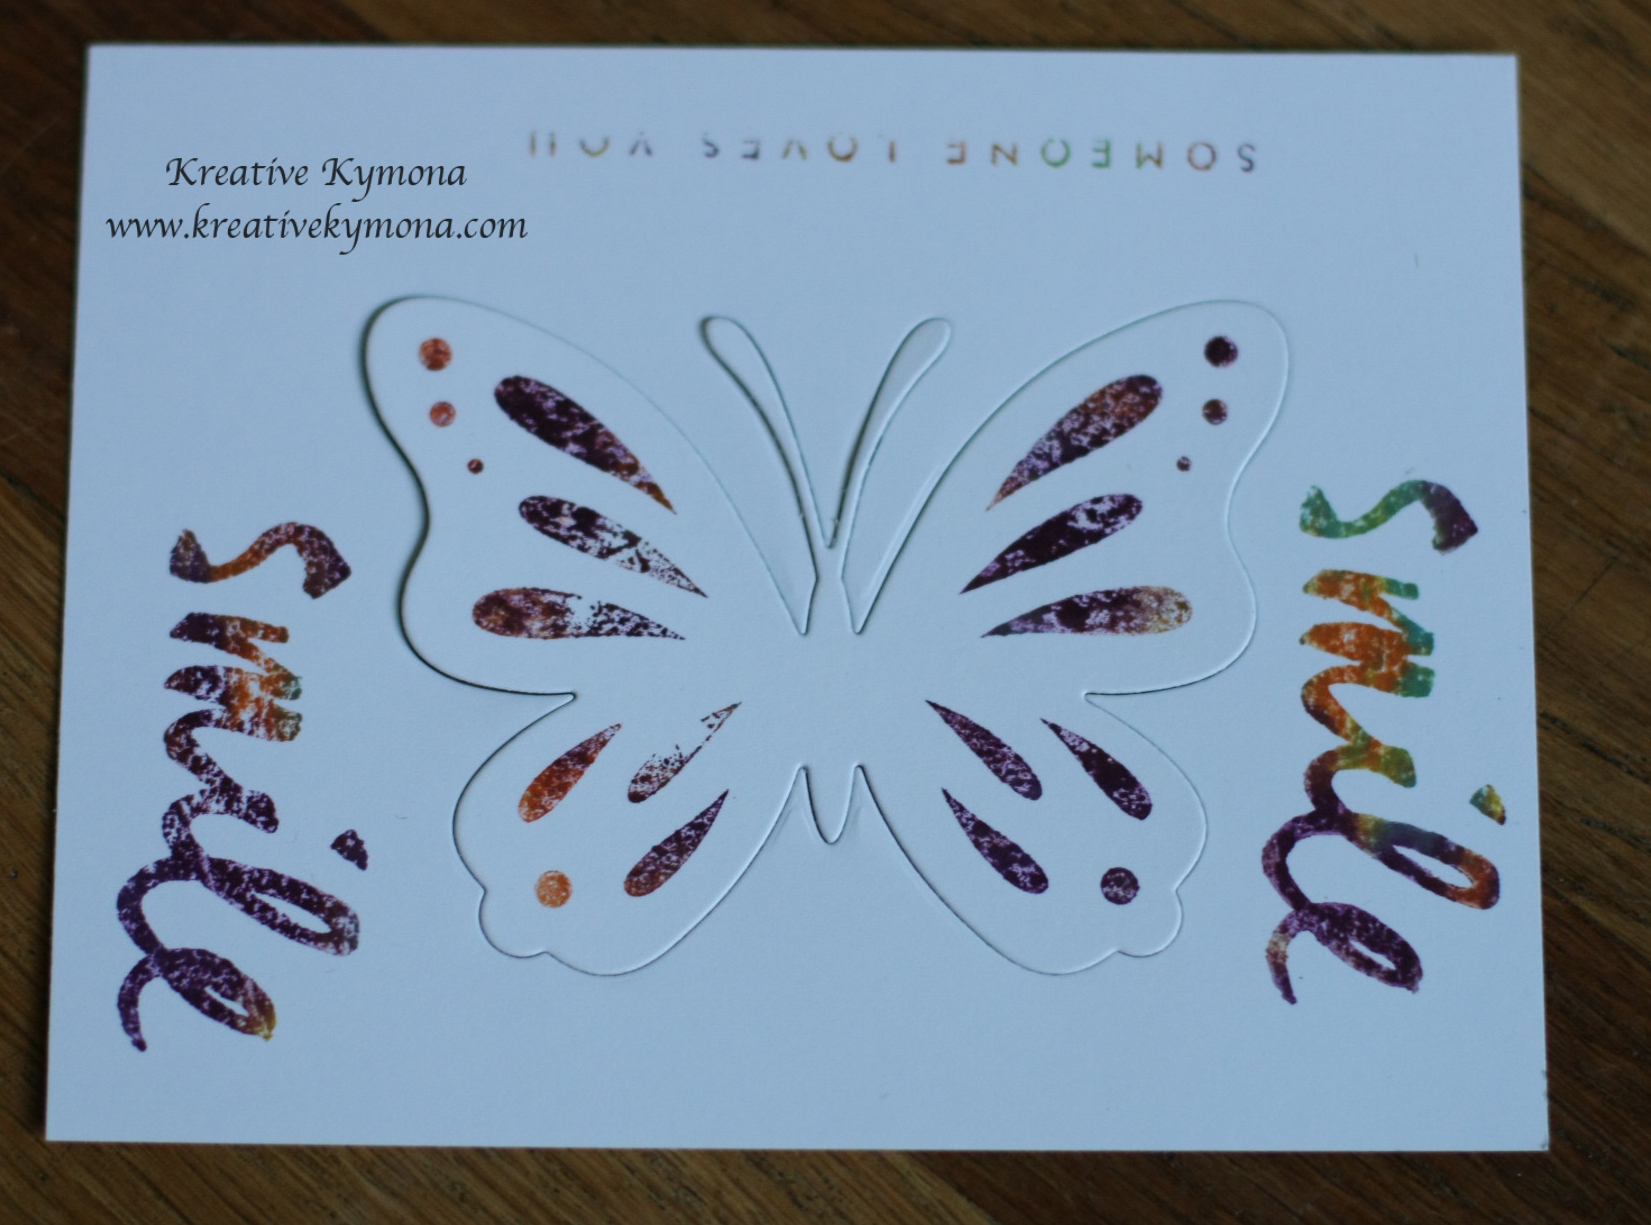
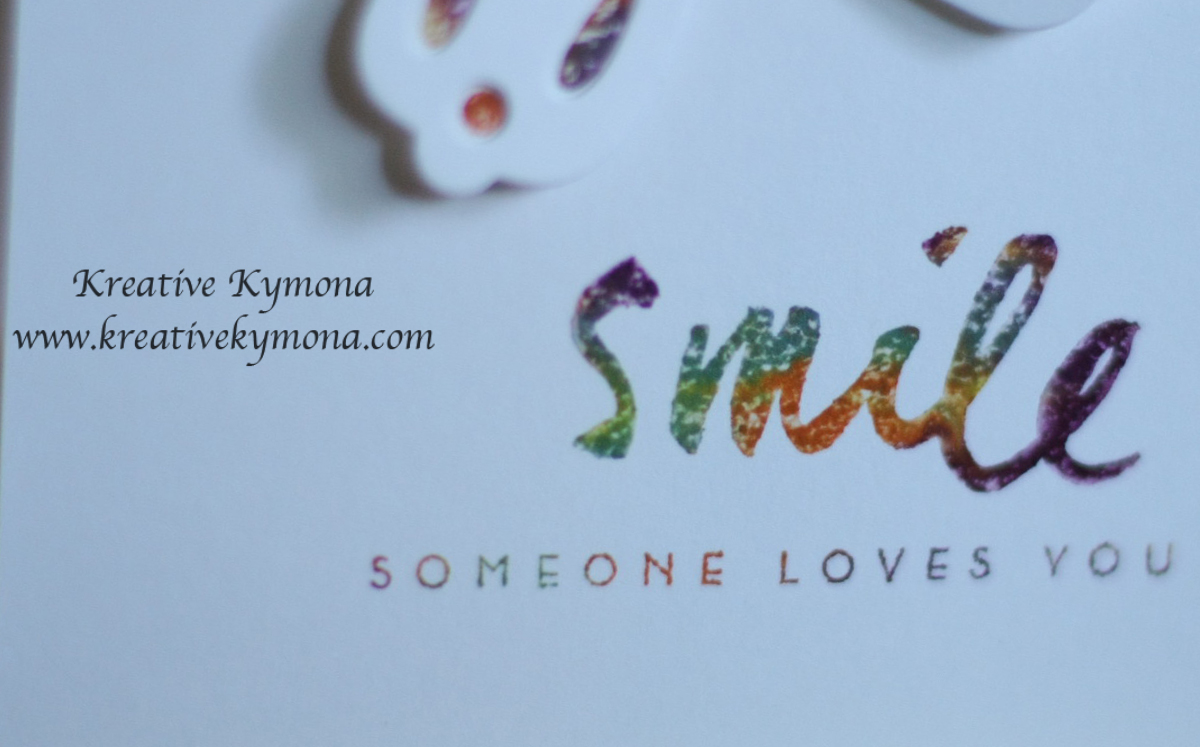
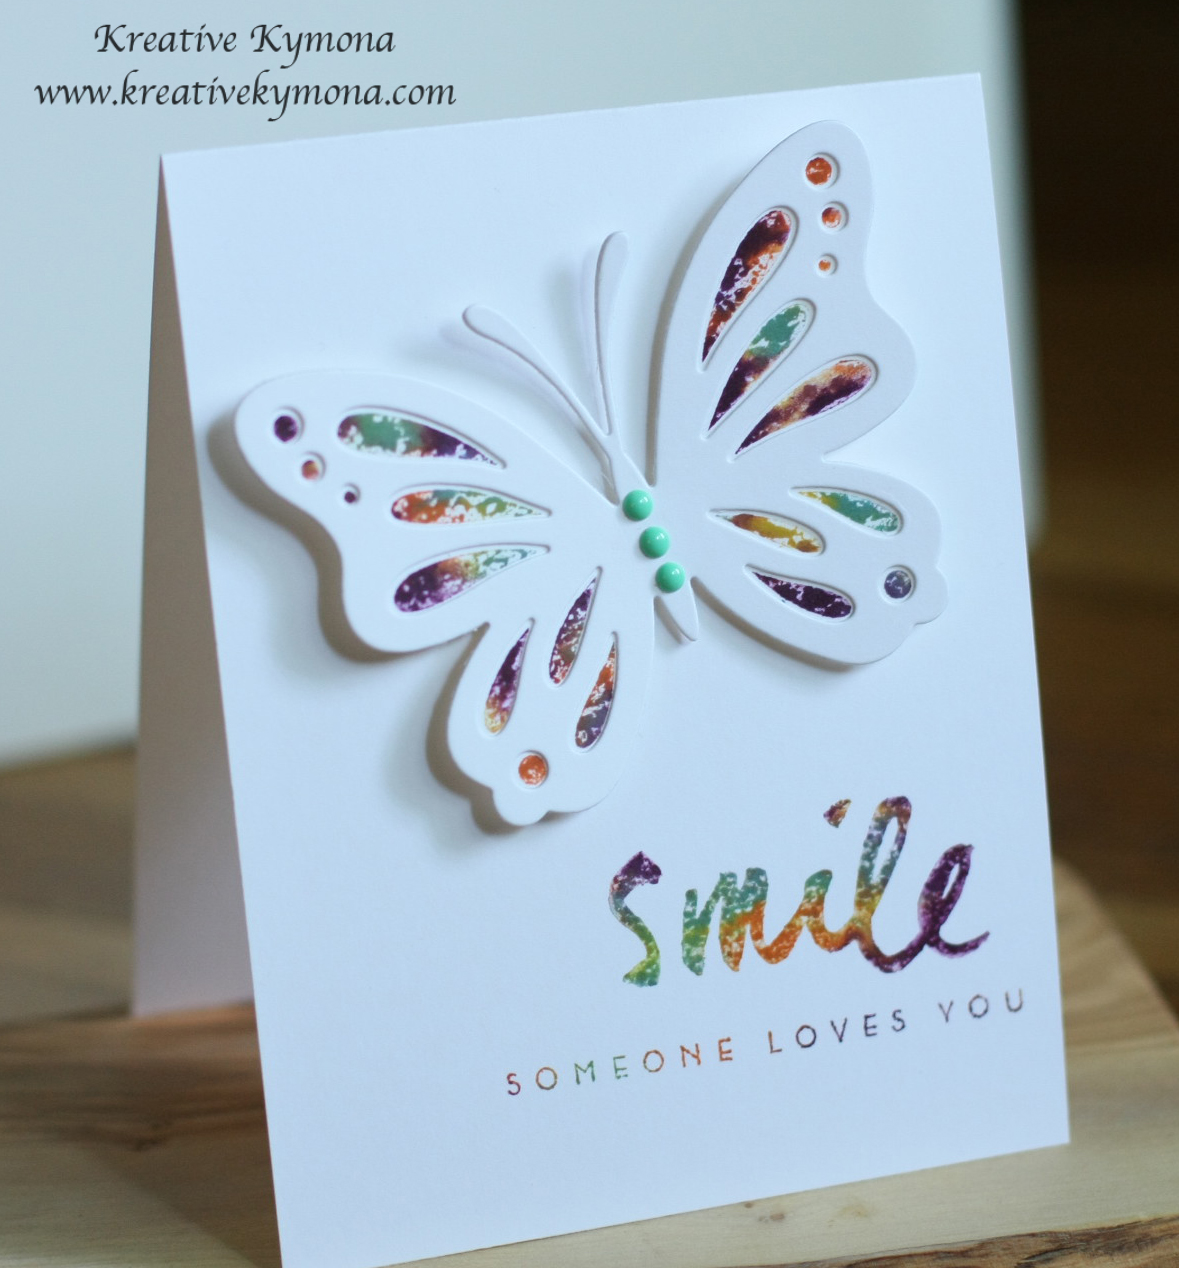
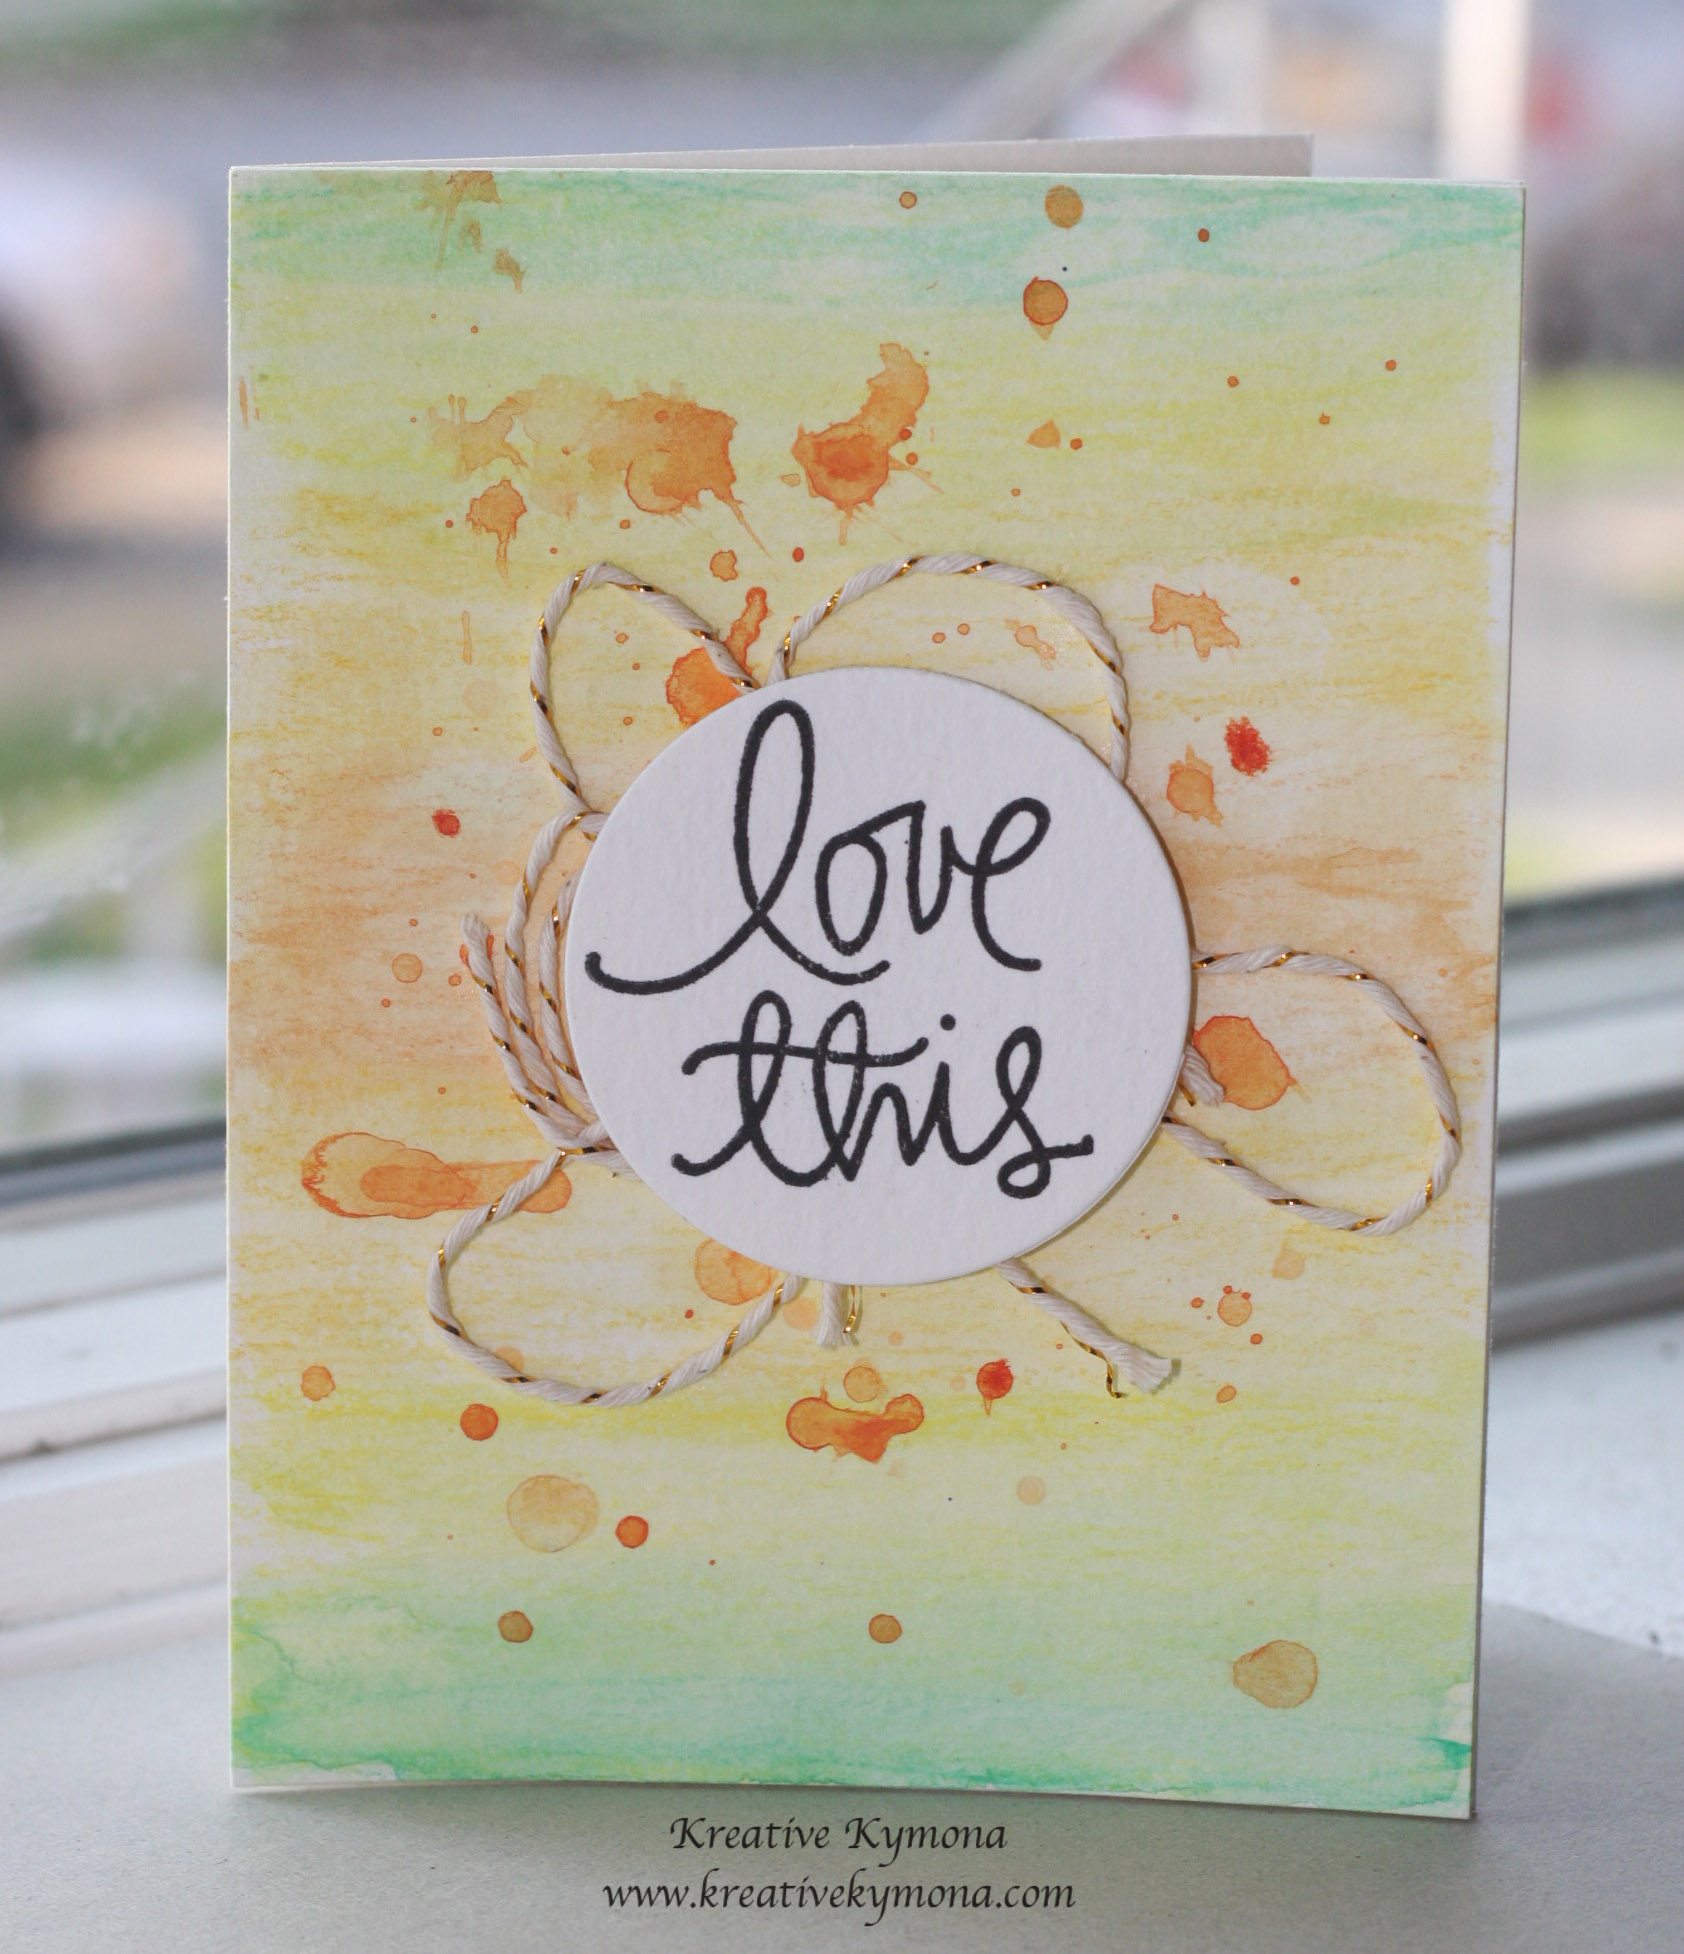
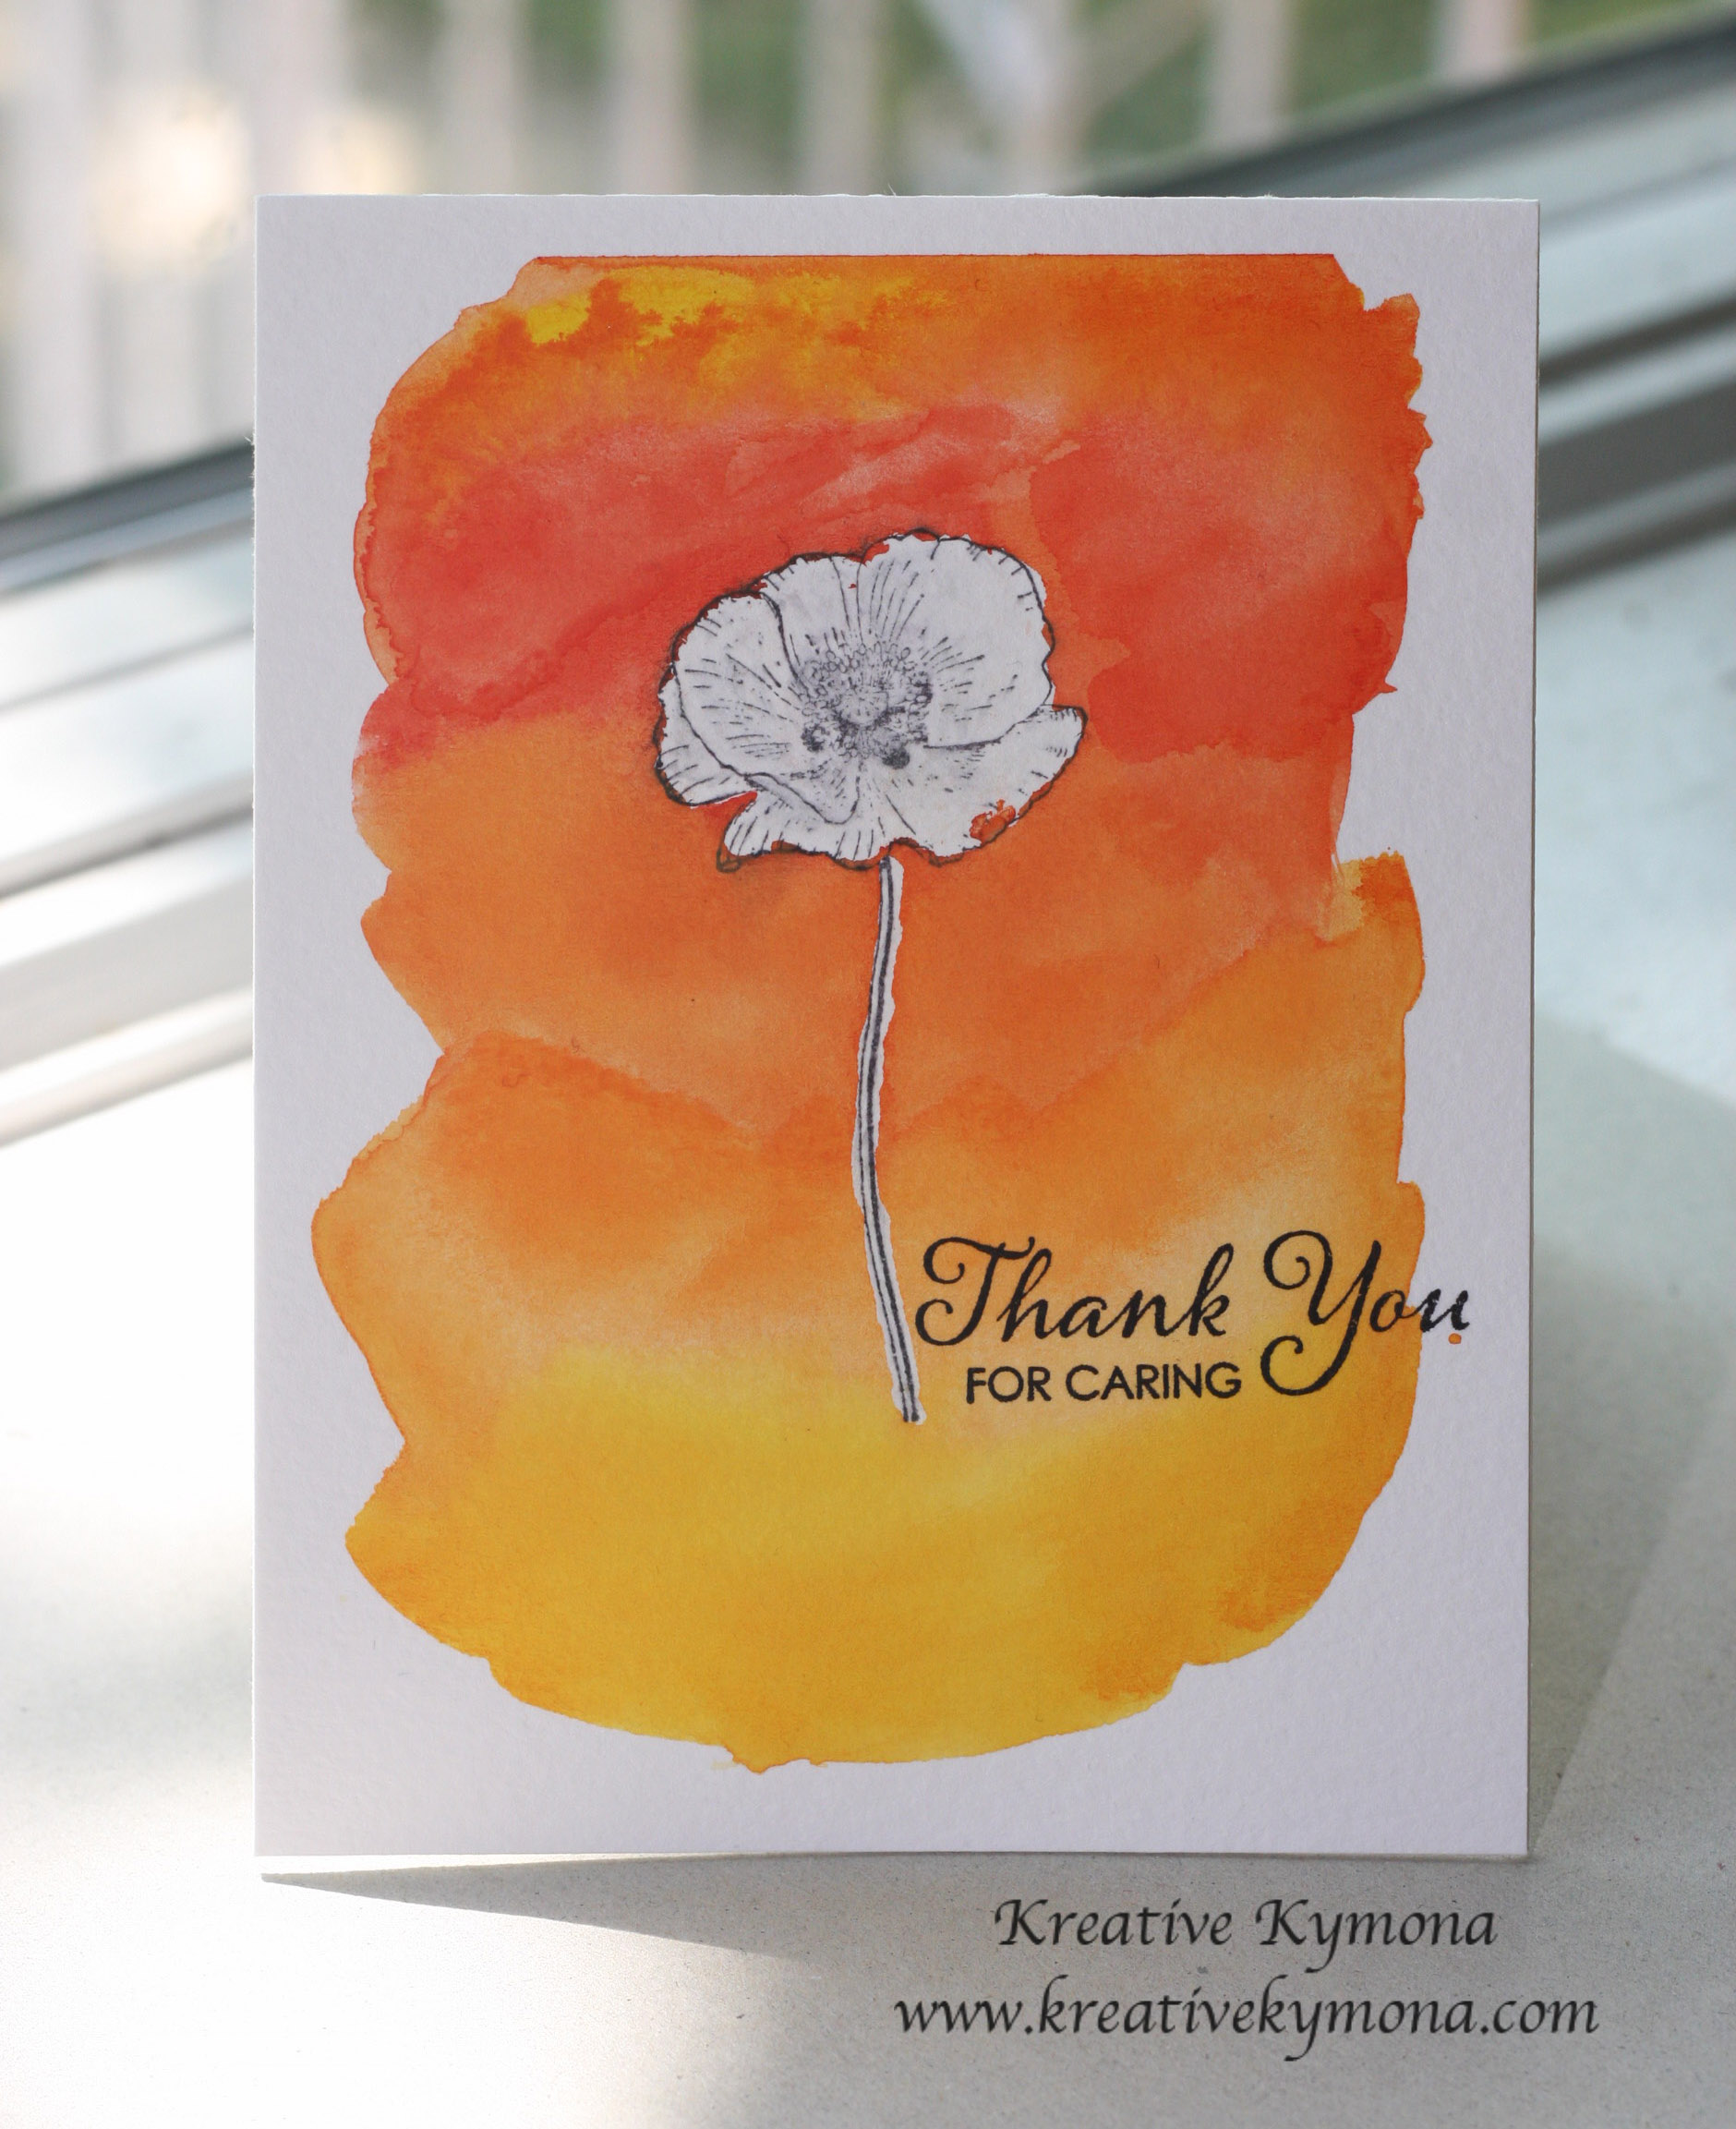
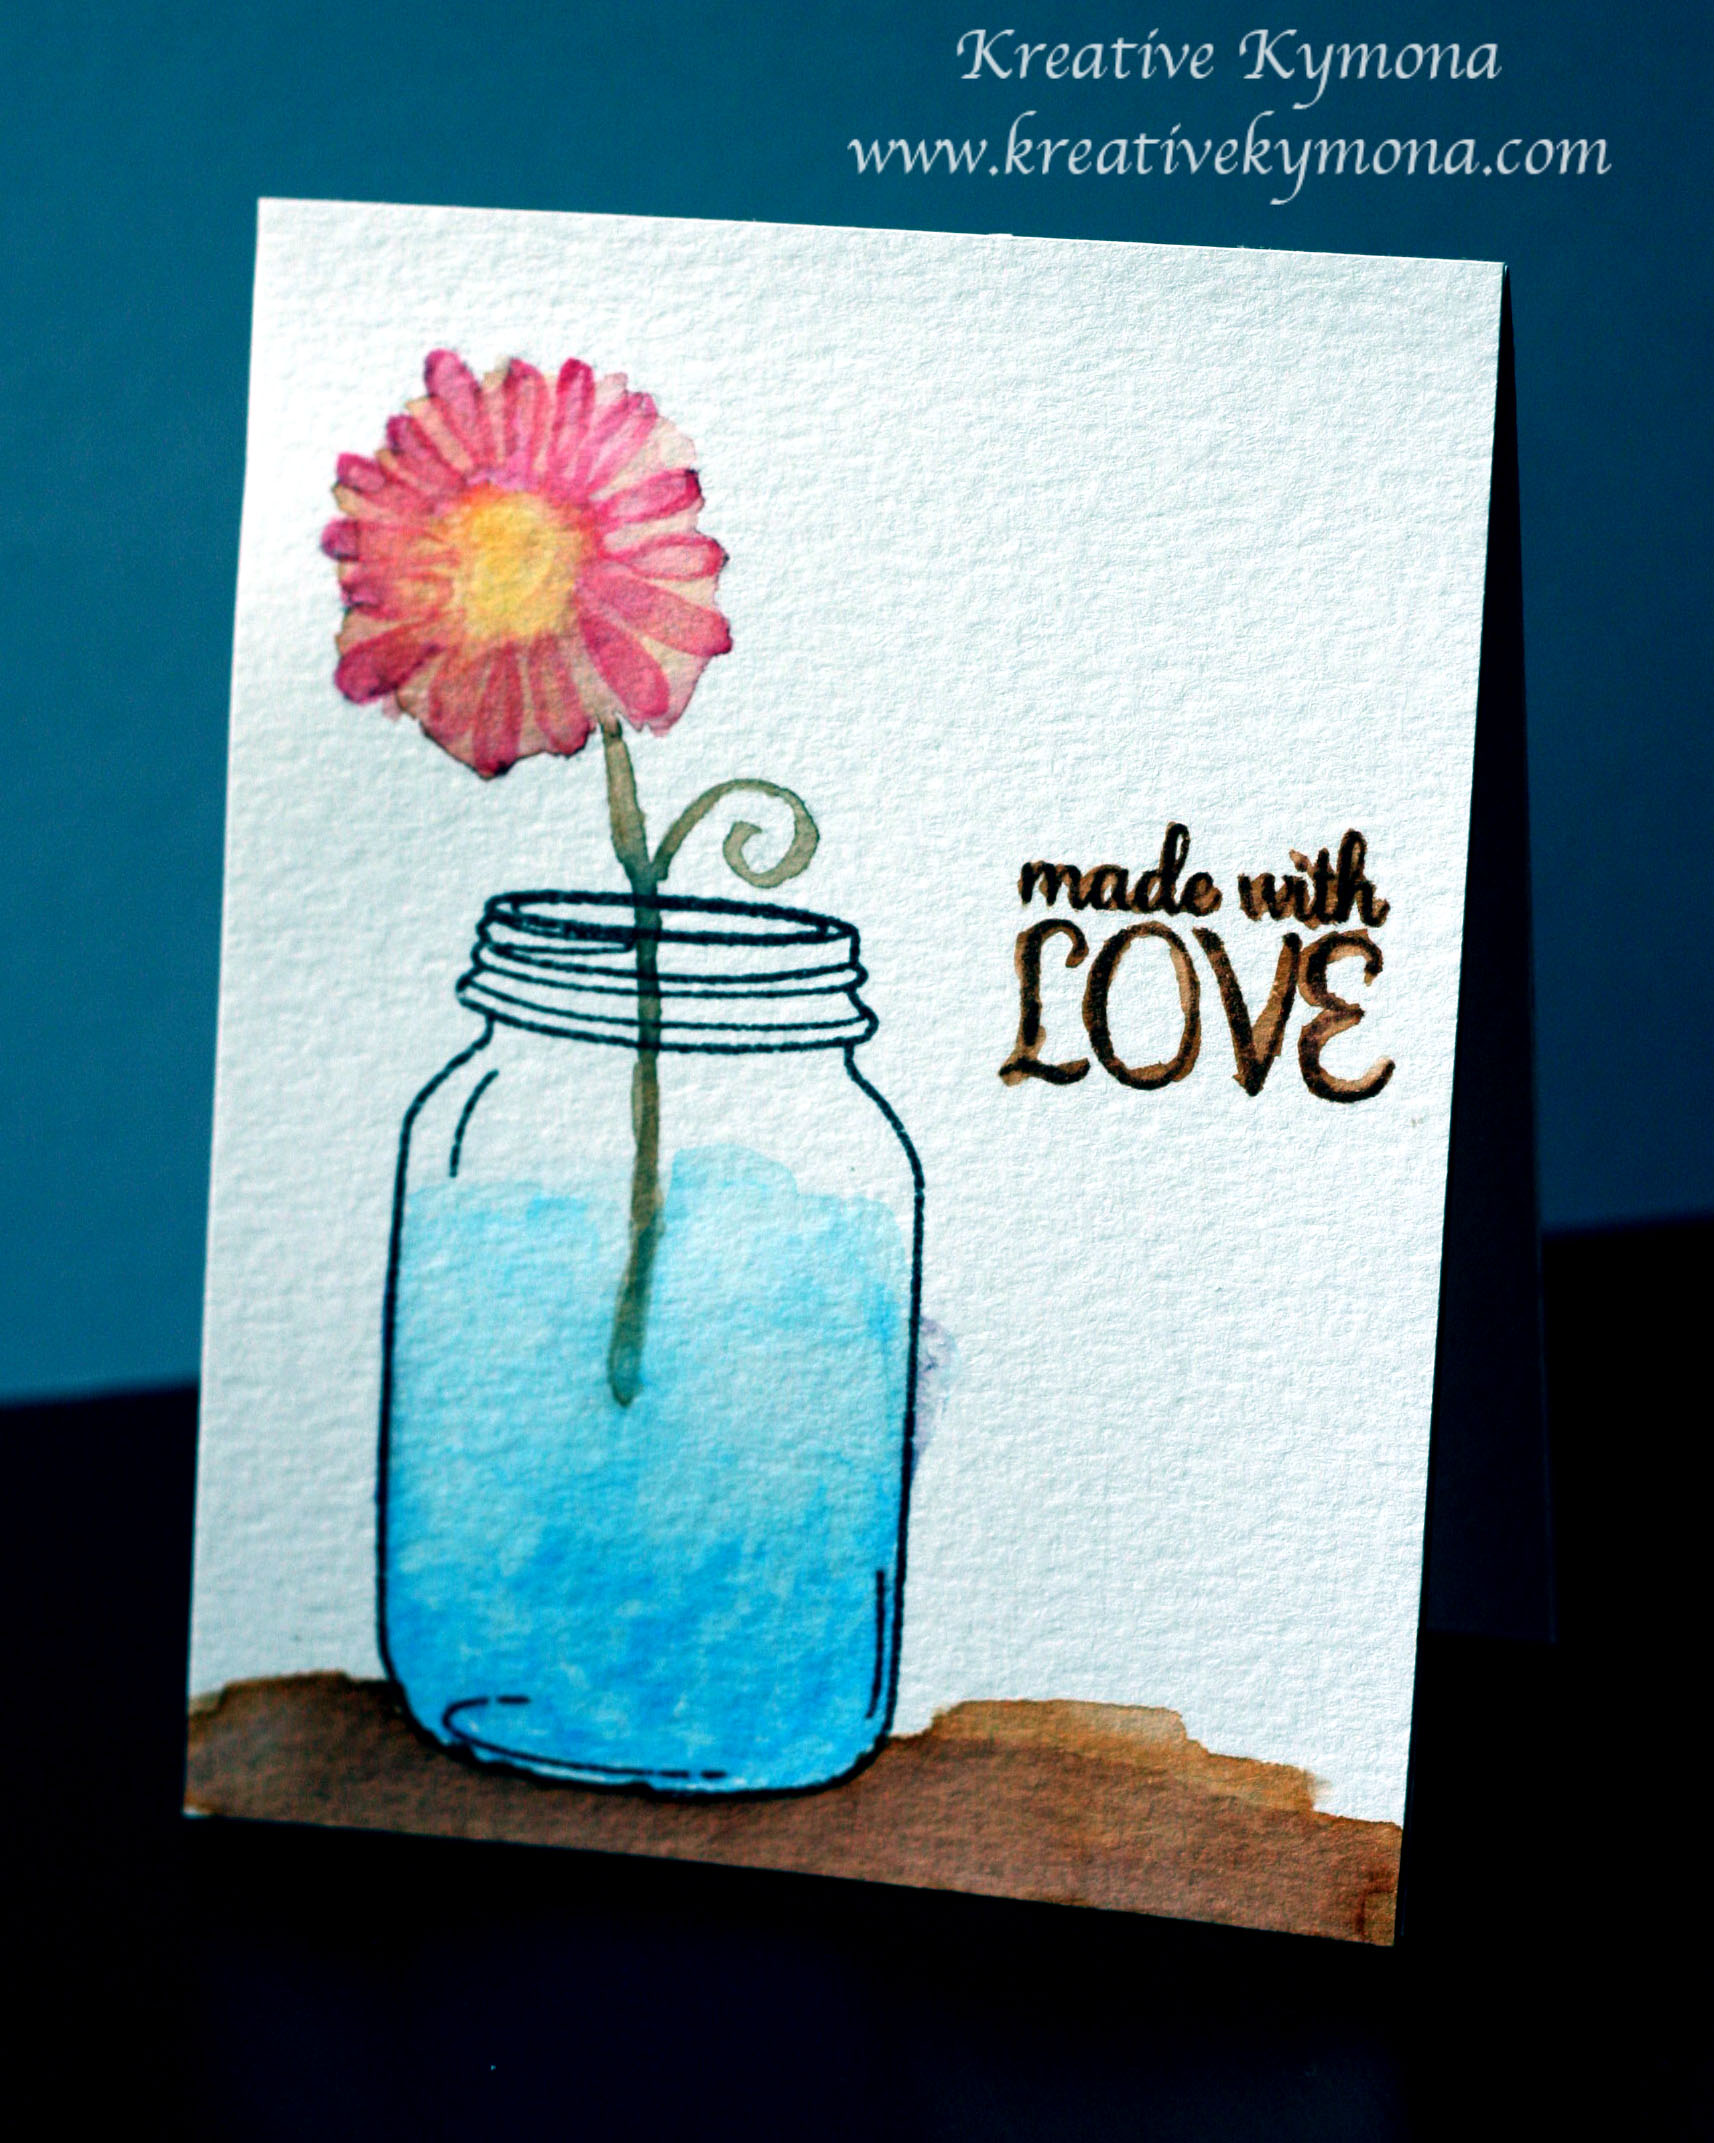
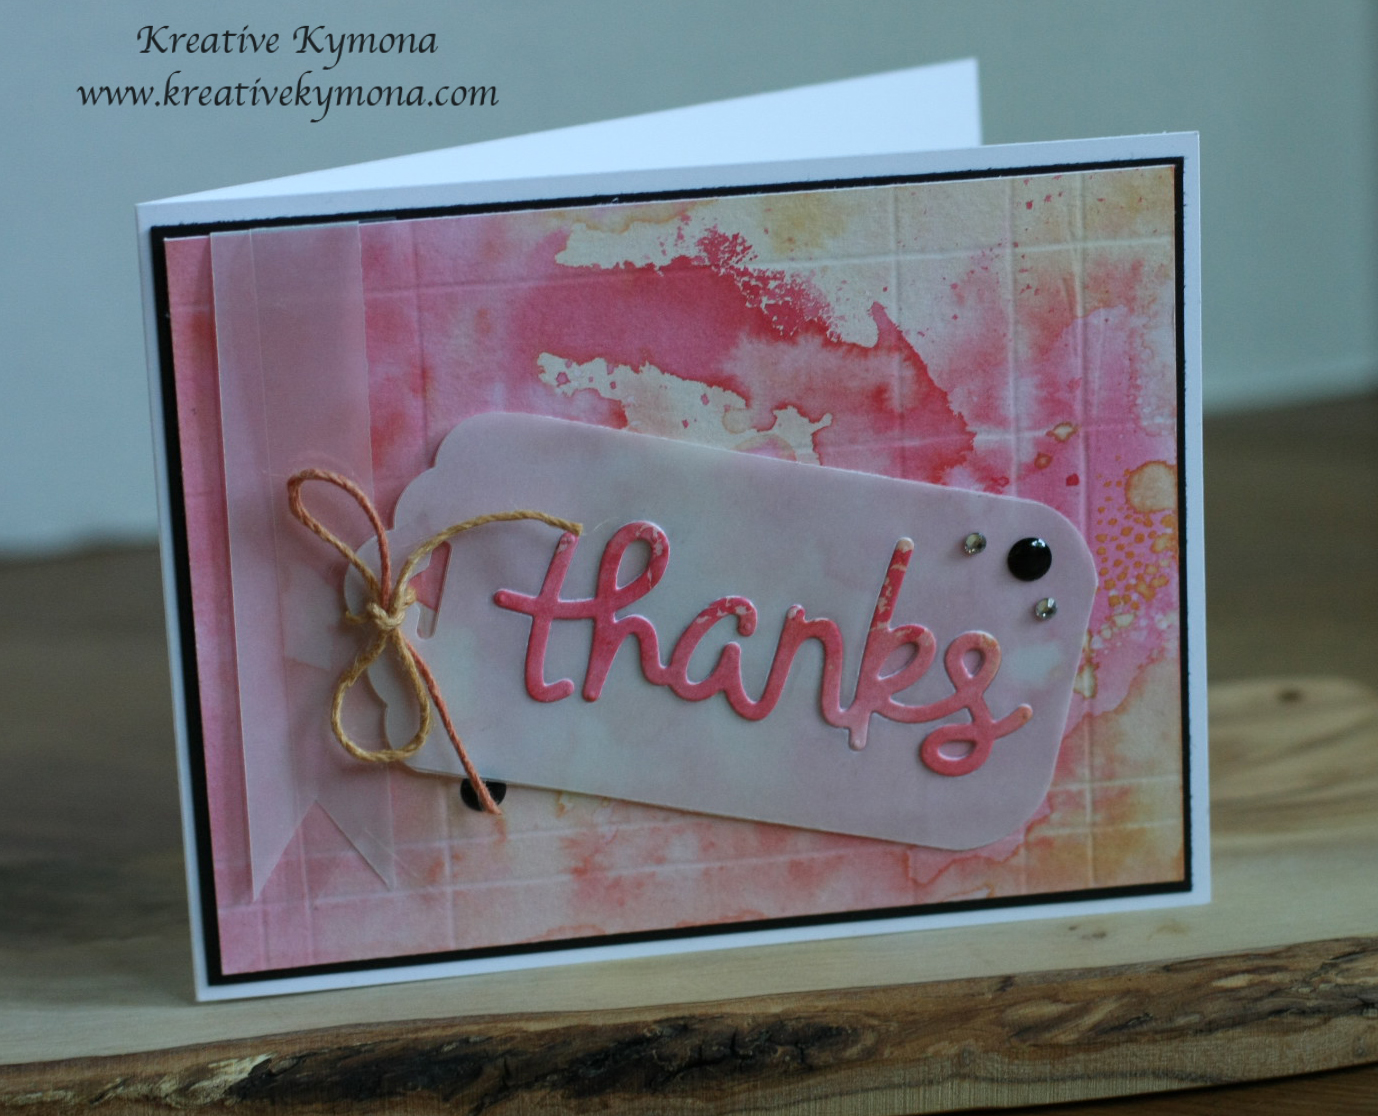
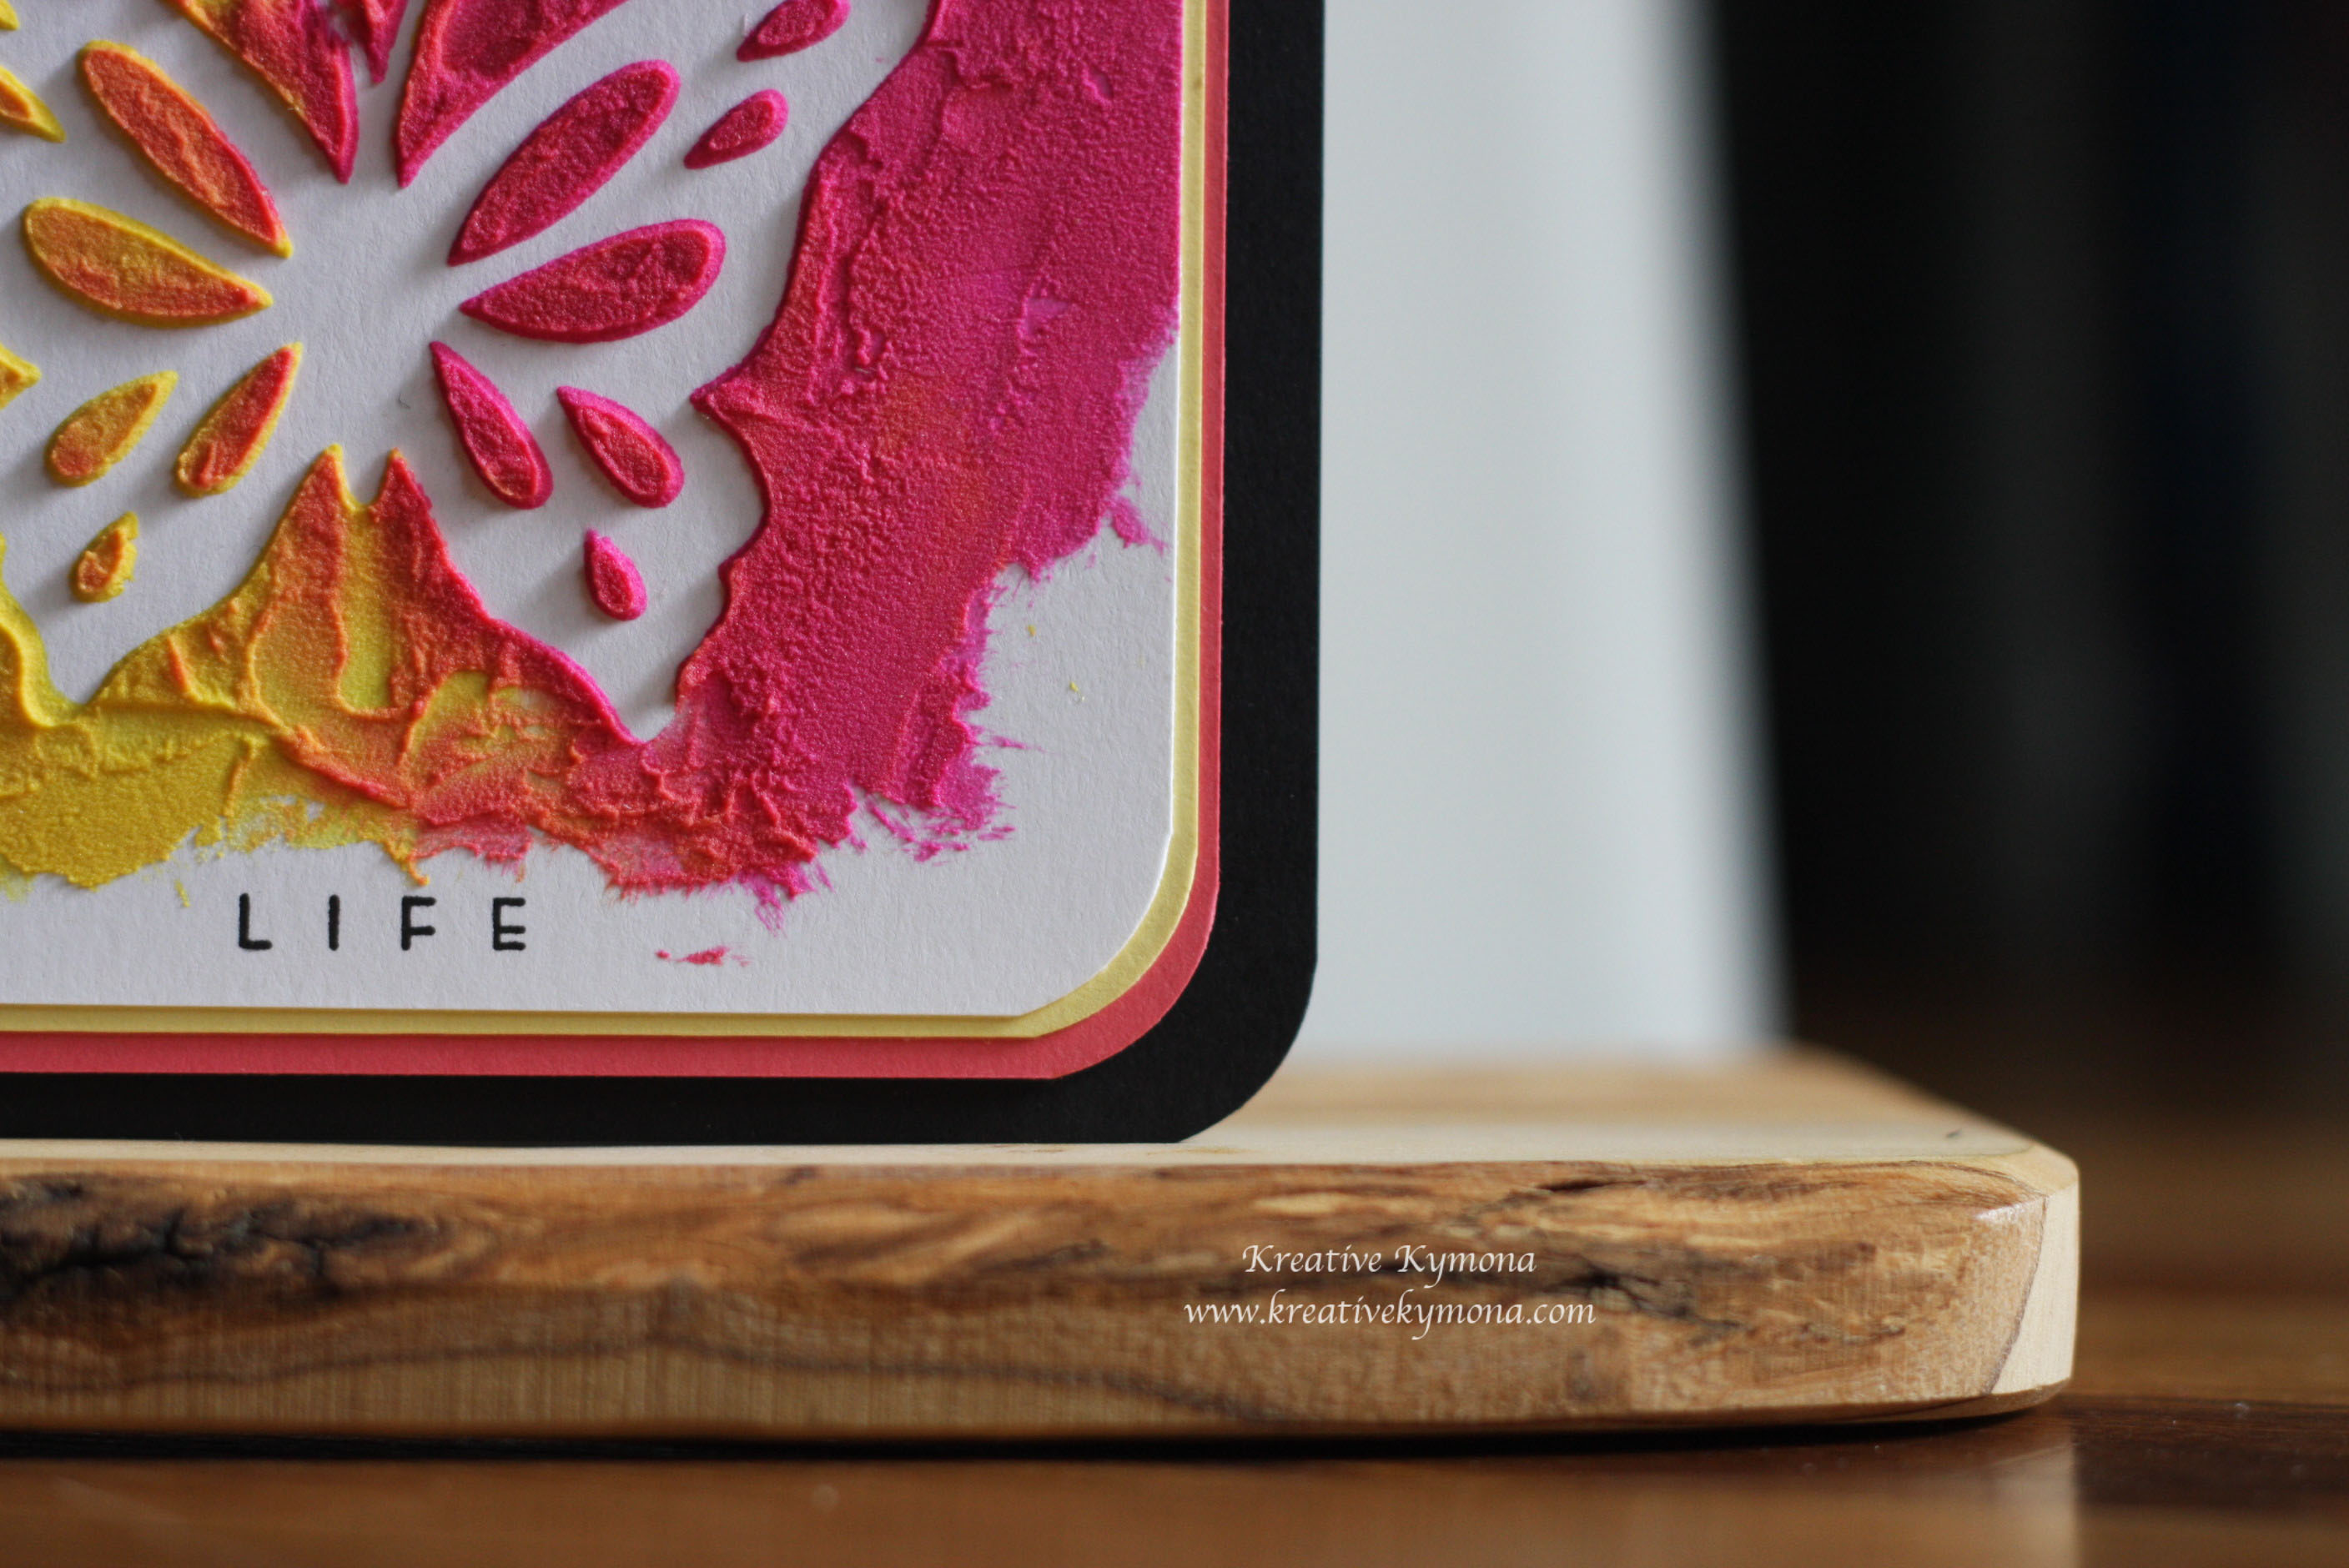
I incorporate myself into my work.  When you look at cards that I create I make sure you see a bit of me in them.  My favorite work is water-coloring.  I love it and have a niche for it.  When you see my water-coloring you will see my personality.  Take a look:

Love thisThank you for caringMade with Love Watercolor Smile Made with Love2 Happy Watercolor Have a Beautiful dayBe Your Own Kind of Beautiful helloswatch Thanks tag card

3. Why do I write/create what I do?

I love creating cards.  It is so relaxing and helps me release a lot of stress.  I love the feel of paper and new tools.  I love getting new craft toys!!! I have stuff that I haven’t even used yet and I bought them months ago, lol!  I’ve always had a love for being creative.  When people get cards from me, they totally love them.  I started when my son was born, that was 16 years ago.  Things have changed since then.  I’ve done scrapbooks, cards, 3-D projects, and I can knit.

4. How does your writing/creating process work?

My creating process isn’t a simple one.  I might see a new stamp, paper, or embellishment that I want to use on my next card project.  I sit at my desk and thing about how I can use the products that I selected. That might take me one-two days before I decide on what I want to do. Once I’m sitting at my desk with my idea in mind, I start to create.  If I see that the card isn’t looking the way that I want, I scrap it and start over.  This might take me from beginning to end, 4 days tops.

Cards that I make for blog challenges, the process is a bit different.   The sketch is already there for you so you just use the products you have to match the challenge.  I love how I interpret those challenges.  This takes me about 2-3 days.


Let’s Meet My Crafty Friend Elle!!

Now let me introduce my friend Elle, from the other side of the world.  She has taught me so much through her blog post and creativity.  Elle has introduce me to Weekly Wishes, creating a gratitude journal and sending parcels.

  • Elle of Hey Jayel is a tea-loving Communications graduate working as an engineer in Singapore. When not busy chasing deadlines, she like to create and can be seen at her craft corner dabbling in calligraphy, art journaling or preparing parcels for her pen pals. Head on over to her blog and see the amazing things she ‘s up too at Hey Jayel. She is awesome, leave her a comment!!

As always thank you for stopping by and learning a little bit more about who I am!!

Tell me what do you think?  Why do you write/create what you do?

~Kymona


Do You Have Petal Power?

Hello everyone, I guess your asking yourself what is petal power?  Guess what I was wondering the same thing.  I thought it was a cute title so I decided to go with it.  LOL, LOL!!!

No for real, petal power is when a flowers petal stand out from the rest of the flower.  What do you think?

Well my notebook today, has petal power.  The petals are so vibrant and rich, I just love it.

Papertrey Ink’s  Make It Monday #167 Challenge is DIY Notebooks!  Yes, notebooks.  So cute and irrepressible.  I couldn’t wait to participate.

Take a look at my Mini Notebook with tear out pages:

Mini Notebook

Mini Notebook side

This mini notebook was so easy to make, I just love it.

Here’s how:

1.  I cut all of my card stock and back chip board to 2-3/4 by 4-1/4.

2. I stamped “read this” sentiment from PTI’s Clip Tips on all of my colored card stock inside my notebook.

3. I stamped my flowers, butterflies and hello sentiment on my front cover.

4. I attached a piece of pattern paper to the top of the cover and to the back of the book with glue.  The pattern paper will hold all of my pages together.

5. I added double-side adhesive to the middle of the pattern paper.

6. I made sure all of the pages of my books were attached to the adhesive.

7. Then I used my hand to crease the front and back of the book.  All of the inside pages should be adhered to the double-sided tape.

WALA, your book is made and ready to use! The double-sided tape allows you to tear the pages out of the book and put it back.

Isn’t that amazing!

Supplies used:

Bazzill Basics 180-piece "Olivia Premium Cardstock KitLife is Beautiful Stamp SetOopsie Daisy Stamp SetClip Tips Stamp SetBasic Rhinestones Jewel AccentsOnyx VersafinePure Poppy InkSummer SunriseWet PaintStudio Calico Papper Pad Snippets 6x6

Please let me know what you think of my Mini Notebook!

~Kymona

Can You Have To Much Watercolor?

Hello everyone, I’m here today with a watercolor card {my favorite} for Freshly Made Sketches #139.

FMS Final 139-001Today’s sketch was created by Rita.

When I say this sketch I knew I wanted to create a watercolor background.  I couldn’t help myself.  Watercolor makes everything look pretty. I wanted a pretty card with a pretty tag that you could take off of the card and use on a gift.

Take a look at my take on Rita’s sketch:

Thanks tag card

To create the watercolor background:

For this card I applied 3 different distress ink’s to my craft sheet in a random order very close to one another.

I spritz water on the colors to activate the color to mix them a bit.

I took my watercolor paper and gently placed it on top of the ink to create my watercolor background.

I let the paper dry completely before I added it to my card base.

If you take a closer look at my watercolor paper you will see I scored it for added texture.

Thanks tag texture

For the flagged banners, I used vellum and window sheet to create them.  I didn’t want to complete cover the background because it was so pretty so, I used them to create a see through look.

Thanks flagged banner

For my tag, again I wanted the viewer to  somewhat see through it, as to not take away from the background.

I created an inlay die cut with the word thanks.  Added a few black enamel dots for contrast and the rhinestone for some bling.

I adhere the watercolor piece to black cardstock and then to the white card base.

I had fun creating this card.  I created another card using the same technique.

Hello tag card

Like I said many times over, Water-coloring is my favorite.

Let me know what you think!!

Supplies used:

Distress Ink Dried marigoldDistress ink Antique linenDistress Ink Worn LipstickLF690_ScriptyThanks_granderanger craft sheetRanger misterTim Holtz Watercolor CardstockMy Mind's Eye Enamel DotsWindow SheetsWhite VellumBasic Rhinestones Jewel AccentsTombow Multi-Purpose AdhesivePink Lemonade CordStampin' TrimmerSimply ScoredTag Topper Scallop PunchBasic Black CSWhisper White

Thanks for stopping by!

~Kymona

Because I’m Happy…

still smilingstill smiling       still smiling

My smiles and happiness continues!!  I found out yesterday afternoon that I was one of the winners of the Muse Challenge#69.  I became a Featured Member yesterday. Yayyyy!!!! I worked really hard and it paid off.

Thank you to everyone who voted this week.  Congrats to the other wonderful women who won and played along this week!!

I’m back again to play along for this weeks challenge.  The Muze Challenge #70 was created by Vicki Dutcher.  Vicki’s card is full of details.  Take a look:

Vicki Dutcher

When I saw Vicki’s card, I knew I had a striped background stamp from Simon Says Stamp that I wanted to use.  Plus I love the color she used and decided to use the same color from Hero Arts.

Here is my take on Vicki’s card.


Enjoy Friends 2

The color made me feel happy and since I’ve been in a great mood, I decided to use the same color.  For my background I used Simon Says  Stamp Wide Stripes Background Stamp with Hero Arts Tide Pool Ink.

The striped mat was adhered to the card base with foam dimensionals.

For the mat under my sentiment die, I sponged the white card stock with same Hero Arts Tide Pool Ink very lightly in a whimsical motion, leaving some of the white card stock to show through. I was going to watercolor that mat but changed my mind.

For my sentiment piece, I rubbed my Hero Arts Tide Pool ink across my white card stock to create the same color.  I used Papertrey Inks Phase Plate #4 Die to cut the ENJOY sentiment and frame.

The mat and the sentiment plate was then sewn together to represent the flagged banner across the front of Vicki’s card.

The sentiment “friends” from Papertrey Ink’s Wet Paint 3 stamp set was stamped in the window with versamark onyx ink.

I added rhinestone for an added dimension.

Was my interpretation of Vicki’s card accurate?  Please let me know what you think.

~Kymona

Supplies used:

Phrase Play #4Wet Paint 3Wide Stripe Background StampclassiccrestsolarwhtieHero Arts Tide PoolSewing MachineStampin' TrimmerBasic Rhinestones Jewel AccentsStampin' DimensionalsOnyx Versafine Ink

Smiling Is So Contagious

Have you ever smiled till it hurts? 

Smiling

Well I’ve been smiling since Saturday.

I received some good news yesterday from CAS(E) this sketch!  My Seeing Stars card was chosen as one of their favorite cards!!!!!  You can check out the announcement here. I was so excited.  Thank you ladies for that distinction.

I’m here again with another CAS(E) this sketch! #78.  Julie Day created the sketch for this challenge.

Take a look:

CTS_Sketch78

This was a fun sketch to work with.  Since I was so happy, I wanted to stick with happy colors for this sketch.

Take a look:

Smile someone love you

I used the zig zap stamp form Life is a Journey Simon Says Stamp to create the zig zap pattern in the three different colors.

I had to use Papertrey Ink’s Wet Paint 3 Smile sentiment because I can’t stop smiling.

To give balance to the card I added some sequins and rhinestones in the colors of the ink.

Simply but classy one layer card! What do you think?

Supplies used:

classiccrestsolarwhtieWet Paint 3Hero Arts Tide PoolBubble GumHero Arts Butter BarLife is a journeyHello Sunshine Mixed SequinsBasic Rhinestones Jewel AccentsStampin' TrimmerCrystal Effects

Let me know what you think.

~Kymona


When You Know Better, You Do Better Blogging!

BelleLiveOption

Hello everyone, and welcome to “The What #BelleLive Taught Me Blog Tour”! You should be arriving from Jennifer Ashley’s blog. If this is your first stop you’ll want to begin at Jo Cavagnis ‘s blog so you don’t miss out on any of the fun, interesting information we are sharing.

Back on May 1 to May 3, 2014,  I took this amazing class called Build A Successful Creative Blog by April Bowles-Olin on the Creative Live Website. I have to say it was totally amazing!! I’ve learned so much from April about what I’m doing and not doing right on my blog.

I wanted to share with all of you what I learned and what I’m still working on to make my blog space fun and more creative.

What I Learned:

1. Finding my own style and voice.

Prior to this class, I was having a hard time finding my own voice and style. I thought if my blog looked liked like other bloggers that I liked, I would get the results I was looking for but that wasn’t the case.  April really taught me how to just be me. Do what makes me happy and comfortable.  She taught me to look for things that I offer that others do not.  I realized that no one but me can be me and that is what my blog offers, the authentic ME!!

2. Better visuals for my blog.

When April talked about visuals for our blogs, I was worried because my pictures were not the best at all.  They were either to dark or washed out.  I couldn’t figure it out at all.  She talked about using your own pictures.  They are more authentic than stock photos.  So, I decided to reach out to a couple of bloggers who photograph cards to see what they are doing.  I took their advise and WALA, I think my photos are sooo much better.  I still have some work to do but boy, what an improvement.  I also signed up for a photography class.

Birthday 2 Cards Before

Hello After

What a difference a lens and reading the camera manual can do!!!

3. Letting people know you exist.

This was a big lesson for me.  I learned in order for people to know I exist I need to put myself out there.  For my craft, joining challenges are a big way to promote yourself. I’ve join so many challenges and I love it!!! I’ve learned so much from others.  April also taught me to leave comments on other people blogs.   I knew this but after this class I decided to leave comments on everyone’s blog that participates in the challenge.

4. Building relationship.

This class has introduced me to a lot of talented people who love to share info and wants to see you grow.  I’m so grateful for this community.  Everyone is willing share and teach me about things I have no clue about.

5. Setting up an email newsletter and other social media platforms.

I learned why having an email newsletter is so important.  So, I want to add this to my blog. I haven’t done that yet but it’s coming shortly. Facebook is the only social media that I’m not on and want to be but I’m not sure why I have taken that step forward.  There is a fear but I’m not sure what that fear is. It will happen soon, hold me accountable.

So, this is my list of things that I really learned and took personal, so that I can improve my blog.  I hope you found this information interesting.

Like I said earlier, this class was awesome and if you want to check it out, visit Creative Live here.

The name of the class is Build A Successful Creative Blog by April Bowles-Olin.  April’s blog is called Blacksburg Belle  and you can find it here.

Tweet:

Please let me know what you think!

~Kymona

Hello World, How are you?

Hello everyone!  I’m in such a great mood today, I can’t stop smiling.  I’ve been working really hard at my craft and slowly by surely its paying off.  So, I’m really proud of myself.

I’m here today with a card for the Muse Challenge #69. This is my first time playing along with them so I hope I don’t disappoint them.

Cornelia was chosen to create the Guest Muse this week and her card is full of bright colors, a cool technique and FUN!

Here is her card:

Cornelia

My job is to use the Muse card as inspiration and create one of my own.

When I looked at Cornelia’s card, it reminded me of my all time favorite technique, WATER-COLORING!!!  I love how she made the colors mix with one another and the splatters across the card.

So I knew right away that I had to pull out my Koi watercolors.  I decided that I wanted to use colors I hardly use that are bright and will stand out on the black cardstock I wanted to use.

Before I painted, I scored the watercolor paper to give it added texture.

I used colors #3, 12, and 16 to create my sentiment and hearts. You can see the colors on my swatch here.

Like Cornelia’s card I wanted to create a one layer card so I decided to create an inlay card with my sentiment and hearts.  So, I die cut my sentiment and hearts from the watercolor piece.

helloswatch

After I cut out all of my pieces that I need to create my card, I realized that I wanted my card to have a stitch edge so to create that I had to use my large journal stitch die, which in turn cut off a portion of my card.  I was ok with that because I love the stitch edge. That idea came from Nichol Magouirk.

After that cut, my card was no longer a one layer card.  I put all of the piece together and here is what I came up with.

Here is my card:

Hello

I added sequin, enamel dots and rhinestones to resemble Cornelia’s paint splatters.  I choose colors that were close to my watercolor sentiment and hearts.

Sooooo, what do you think? No stamping required. I love how it came out.

Supplies used:

Canson Watercolor PaperKio WaterColorsBasic Black CSLargeStitchedJournalingCardScripty HelloHello Sunshine Mixed SequinsBrights Candy DotsBasic Rhinestones Jewel AccentsStampin' TrimmerSnail AdhesiveStampin' DimensionalsclassiccrestsolarwhtieWe R Memory Keepers Corner Chomper

Thanks for stopping by!

~Kymona

What is Texture?

Happy Friday everyone!!! Today couldn’t get here fast enough.  The week was dragging and cold.  To keep my cool, I joined Addicted to CAS Challenge this week.  Their code word is Texture. How interesting!!  How often do you get a card with texture on it.  Think about it.

So, the question is what is texture?

According to Webster, texture is the visual and especially tactile quality of a surface.  For example a rough texture.

Well that is interesting, who wants a card with a rough texture.  When you think of cards, you think pretty, smooth, subtle, funny, and bright.  So how does texture play apart on a greeting card.

I will show you, take a look at the card I came up with.

Life

Can you say texture?  Yes, you can!! Guess what, it is rough!!!  It’s a pretty rough card!!

Life side

You can see the thickness of this textured butterfly.

Life close up

I saw Laura Bassen create a card like this and I wanted to give it a try.

1. I die cut 4 butterflies from Papertrey Ink’s Life is Beautiful die cut to create a butterfly stencil.

2. I attached the stencil to my white cardstock.

3.  I mixed two distress inks colors with embossing paste.

4. I spread a thick coat of the color embossing paste over my heart stencil.

5. Once I was done applying the paste, I lifted the butterfly stencil and WALA!!

Have you notice that one of my butterfly antenna’s are missing.  I think that is the beauty of this card and that is why I use the sentiment “Life”!  Life isn’t perfect and sometimes neither are we.

I hope you like my card just as much as I like it.

BTH: My seven year old daughter made a card for this challenge as well, take a look here.

Supplies used:

Basic Black CSWhisper WhiteStrawberry SlushDaffodil Delight CSDistress Ink Mustard SeedDistress Inks Picked RaspberryLife is Beautiful DieLife is Beautiful Stamp SetWe R Memory Keepers Corner Chomper


Please leave me a comment below and let me know what you think.

~Kymona