My Mug Swap for 2014

Second Post for the day


Hello everyone!  I’m back again today with a different type of post!  I’m excited about this post because I’m participating in a Swap that is amazing!!

Its the Annual Mug Swap!!  I found this awesome project on Instagram.  This year’s theme is Blessing Others!!  Isn’t that amazing!!

Mug swap logo

Here is how it works:

Give a mug. Get a mug.  You sign up with Kim over on her website and she assigns you partner to swap a mug with.  What I love is that its a total surprise.  You don’t know who has you or what part of the world they are from.  I LOVE THINGS LIKE THIS!!

So Kim, creates a form and you fill it out with some information about yourself so that the person who gets your name can get you a mug based on what you say.  How much fun is this!!

The funny thing is I missed the first round and was down about that.  The spots go sooooo fast.  Then Kim opened 30 more slots and I rushed to get my form in.  I made it by the skin of my teeth.  I think I was the last spot.  I was so excited when I saw that my form was accepted.  Yayyyyy!!

So with that said, next year I’m going to be the first in line.  You should too!

Now on to my mug swap:

I wasn’t given a lot of info about the person I have to send my mug too.  I check all of her social media platforms but unless you friend her you can’t get any info.  All I know is that she is moving and is a new mom wanting to get to know other moms.    She lives in the States.  Wow, that is a lot to go with!! Not really!

So, I decided to stick with what I know and that is I’m a mom too.  So I searched for a mug that represented that.  I look high and low.

I thought living in NY, we had all kinds of stores.  I went searching for mug stores.  Can you believe that we don’t have any!!  I search Manhattan, high and low, and none.

I did find a small shop that sold all sorts of knick-knacks and I found this mug:

Mug Swap

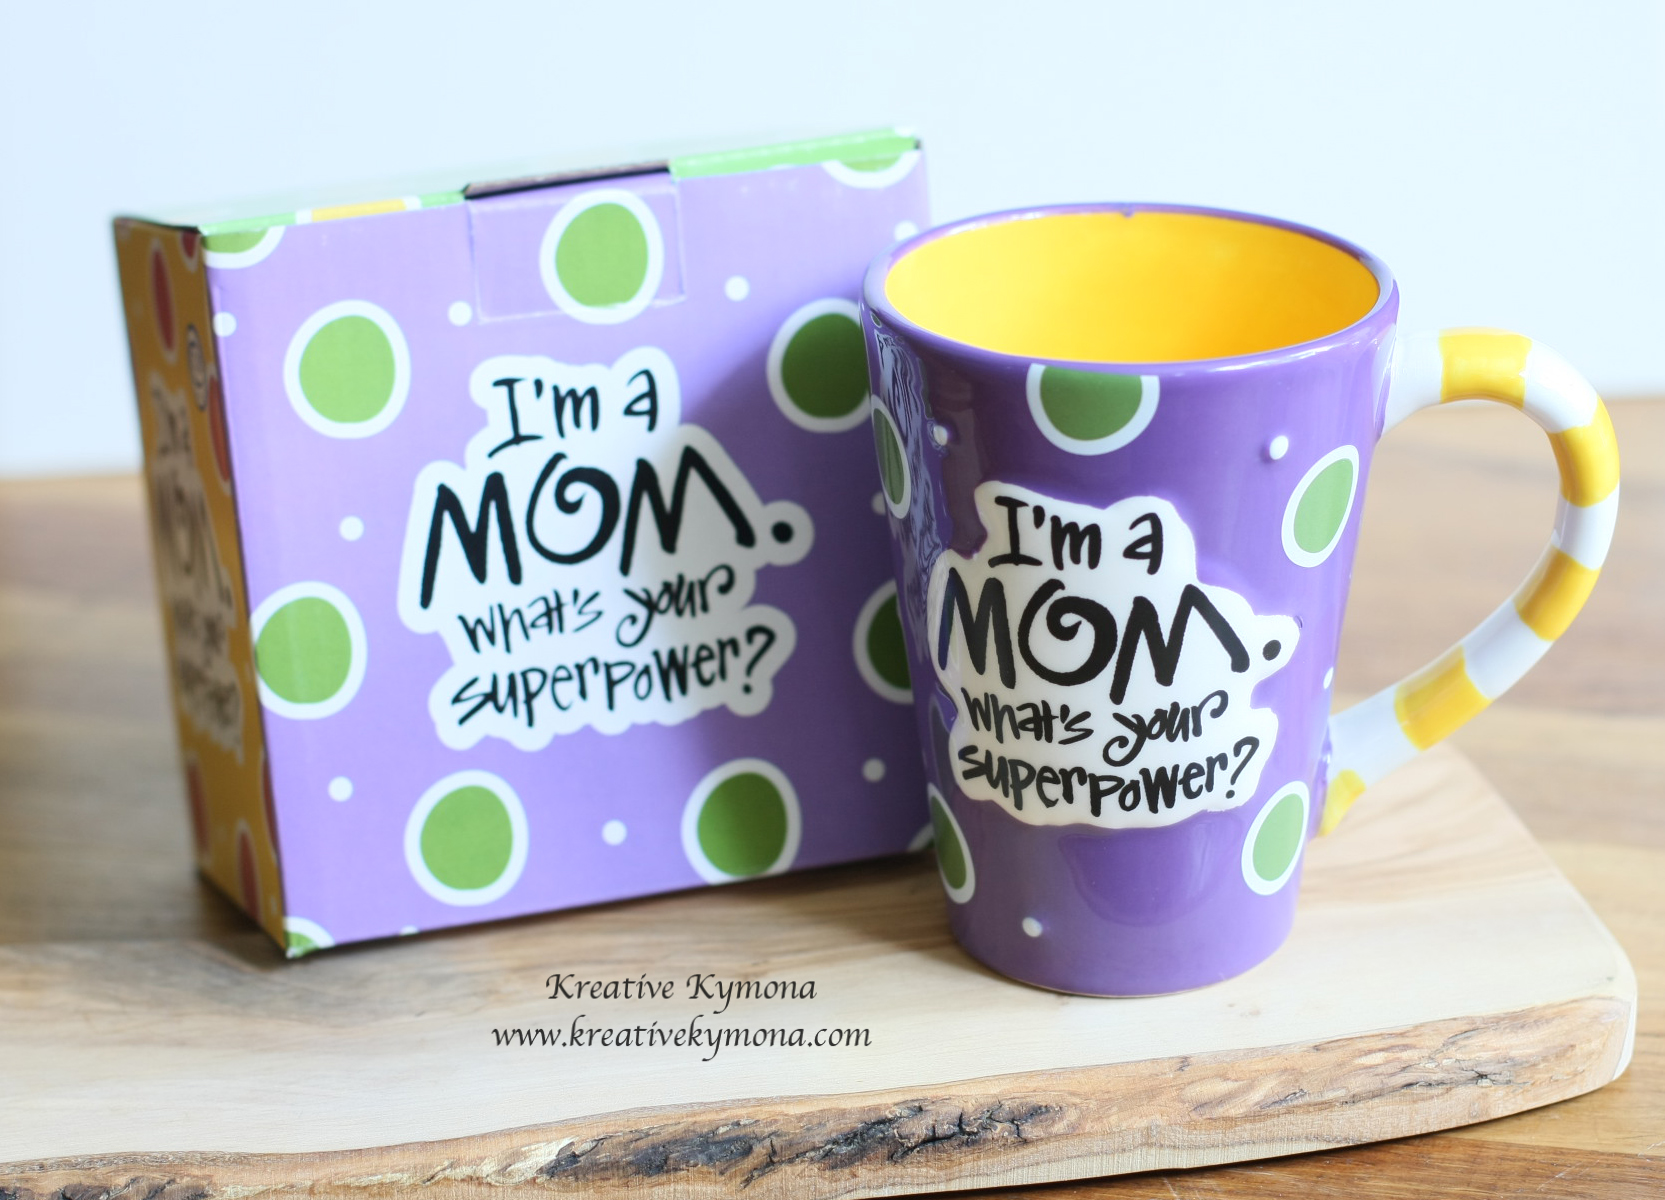
I knew right away that this was the mug I wanted to get!!  As a mom, I know I have superpowers and I want her to know that she has them too.  Being a mom is such an important job that we will have for the rest of our life’s!

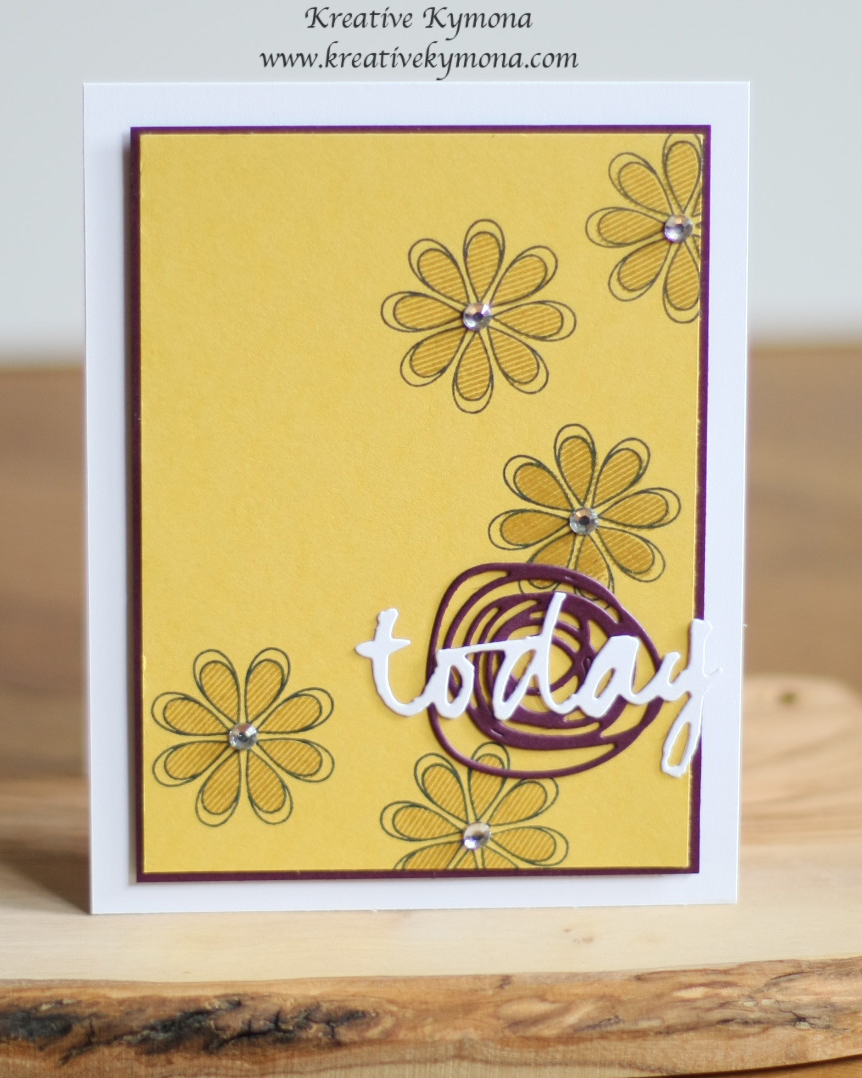
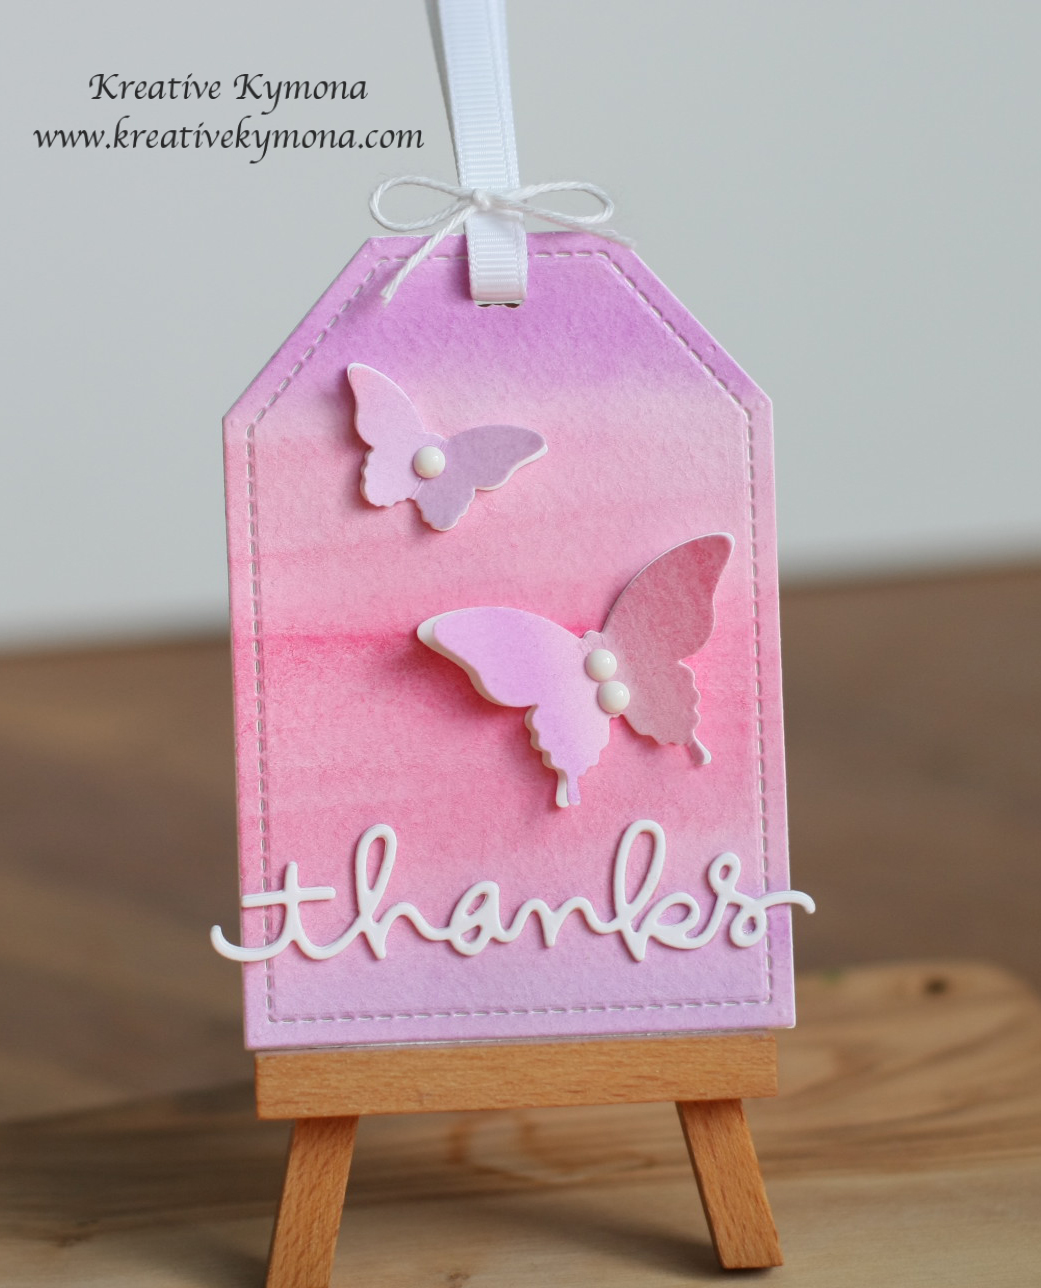
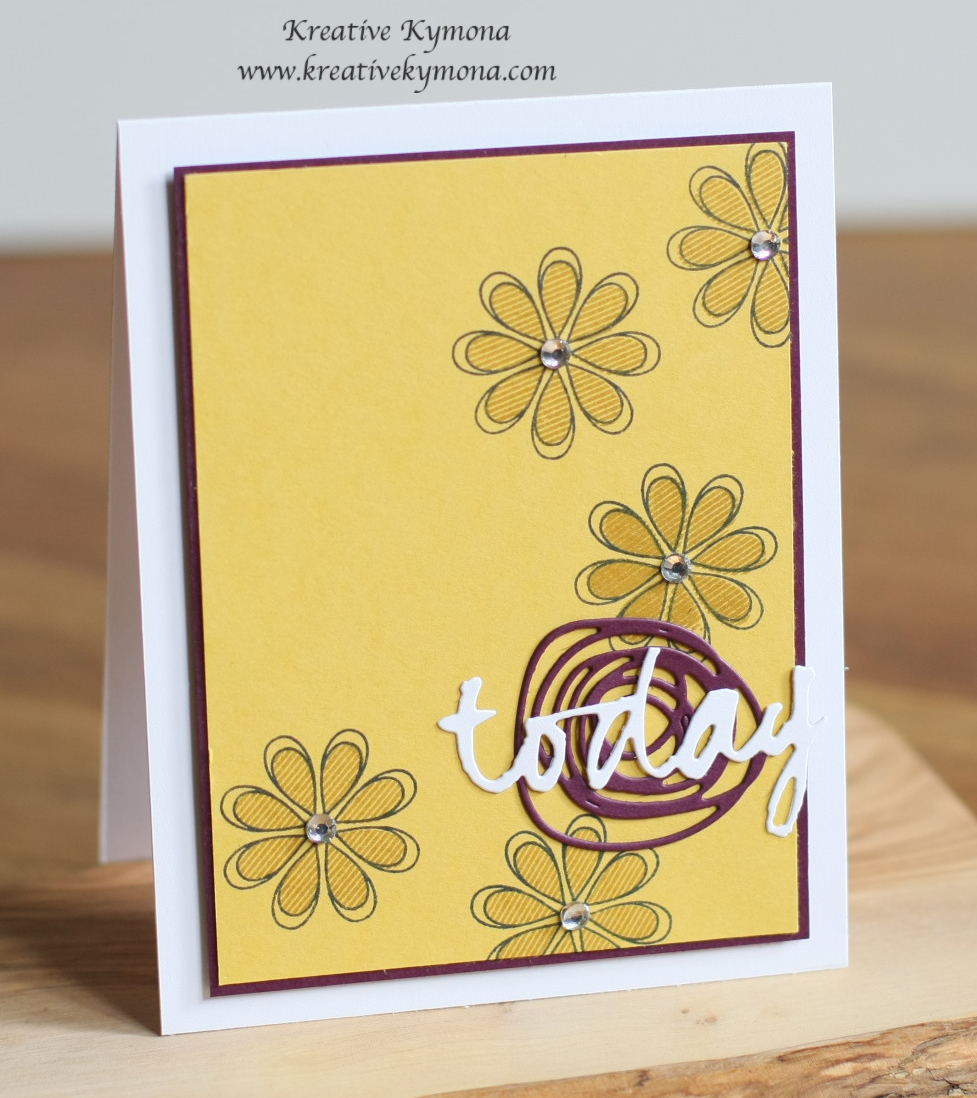
I hope she likes her new mug and uses it often!  It’s going in the mail today and should get to her by Wednesday of next week.  I can’t wait.  I will also include a really nice card, the one I made today  and some other stuff I think she will like.

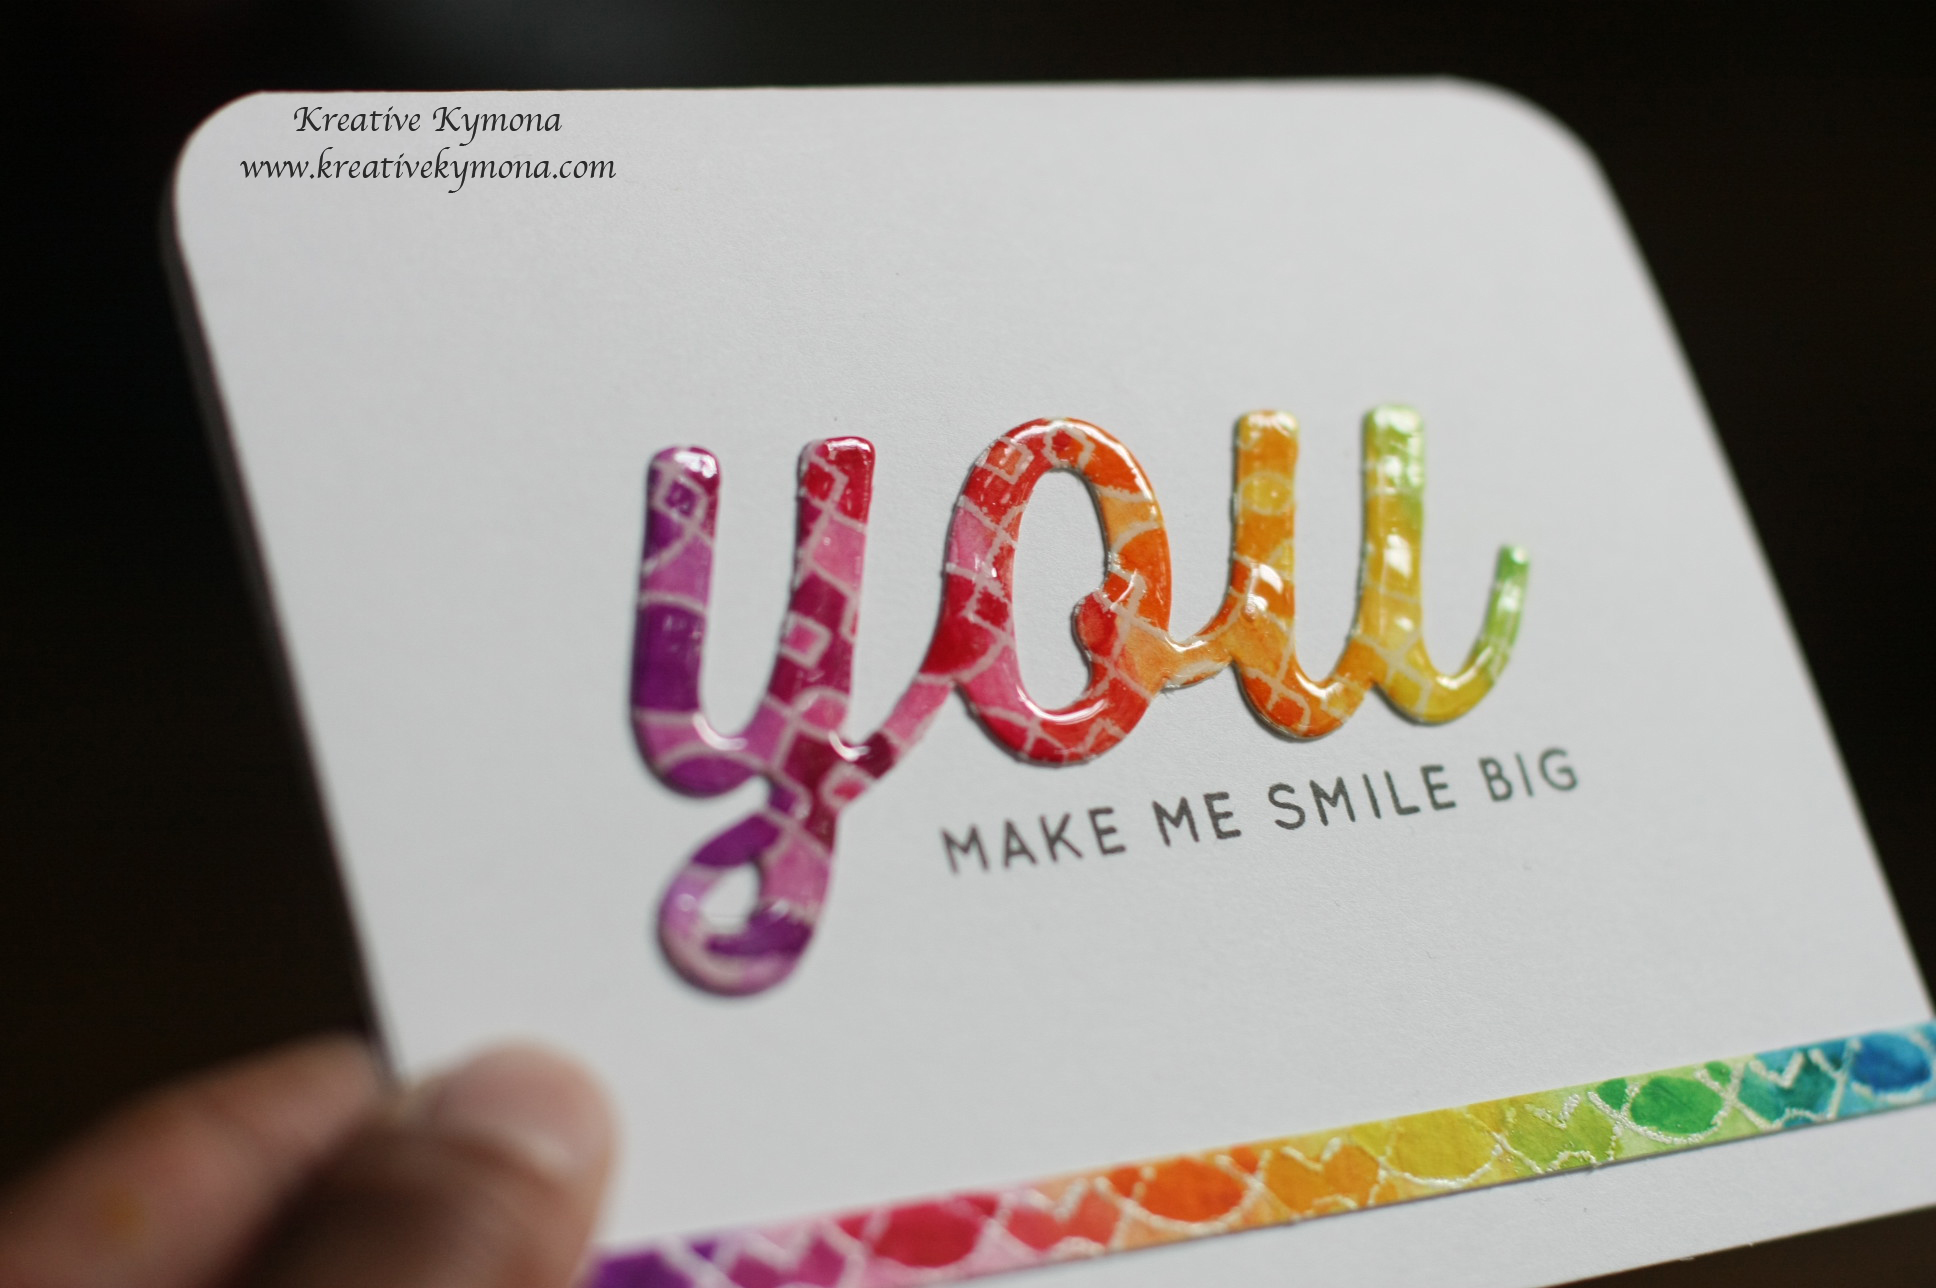
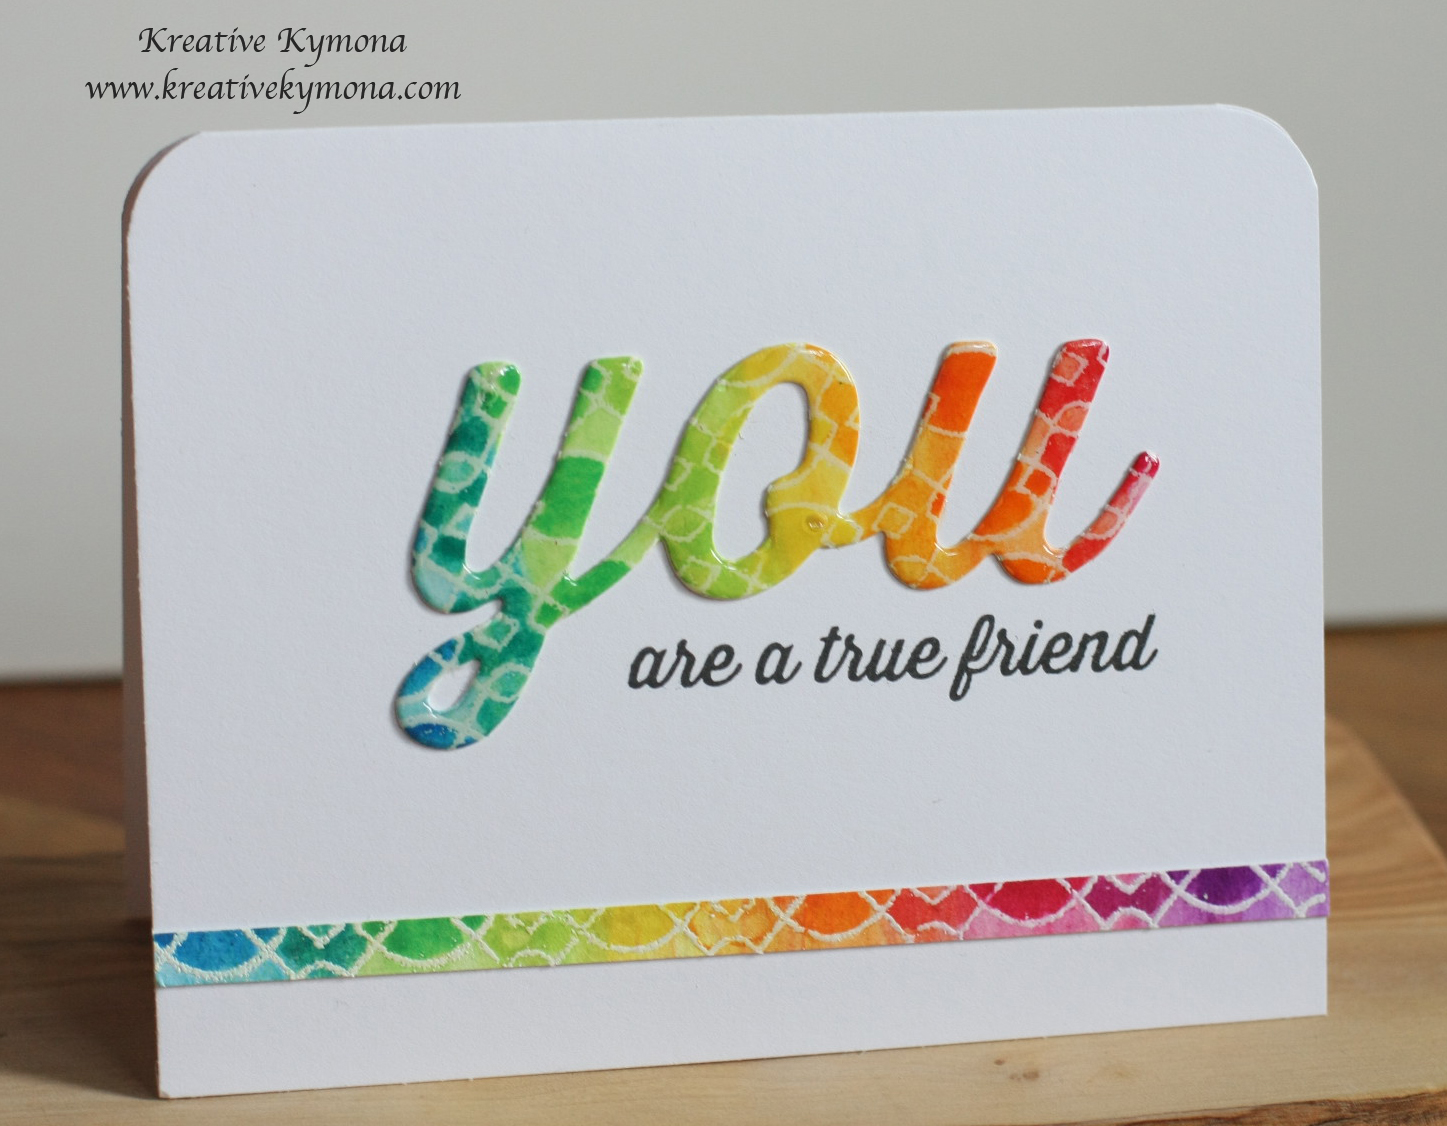
Here is the card just in case you haven’t seen it:

Today

I hope I make a new friend.

I will keep you updated on this mug swap journey!!

Thank you for stopping by!

~Kymona

Today Is A Good Day!!

Hello everyone!  I’m here today playing along with the Muse Challenge #80 this week.  The Muse this week is Therese Calvird.

Take a look at her card:

Amazing!Therese Calvird

Take a look at my card that I created:

Today

I wanted to keep this card nice and simple just like Therese card. I’m not really good with floral stamps.  I never know what to do with them.  So I used these blossom stamps because they are easier to maneuver to me.

1. I cut my card base out of Bazzill Marshmallow to an A2 size card (4.25 x 5.50 scored at 5.50).

2. My card panels are Stampin’ Up! Blackberry Bliss (3.75 x 5) and Hello Honey cardstock (3-10/16 x 4-14/16).

3. On the Hello Honey cardstock, I stamped Papertrey Ink’s Oopsie Daisy stamp set with Memento Black Ink.

4.  I stamped the inside of the flower using the same stamp set with Hello Honey ink.

5. I used Papertrey Ink’s Circle Scribbles Die to cut out the medium scribble with Stampin’ Up! Blackberry Bliss cardstock.

6. I adhered that scribble piece with Tombow Multipurpose Glue.

7. I used Papertrey Ink’s Wet Paint Cuts II ” Today” from Bazzill Marshmallow cardstock.  I adhered that to the scribble with Tombow Multipurpose Glue.

8. I added Stampin’ Up! Rhinestones to the center of the flowers.

Very easy, simple card to recreate.

So, what do you think?  Do you like this card? Let me know.

Today Front view

Supplies used:

Bazzill Marshmallow CSBlackberry Bliss CSHello Honey CSOopsie Daisy Stamp SetMemento Black InkHello Honey InkPTI Circle Scribbles DieTombow Multi-Purpose AdhesiveBasic Rhinestones Jewel Accents

Thank you for stopping by!

~Kymona

Striped Thanks

Hello everyone!  I’m here with Papertrey Ink Make It Monday #176: Backgrounds with Embossing Paste.  It’s been a while since I’ve played along with them.  So, I’m glad I had a chance to play today.

Laura Bassen showed us how to use our dies to create stencils so that we could make pretty backgrounds using embossing paste.

I’ve done this before so it was nice to do this technique again.

Here is my card:

Thanks {watercolor}2

Here is how I create my card:

1. I used Papertrey Ink’s Stripes Horizontal Cover Plate to create my stencil.  I just ran the cover plate through my big shot twice for some thickness.

2. One at a time I mixed my distress reinkers with Wendy Vecchi Embossing Paste.  I mixed the paste and  Mustard Seed Distress Ink and spread my paste on the top of my stencil thick.  Then I mixed Peacock Feathers Distress Ink and spread it in the middle of the stencil, thick.  The last I mixed Picked Raspberry and spread it on the bottom of my stencil, thick.

3.  I lightly spread the paste upwards from the bottom to mix the colors going up.  Once I removed all of the excess paste, I removed my stencil to reveal the colorful stripes.

4. I set my card panel to the side and die cut my middle Papertrey Ink Circle Scribbles Die out of Stampin’ Up! Vellum.

5. Then I die cut Lawn Fawn Scripty Thanks out of Basic Black Cardstock.

6. I adhered the vellum scribble to my striped card panel with Glossy Accents.  I added my scripty thanks to the vellum scribble with Tombow Multipurpose Glue.

7. I rounded my corners with my We R Memory Keepers Corner Chomper (which by the way broke today, I’m so sad, I have to buy another one.).

8. The “thanks” looked to plain so I added Glossy Accents for a little shine.

That’s how I created this card!!  Oh by the way, my card size is 4-1/4 x 5-1/2 scored at 5-1/2.  My card panel measures 4 x 5-1/4.

So what do you think?  Let me know.


Supplies used:

Stripes Horizontal Cover Plate PTD-0536Distress Ink Mustard SeedDistress Ink Peacock FeathersDistress Inks Picked RaspberryEmbossing PasteLF Scripty ThanksBasic BlackWhite Vellumglossy accentsTombow Multi-Purpose AdhesiveWe R Memory Keepers Corner Chomperranger craft sheet

Thank you for stopping by!

~Kymona

I Love Back To School, Do You?

Hello everyone!  I’m here today with the DoubleClick Skittles Back to School Challenge!!  This will be so much fun!

I love back to school.  I love new paper, pencils, pens, notebook, glue, OMG I love everything.

This is our second challenge and I wanted to say to everyone who participate in the first, Thank You so much.

This challenge runs for two weeks.  This is the second of the two.  So, you have one week before the challenge ends.

Now on to my card for this challenge:

Skittles Back to School

My daughter has her first male teacher this year so I wanted to make sure my projects were male centered.  This is challenging to me since I’m so use to making cute girly things, lol.

Want to know how to make this card, well here’s how you do it:

1. I cut my card stock so that is measures an A2 size card (4-1/4 x 5-1/2 scored at 5-1/2).

2. I used my Big Shot and Stampin’ Up! Alphabet Press Textured Impressions Embossing Folder to create the the texture on the front of my card.

3. I used my Project Life Lined Journaling Cards for the first time ever, LOL.  I love these little cards.  (I have no idea what my resistance was but its over.) I divert!

4. I stamped my crayon, glue, paintbrush and ink from the Sweet Stamp Shop Artsy Fartsy Stamp Set with Memento Tuxedo Black Ink.

5. I used my Copic Marker #G07, YR16, V17, B14, R27, G28, Y19, Y13, B12 to color in all of my images.  (I’m so happy about that.  I’m trying to practice my coloring.)

6.  I stamped my sentiment from Simon Says Stamp Hey Teacher Stamp Set using Memento Tuxedo Black Ink.

7. I added color to my apple using my Copic markers.

8. I adhered my journal card to my card base using foam adhesive.

9. I  added Wink of Stella to some of the embossed letters and numbers on my card base.

10. To really make my card pop, I added my Pumpkin Skittles to the four corners.

Here’s a close-up:

Skittles Back to School close up

So what do you think? Now its your turn to play along with our challenge.  The challenge ends on August 19th.  The winner will be announced on August 23rd.

The winner will receive The New Summer 2014 Skittle Release!

New Summer 2014 Skittle Release


Supplies used:

Big Shot Die-Cut MachineAlphabet Embossing FolderProject Life 3x4 Lined CardsArtsy FartsySSS Hey TeacherMemento Black InkCopic Markers3M Mounting TapePumpkin Pie

Thank you so much for stopping by.

~Kymona

Sending Smiles..

Hello everyone!!  I’m back again with an other card for Create a Smile September Guest Designer Search which is closing on Thursday, August 14th.

Blog-Badge

They have a new freebie digi file called Mrs. Anty.  I think this little ant is the cutest little creature I’ve seen.

Take a look at my card:

Sending Smiles

Aren’t these little ants so cute.  Yes, I fussy cut out all of them.  That’s the mother and her two children walking home.

Sending Smiles close up

This is how I created this card:

1. I cut the hill out of Stampin’ Up! Gumball Green Core’dinations cardstock using the curve die from Avery Elle Custom Panels Die.  The cardstock is on the clearence rack for $2.79, grab it while you can.

2. Then I cut the sun and the clouds out of Bazzill Marshmallow cardstock and Stampin’ Up! Daffodil Delight cardstock with Lawn Fawn Spring Showers Die.

3. I used my Copic marker #BV23 to color in the ants.  Then I cut all of my ants out.  Now it’s time to put the card together.

4. I added the ants, hill, sun and clouds with Stampin Dimensionals.

5. For my sentiment, I decided to use one in the Mama Elephants Up and Away stamp set with Versafine Onyx Black ink.

That’s it!!  Nothing more to it!!!

Please let me what you think of this card.


Supplies used:

Gumball Green Cord'dinations cardstockBazzill Marshmallow CSDaffodil Delight CSLF Spring ShowersStampin' DimensionalsUP AND AWAYOnyx Versafine InkBig Shot Die-Cut MachineMagnetic PlatformStampin' TrimmerCopic Markers

First for me…….

Hello everyone!!  I’m here today playing along with AAA Cards Challenge and the Muse Challenge #79.

I wanted to take this time to say Thank you so much to the ladies over at the Muse Challenge for choosing my card for Honorable Mention.  I really appreciate it. If you missed the card you can find it here.

Now on to this week’s challenges.  I had a lot of fun creating my project for these challenges.

AAAcardGame14

Muse VD

Both of these challenges used Water-coloring, which happens to be my favorite.  I decided to do something a little different then what your use to seeing.

I created a TAG!!!  Yes, a tag and its not on a card.  This was a bit of a challenge because my working area was smaller then a normal card size.  I wasn’t sure if I needed to fill all of the space or should I leave some empty areas.  It took me one hour to decided just on that.  LOL!!!

Take a look at my TAG:

Watercolor Thanks

To create this tag:

I used a piece of watercolor paper and my Koi watercolors to create my background.

I cut my tag using Pretty Pink Posh Stitched Duo 1 Dies.

I cut my thank sentiment using Simon Says Stamps Thanks Die out of Bazzill Marshmallow cardstock 4 times from some dimension.

I used my Stampin’ Up! Bitty Butterfly Punch and Elegant Butterfly punch to punch out four butterflies, 2 from my scrap watercolor piece and 2 from Bazzill Marshmallow cardstock.

I added My Mind’s Eye White Enamel Dots to the center of the butterfly for detail and more contrast.

I punched a hole in the top of my tag using Stampin’ Up! 1/8″ Circle Handheld Punch.

I added 2 pieces of retired Stampin’  Up! ribbon and tied it with Stampin’ Up! Whisper White Bakers Twine.

Thats all!  Very easy and fun to do!! I hope you give it a try.  I will be making more tags from now on.

Here’s a close up:

Watercolor Thanks closeup

Supplies used:

Canson Watercolor PaperKio WaterColorsStitched Duo 1 DiesSSS Thanks dieBazzill Marshmallow CSBitty Butterfly PunchElegant Butterfly PunchMy Mind's Eye Enamel Dots1_8 circle handheld punchWhite Baker's Twine

Thanks for stopping by!

~Kymona

Stretch your Stamps 2: Day 3 Homework

Hello everyone!!  For our third lesson we worked with alphabet and sentiment stamps.  We were taught how to really stretch our stamps in such amazing ways.

Julie Ebersole taught us how to create a word search using our alphabet stamps set.  This was so much fun.

Take a look at my card:

Wordsearch

I used Lawn Fawn’s Clark’s ABCs stamp set to create word search.

I placed my main sentiment on my acrylic block and stamped my card panel with Versafine Black Ink.

I covered the stamped image with clear embossing powder and heat set it.

Then I placed random letters on my acrylic block to finish the word search.  I stamped those letters in Hero Arts Soft Granite ink.

After all of my letters were stamped, I used my Koi watercolors to add a small amount of watercolor to the top of my cardstock.

I added some star wood veneers topped with white paint and Stampin’ Up! rhinestones to my project.

On my card base I drew a line around the card to create a boarder.

I added foam adhesive to my word search panel and placed in the center of my card.

So I have to confess, it was hard to line up my letters correctly but I kind of like it this way.  I have to try again. Julie made it look so effortlessly.

So what do you think?  Let me know!!

Supplies used:

LF ClarksABCsHero Arts Soft graniteKio WaterColorsBasic Rhinestones Jewel Accents3M Mounting TapeBazzill Marshmallow CSStampin' Trimmer

Thank you for stopping by!

~Kymona

Stretch your Stamps 2: Day 1Homework

This is my second post for the day.

If your looking for the Create a Smile Guest Designer Search post click here.


Hello everyone!  My favorite online card classes are back in session and I’m super excited!  I love these classes.  I learn so much and met so many wonder crafters from all over the world.

SYS2

Stretch your Stamps 2 helps us look at our stamps in a whole new way!! The class started yesterday and I’ve learned a lot thus far.

For our first lesson, Kristina Werner taught us how to multilayer emboss resist with a regular background stamp.

For this lesson we used Hero Arts Highline Ironwork Background Stamp because it has a lot of detail that can be painted and repainted.

First we did a simple wash of watercolor, dried the complete background and then add another layer of watercolor to spot highlight the design.  This stamp works because the design is open and has lots of open spaces to paint.

Take a look at my watercolor piece when I was finished with it:

watercolor pieces

From this piece I created these cards:

Big Hug and Background

Big Hugs close up

Big You and Background Stamp

Big You whole card

I was able to make three cards with this one watercolor piece.  I really loved this technique.  I would have never thought to use this back ground stamp in this manner.

I’ve used this stamp before, take a look at this card.  You can clearly see the difference in the way the stamp was used.

I have two other techniques to try for this first lesson.  I’m going to try and post the assignments as I do them.  Please don’t hold me to that totally, things do come up.

Supplies used:

Hero Arts Highline IronworkKio WaterColorsSSS HelloYouOnyx Versafine Inkglossy accentsWink of Stella clearBazzill Marshmallow CSStampin' TrimmerTombow Multi-Purpose AdhesiveStrathmore Watercolor paper

Thank you for stopping by!

~Kymona

I Love You Birdie!!

Hello everyone!! I’m here with a brand new stamp company based in Germany called Create A Smile.  They have fun designs, cute images and punny sentiments that you will love.

Blog-Badge

Over on their Create a Smile blog, they are having a Guest Designer Search for their September Release!!

How exciting is that!!  When I saw that, I knew I would love to be Guest Designer for them.  So I created a project with their free digi birdie to be included in the running!

Take a look at my card:

I Love You Birdie

When I saw this little birdie on their blog, I fell in love with him.  He is the cutest bird I’ve seen.  His big eyes pulled me in.

I used Copic marker Y13 and Y19 to color him in.

I fussy cut him out because I wanted him to pop him off of my card.

I created my tag using Pretty Pink Posh Stitched Duo 1 and Simon Says Stamp Audrey Blue cardstock.

I stamped my “I Love You” sentiment from Papertrey Ink Building Blocks stamp set in Versafine Black Ink. I added foam adhesive to the back of my birdie and adhered him to the tag.

I used my white gel pen to create eyes on my birdie.

I punched a hole in the top of my tag and add some retired So Saffron ribbon and Tempting Turquoise bakers twine.

For my card base, I used Simon Says Stamp Medium Dots Stencil to create a subtle background with Spiced Marmalade Distress Ink and my mini distress blending tool on a piece of Bazzill Marshmallow cardstock.

I added foam adhesive behind my tag and WaLa, I was done.

So what do you think?  Will my card win over anyone’s heart?  I hope so!!

Let me know what you think below.


Supplies used:

Stitched Duo 1 DiesCopic MarkersBuilding BlockOnyx Versafine InkSSS Medium DotsSpiced MarmaladeBlending tool3M Mounting TapeStampin' TrimmerBazzill Marshmallow CSSSS Audrey Blue CSWhite gel pen

Thanks for stopping by.

~Kymona

Nothing Is Impossible Today!

Hello everyone! Let me begin by saying Thank you to all of the lovely ladies over at the Muse for picking my dragon card last week as Featured Member.  Awesome!!

If you missed that card, you can check out the the announcement here.

So onto today’s news, I’m here today playing along with the Muse Challenge,  Simon Says Stamp Wednesday Challenge, Addicted to Stamps Challenge Blog today.  I’m so glad to be playing along with everyone this week.

The Muse this week was Bev Beunker!  Her card was full of colors.

Take a look at her card:

musegd

I love the sequin and the photo frame she used on her card so I knew I wanted to have the thing on my card.  I stuck to two main colors.

For Simon Says Stamp Wednesday Challenge the theme is Anything Goes.

wed-newchallenge-headerFor Addicted to Stamps Challenge Blog the theme is Anything Goes.

Addicted to Stamps

Take a look at my card:

Noting is Impossible

Nothing is impossible 2

I received my cute Sweet Stamp Shop Elephant Heart stamp set this weekend so had to use it for this card.

Instead of placing my sequin on the outside panel of the card I wanted my photo frame from Stampin ‘ UP! On Film Framelit Die to be interactive so I decided to create a shaker card with sequin.

I stamped my elephant and the sentiment on to a piece of patten paper from Simon Says Stamp Card Kit for July 2014 Pink Paislee Pen Pals.

I used my Copic markers N4 and N5 to color in my elephant.

I die cut out the “today” from Papertrey Ink Wet Paint Cuts 2.

Nice, simple and easy.  No fuss with this card.

So what do you think? Let me know.


Supplies used:

Elephant HeartsOn Flim Framelits DieSSS Card Kit July 2014Copic MarkersPTI Wet Paint Cuts 2

Basic BlackSSS Khaki CSSSS Lipstick Red CardstockStampin' Trimmer3M Mounting TapeAcetate

Thank you for stopping by!

~Kymona